Page18
December 1, 2011
Santa Fe NZ Pellet Stove
R
7068-114B
C. Snap Disc #2 Replacement
NOTE:CombustionBlowerGasketisalsorequired.Sold
separatelyunderPartNumber240-0812.
1. Turn down thermostat, let appliance cool completely if running.
Then unplug appliance before servicing. Disconnect appliance
fromventingattherearofappliance.
2. Removebothupperandlowersidecurtainsbyremovingthesix
7/16”nutsontherearoftheappliance.
3. Disconnectthevacuumhoseandwiresfromthevacuumswitch.
Disconnecttheblueandwhitewiresfromthecombustionblower.
Removecontrolboxretainerclip.Remove twoscrewsthathold
thejunctionbox.Setasidecarefully.Disconnecthopperswitch.
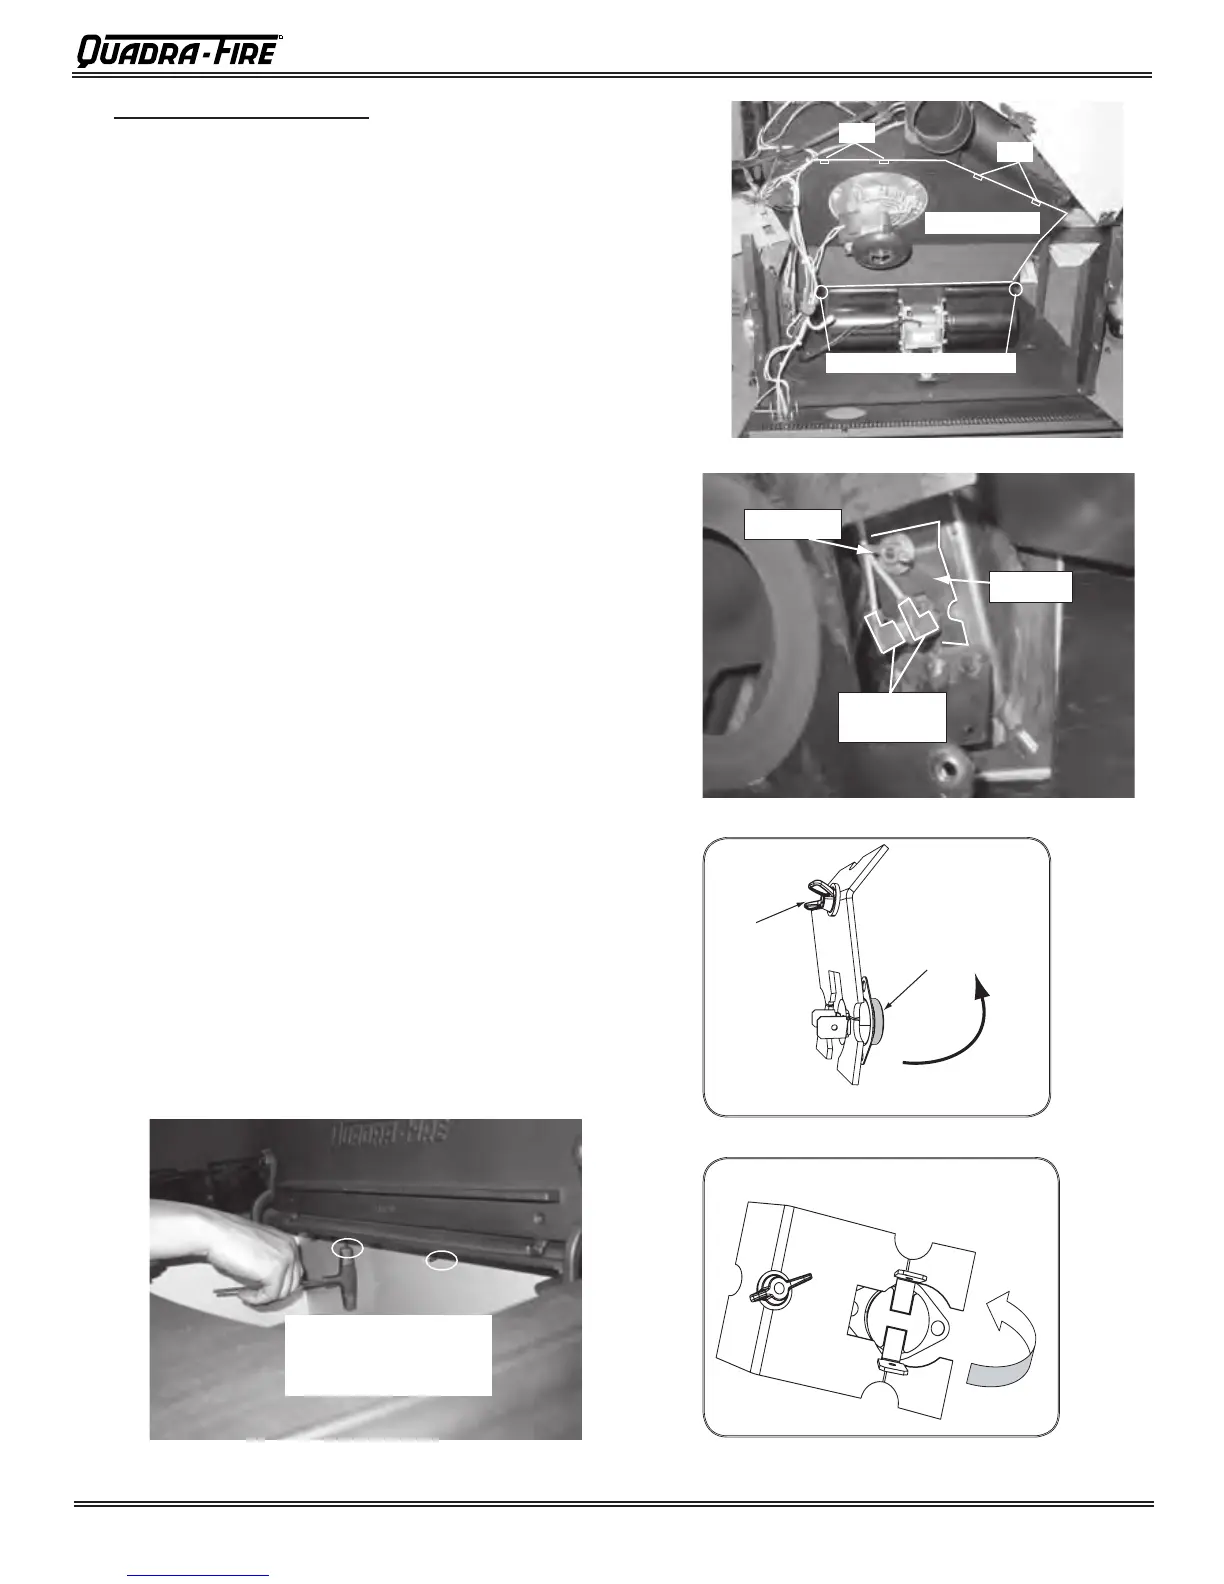
4. Removecasttopfromappliance.Twofastenersarelocatedout-
sidethehopperoneachside.Theothertwoarelocatedinthe
hopperalongtheback. Figure 18.1.Removetherearscreenof
theappliance(besuretheventisdisconnected)byremovingthe
sevenscrews.Liftslightlyupwardsastonotdamagethehopper
switchandsetaside.
5. Removelowerscrewbyremovingvescrews.Layatonground.
6. Remove convection cover by removing the two screws at the
bottom(oneeachside)andslidetotheleft,thensetaside.
7. Removetheve7/16”boltsholdingthecombustionblowerhous-
ingtotheexhaustplenum.Discardgasket.(Cleanblowerimpeller
andplenumifneeded).
8. Disconnectwiresfromsnapdisc#2.Figure 18.3.
9. Loosenwingnuttorelievethepressureon snap disc fromthe
bracket.Theshadedareaofthesnapdiscisinsertedintoahole
inthefeedtube.NOTE:Youmayneedplierstostartthewing
nut.Figure 18.4.
10.
Whenbracketislooseenough,rotatethebracketcounterclockwise
andawayfromfeedtube.Figure 18.5.
11.Reach behind bracket and remove old snap disc. Install new
snapdiscandrotatebacktooriginalpositionensuringthesnap
discisinsertedintheholeinthefeedtube.Tightenthewingnut
andre-attachthewirestothenewsnapdisc.
12.Re-install in reverse order. Be sure to use new gasket when
installingcombustionblowerhousing.
Remove 2 screws on the
outside of hopper in the front
and 2 screws inside the
hopper at the back.
Figure 18.1
Convection Cover
Hook
Hook
Remove 2 screws at each end
Figure 18.2
Wing Nut
Bracket
Disconnect
Wires
Figure 18.3
Loosen Wing
Nut to relieve
pressure
Shaded area
inserted in hole in
Feed Tube
Rotate bracket counterclockwise
once pressure is relieved
With bracket in rotated position,
reach behind bracket and remove
and replace Snap Disc
Figure 18.4
Figure 18.5