EasyManuals Logo

QubicaAMF Options Ball Return User Manual

Default Icon
46 pages
To Next Page IconTo Next Page
To Previous Page IconTo Previous Page
Page #19 background imageLoading...
Page #19 background image
I
NSTALLATION
Options
Ball Return Installation Manual
612
-
860
-
010
13
Rev. Date
10/07
NSTALLING THE
B
ALL
R
ACK
A
ND
O
PTIONAL
L
OWER
R
ACK
NOTE: The Ball Rack and Pedesta
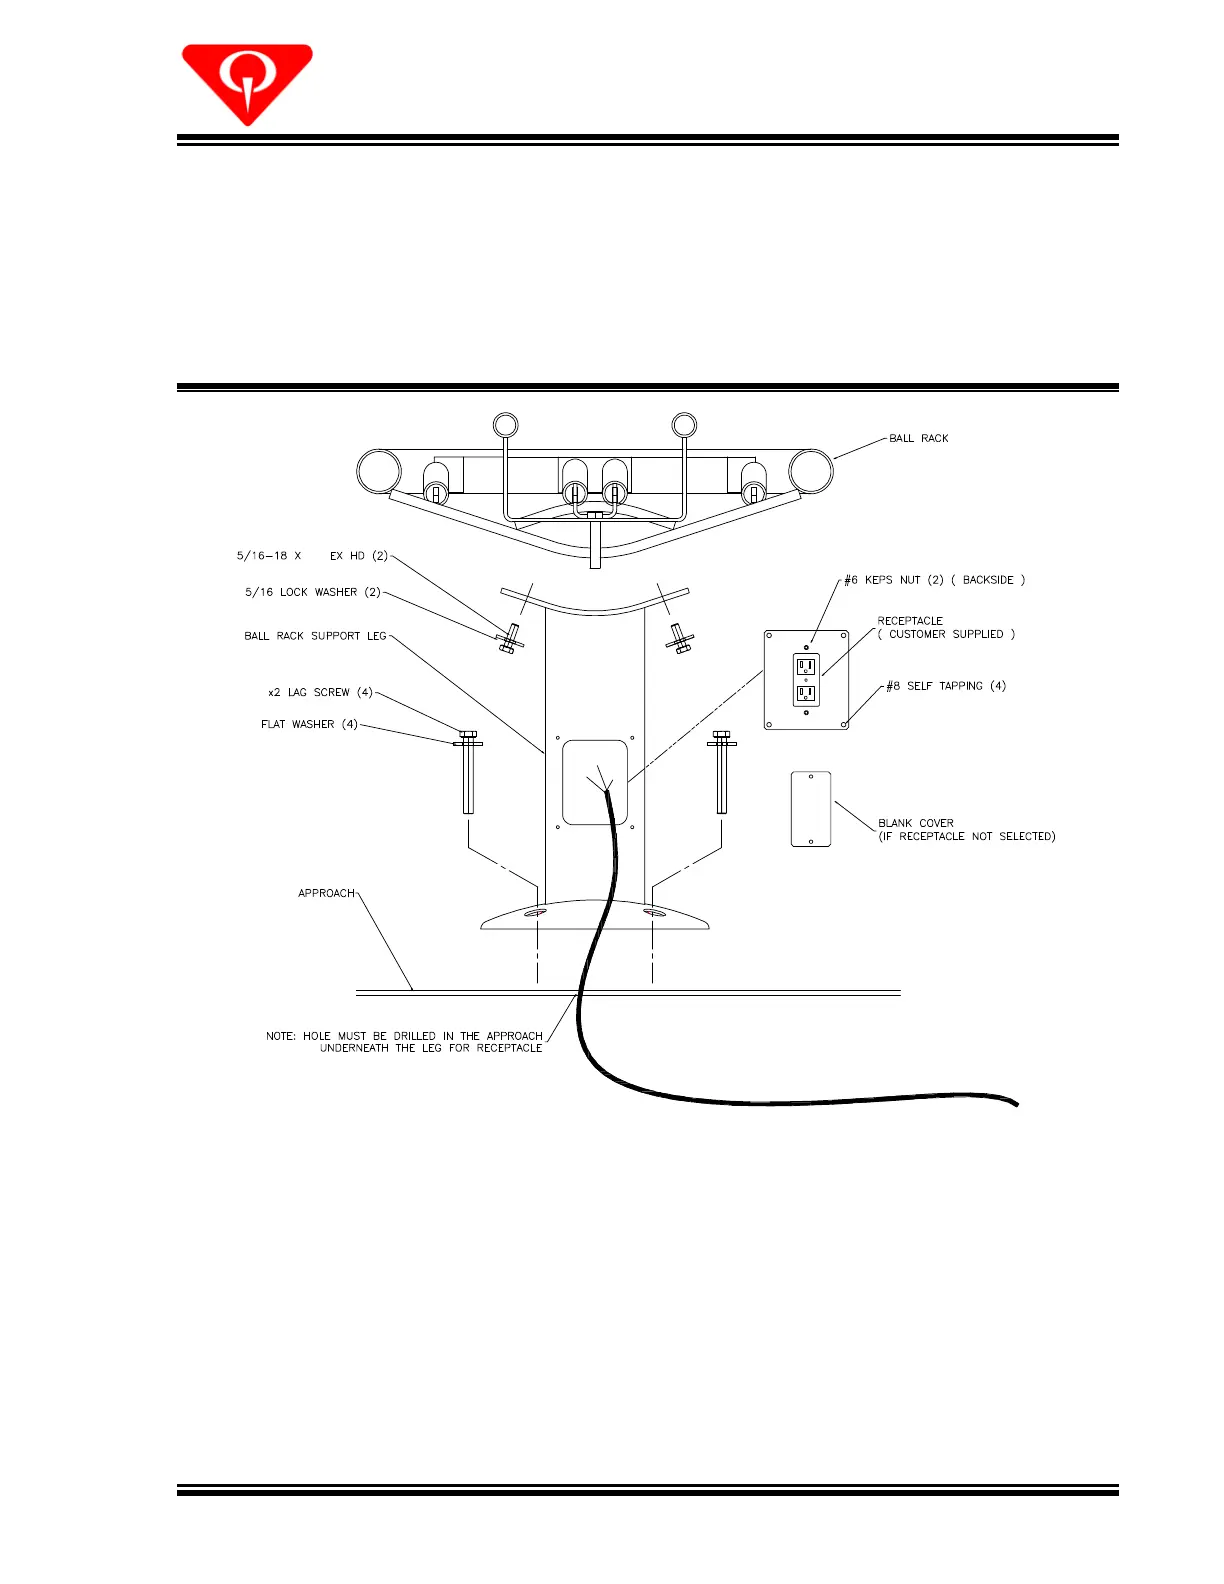
l Leg are shipped in separate boxes.
1.
Attach the pedestal leg
259
001
028
)
to the underside of the Ball Rack’s center
cr
oss member using two 5/16
18 x 3/4
hex screws (
7010
003118
075
) and lock
washers (951
156
-
002). See Figure
10
.
F
igure
1
0
, Leg Assembly t
o Rack
Installation
2.
Install the lower rack
brace (259
001
0038
) to the underside of the ball rack’s cross
member that is closest to the blower using 5/16
18 x x1 button head cap screws
(808
557
160) and split lock washers (951
-
156
002).
3.
I
ns
tall the lower rack (259
001
030
) onto the upper rack so that the lower rack
straddles the pedestal and mounts to the underside of the lower rack leg as shown
in Figure 11.
a.
Attach the lower rack to the pedestal leg using a 5/16
18 x 6
1/2 hex screw (81
0
157
001), two flat washers (948
722
111), one per side, and a 5/16
18 hex lock
nut (844
057
002).
3/4
3/8
3/8

Questions and Answers:

Question and Answer IconNeed help?

Do you have a question about the QubicaAMF Options Ball Return and is the answer not in the manual?

QubicaAMF Options Ball Return Specifications

General IconGeneral
BrandQubicaAMF
ModelOptions Ball Return
CategorySports & Outdoors
LanguageEnglish

Related product manuals