Ball Return Installation Manual
pgrading your existing Options Ball Return with the 252
below. The guard reduces the li
inside the ball return in the area where the ball exits the lift or
where there are moving parts. The installation utilizes much of the lift’s existing
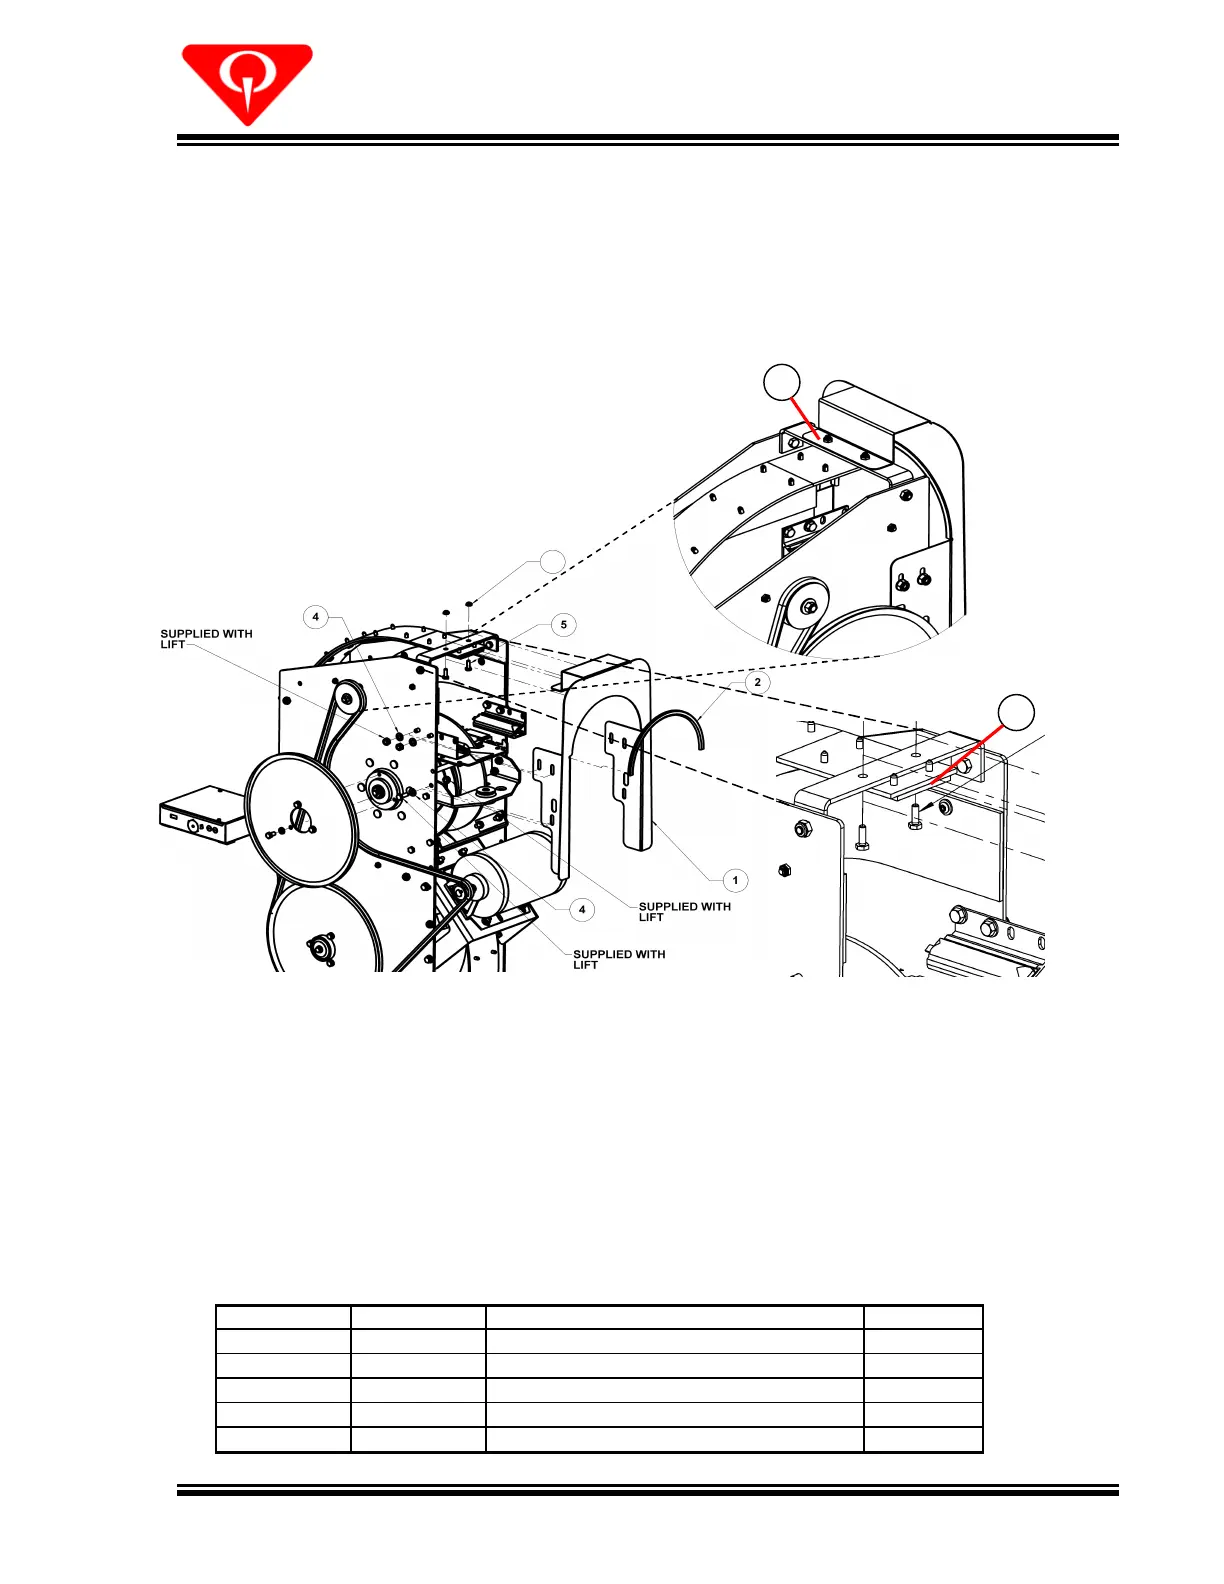
Turn OFF power and remove the Hood
before installing the hand guard.
Separate the urethane wear strip from its backing
(see A above for location)
the upper mounting screws (item 5) so that the screw heads are covered by the urethane
Install the guard’s upper mounting
e on top of the lift’s upper cross brace. (see B
Secure the guard’s side flanges to the inside of the lift’s side plates, and install the edge
trim to protect the bowling balls as they leave the lift.
Options Ball Lift Hand Guard
 Loading...