Ball Return Installation Manual
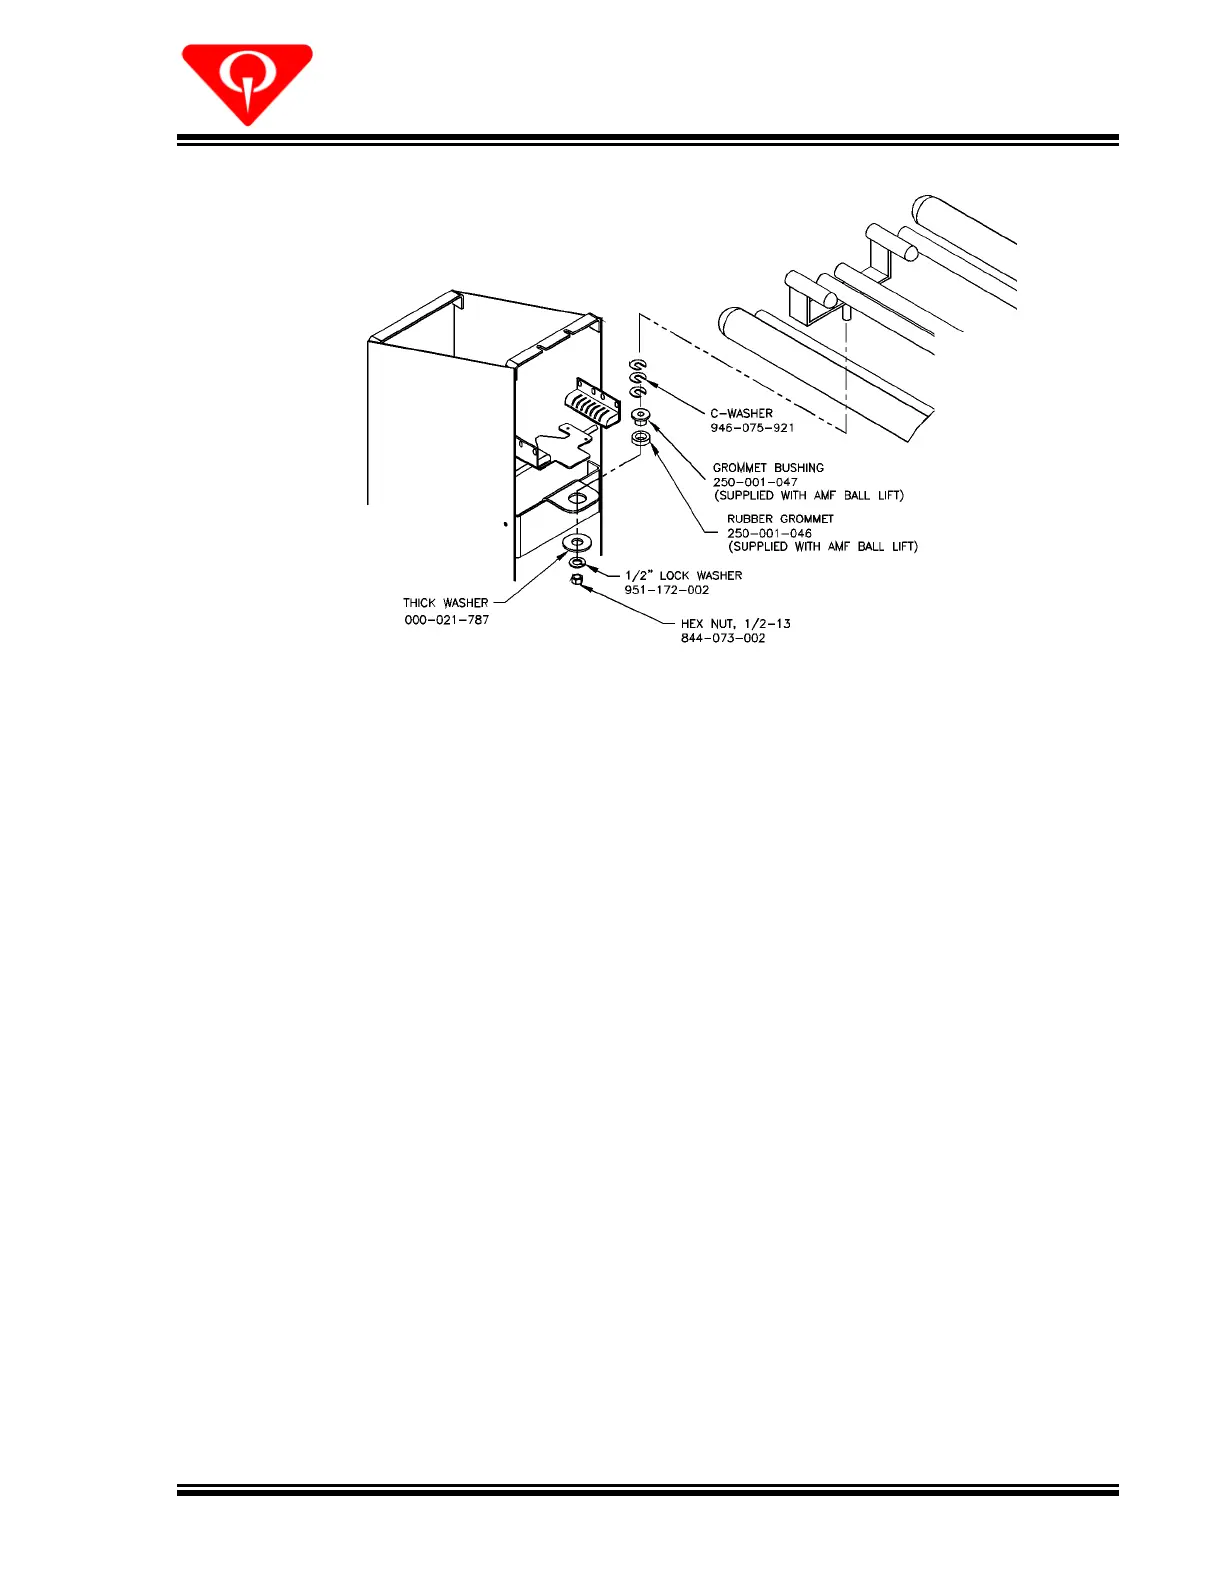
Rack to Ball Lift Attachment
Slide the rack assembly into place and secure it
to the approach using four 3/8 x 2
002), and flat washers (94
le is present, route it up into the pedestal leg.
Cover the four openings in the base of the pedestal using the black button plugs
Install the duplex receptacle in the opening provided on the pedestal in accordance
ical codes. (Refer to Figure
Place a level along the length of the top rail of the ball rack (either side) and check
for level. If high at the Ball Lift end, remove one or more C
level condition. If low at the Ball Lift, add was
Verify that the rack is leveled correctly by placing a bowling ball with no initial speed
onto the center rails approximately mid way along the rack. The ball should move
toward the end of the rack and pick up enough speed to fall onto the side trac
 Loading...