GL100 User manual
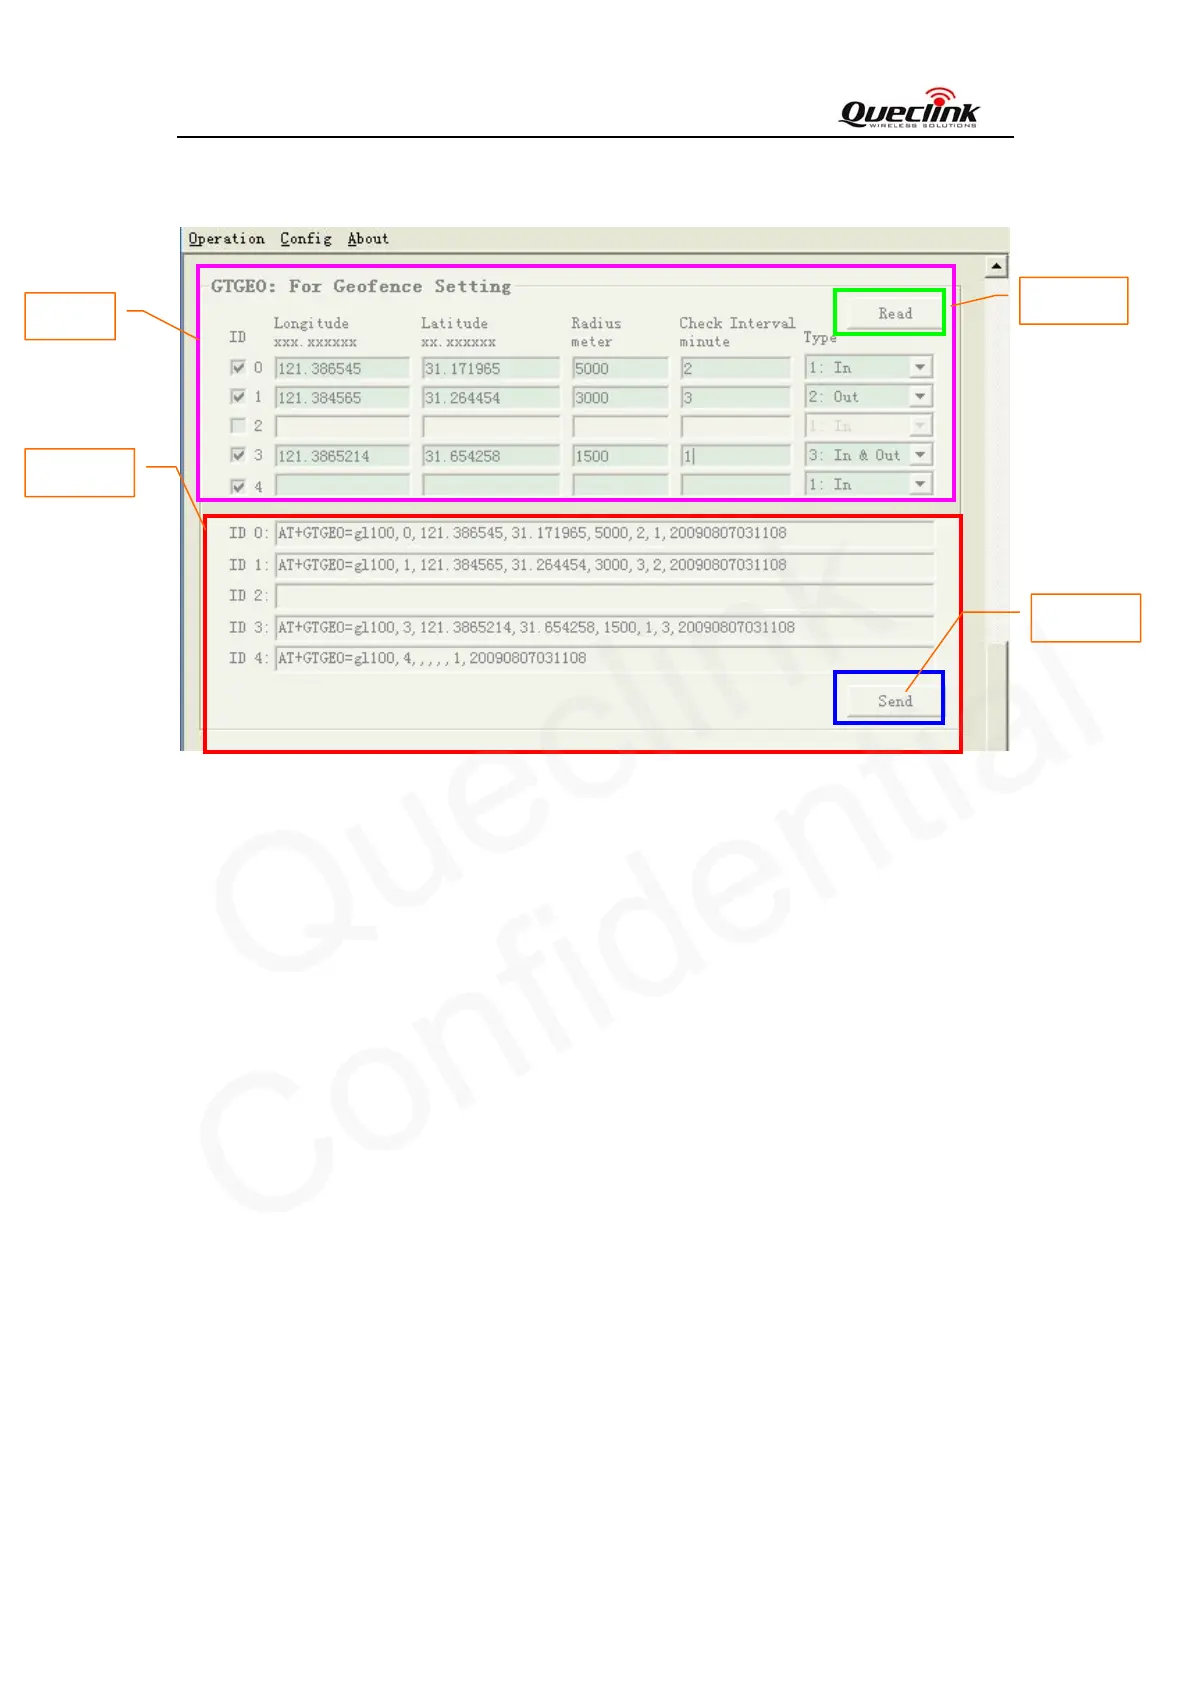
4.4.4. Set the parameters of Geo-Fence
Step_1: User can define up to five Geo-Fence regions on GL100. Each region is a circular area
which is defined by central coordinate and radius. When the device enters or leaves a
predefined Geo-Fence region, GL100 will send alert information to server.
Step_1
Step_3
Step_4
Step_2
“ID”: The "Send" button will be enabled when some ID check boxes are selected. After
pressing the “Send” button, the rule of selected Geo-Fences will be downloaded to
GL100.
“Latitude”: 20bytes, unit: degree, example as 31.187891 degree
“Longitude”: 20bytes, unit: degree, example as 121.412248 degree
“Radius”: 10bytes, unit: meter, example as 1000 meters.
“Check Interval”: The interval of GPS checking for Geo-Fence alarm.
“Type”: A numeric which indicates when to report the notification to backend server
about the Geo-Fence.
In: Reports when enters the Geo-Fence region.
Out: Reports when exits from the Geo-Fence region.
In & out: Reports when enters or exits from the Geo-Fence region.
Step_2: When “ID” check box is selected, the command message which shall be sent to GL100
will be generated based on input and displayed here. Please note this command message can also
TRACGL100UM002 - 17 -