9
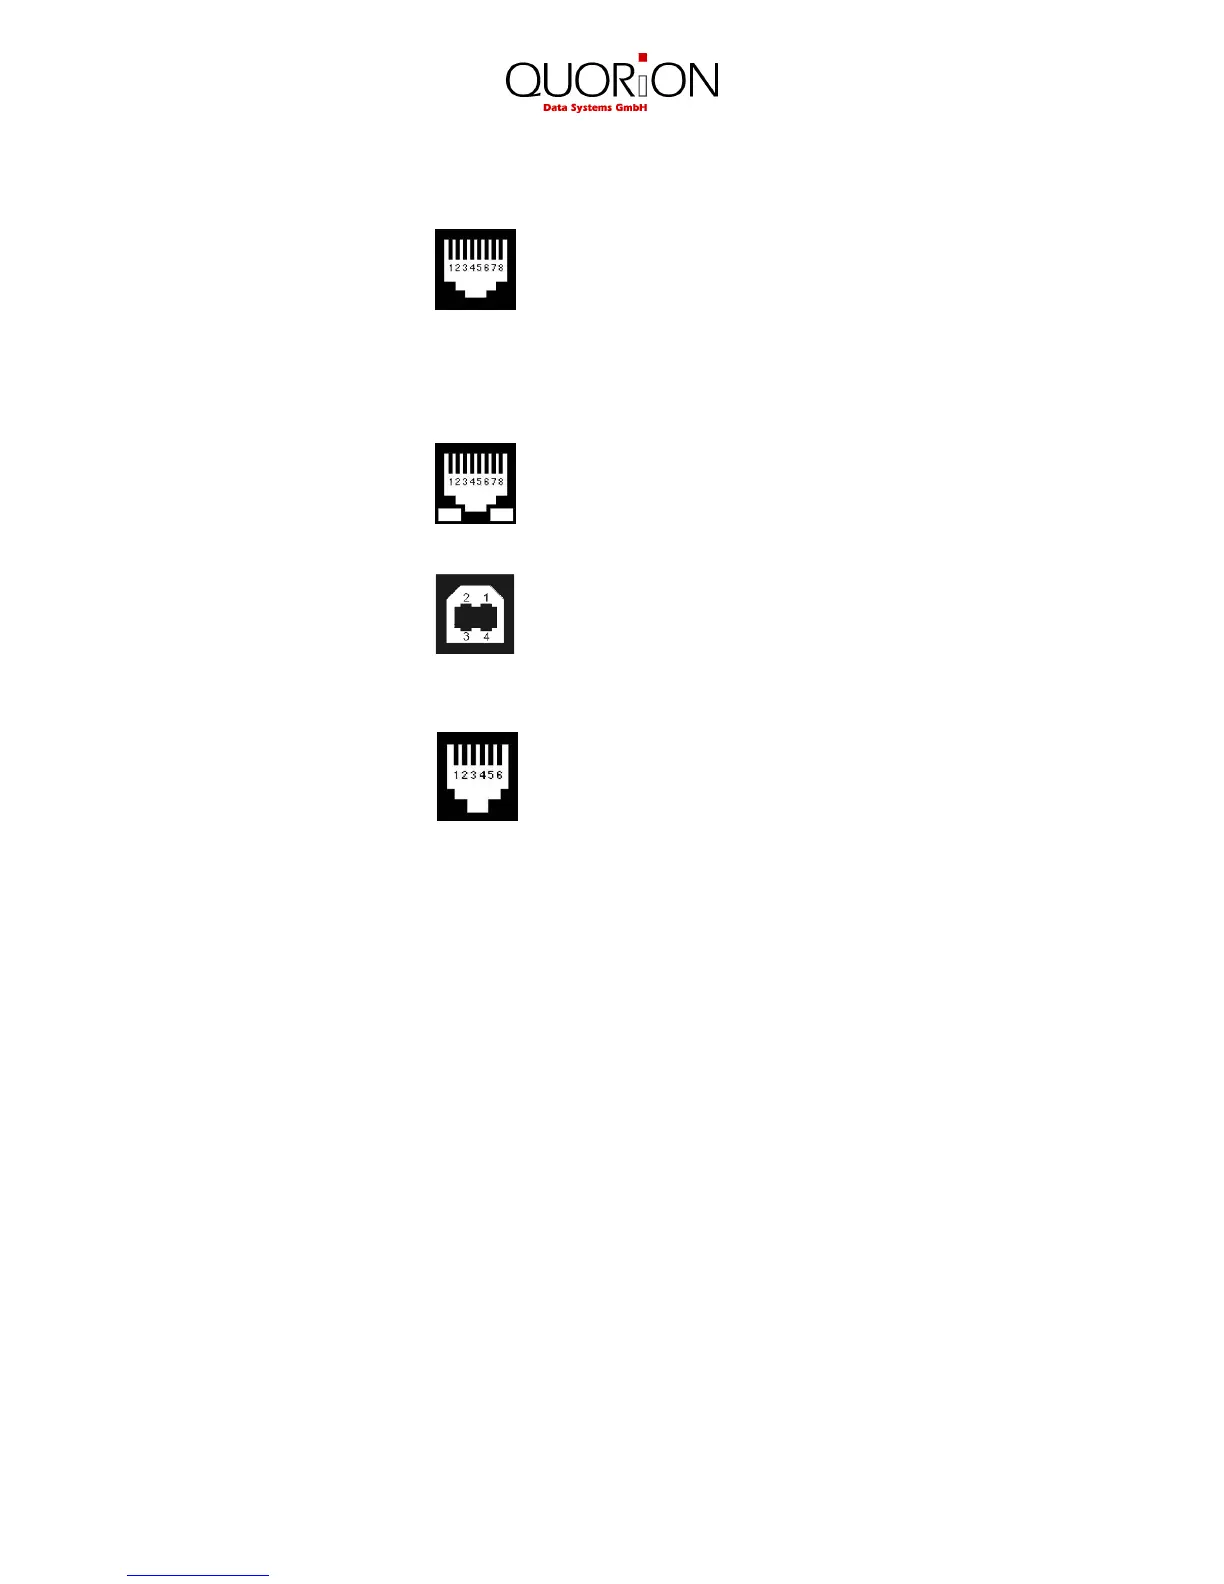
2.3.1 Pin Assignment
RS232 Port 1: +5V DC (max. 0,5A)
2: RxD
3: TxD
4: DTR
5: GND
6: DSR
7: RTS
8: CTS
Ethernet Network 1: TX+
2: TX-
3: RX+
6: RX-
USB Device 1: VCC
2: USB N0
3: USB P0
4: GND
Cash Drawer 1: GND
2: Magnet -
3: Sensor
4: Magnet +24V
5: n/a
6: GND
2.3.2 Connection to PC
The QMP 2000 can be connected to a PC for programming, reporting and back-office. QUORiON offers a
small software tool, called QProg, for this purpose. The connection can be established via USB or LAN.
Connection via USB
If you want to use USB, you need to install a driver on your PC first. This driver will create a virtual COM
port in your Windows system. Please follow these steps to install:
• Switch on the QMP 2000
• Connect the cash register to the PC using a standard USB device cable
• Wait for the Windows message “New hardware found”
• Select the driver files “stmcdc.inf” and “usbser.sys” from your local drive
• The installation will now run automatically
Please note, that system parameter 1 in the cash register (PC port) has to be re-programmed to 16 for USB
communication. This will activate the USB communication, but de-activate RS232 for PC. The
communication between PC and QMP 2000 will run with 12 MBit/s (USB full speed).
 Loading...