Raisecom
Gazelle S1020i-GL (A) User Manual
Raisecom Proprietary and Confidential
Copyright © Raisecom Technology Co., Ltd.
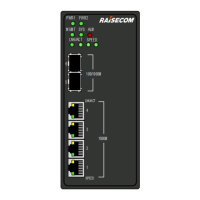
Figure 4-7 Inserting the fiber
Step 3 To remove the fiber, push the fiber connector inward slightly, press the spring clip downward,
and then pull out the fiber.
4.4.3 Connecting power cable
Confirm the power type supported by the Gazelle S1020i-GL before installing the
power cable. Connect the proper power voltage to the corresponding PINs
according to the marks displayed on the device shell. Otherwise, the Gazelle
S1020i-GL will be damaged or fail to be started normally.
Ensure that the ground cable is correctly grounded before connecting the power
cable.
Disconnect all power supplies before connecting or removing the power cable.
Use the power cable which meets the technical specifications.
The power interface of the Gazelle S1020i-GL is a Phoenix terminal. Connect the power
cable as below:
Step 1 Make the power cable according to specifications.
Step 2 Insert the power connector into the power interface of the Gazelle S1020i-GL snuggly and
tighten the screws at both sides of the connector, as shown in Figure 4-8.
 Loading...