Raisecom
Gazelle S1020i-GL (A) User Manual
Raisecom Proprietary and Confidential
Copyright © Raisecom Technology Co., Ltd.
Figure 4-8 Connecting the DC power connector
Step 3 Connect the other end of the DC power cable to the cabinet or the power sourcing equipment
in the machine room.
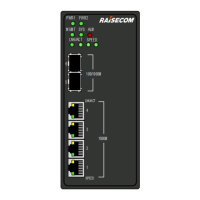
4.5 Powering on device
Power on the Gazelle S1020i-GL as below:
The Gazelle S1020i-GL can be powered on after being inserted with the power cable and
installed properly.
The Gazelle S1020i-GL is powered on when the power LED (PWR) is lightening up.
The Gazelle S1020i-GL begins to operate properly after Power-on Self-Test (POST) and
initialization. Interface LEDs indicate the working status of the interface (lit up, off, or
blinking)
4.6 Checking installation
Table 4-3 lists items to be checked after installation.
Table 4-3 Items to be checked after installation
Components are installed properly without loose ends or shedding
phenomenon.
Cables are correctly connected without loose ends or shedding
phenomenon.
 Loading...