8.
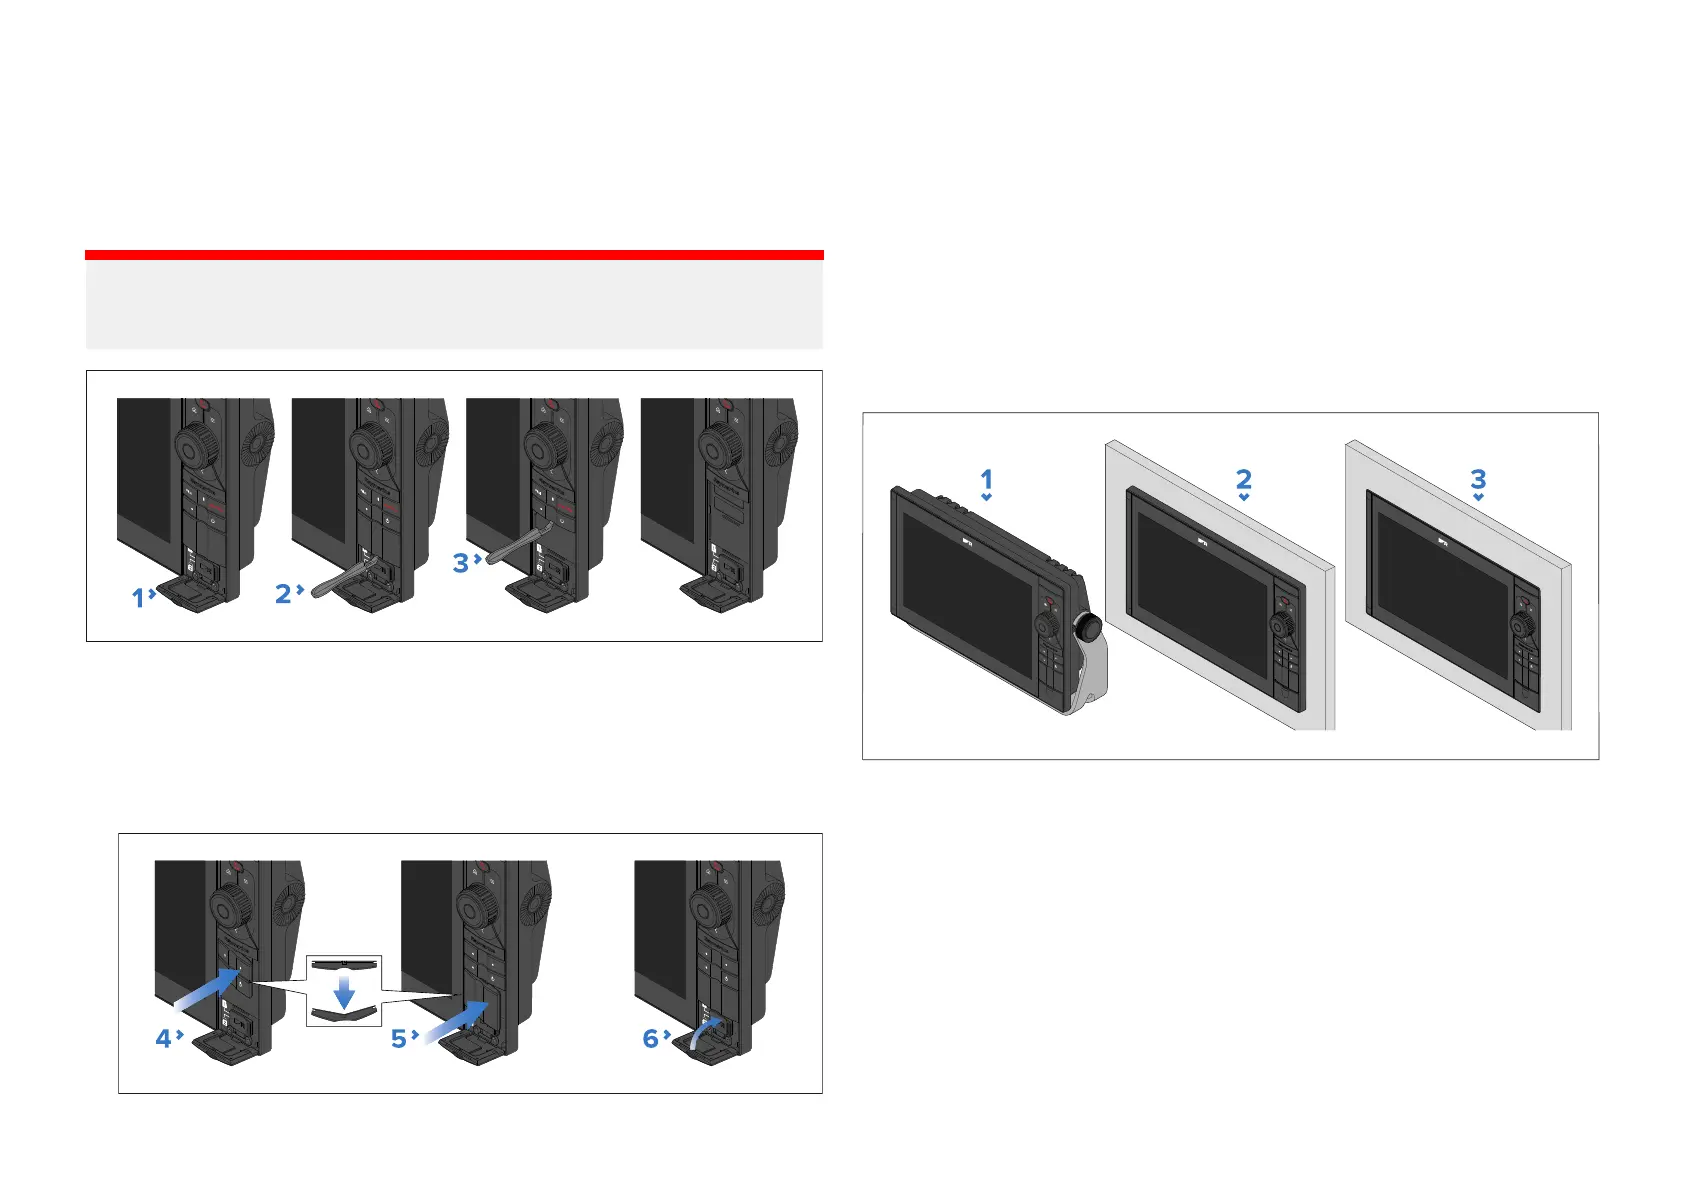
1Replacingthelowerkeypad
Thedisplayissuppliedwiththepilotcontrollowerkeypadfitted.Ifyouwill
notbeusingthedisplayasanautopilotcontrollerthenyoucanswapthe
pilotcontrolkeypadwiththeuserconfigurablelowerkeypadsuppliedwith
thedisplay.
Important:
DoNO Tusemetallicorsharpobjectstoremovethekeypadorinfillpiece
asthiscoulddamagethekeypadand/ordisplay.
1.Openthecardreaderdoor .
2.Axiom2Pro12andAxiom2Pro16only—Usingaplasticprytoollever
theinfillpiecelocatedbelowthelowerkeypadagainstthesmallplastic
protrusiontoreleaseitfromthedisplay.
3.Usingaplasticprytoolleverthebottomofthekeypadagainstthesmall
plasticprotrusiontoreleasethekeypadfromthedisplay.
4.Insertoneedgeofthereplacementk
eypadandthenbendthekeypad
slightlyinthemiddletoallowtheotheredgetobeinsertedintothe
oppositeside.
5.Axiom2Pro12andAxiom2Pro16only—Insertoneedgeoftheinfill
pieceandthenbendtheinfillpieceslightlyinthemiddletoallowthe
otheredgetobeinsertedintotheoppositeside.
6.Closethecardreaderdoor.
8.2Mountingoptions
Axiom®2Prodisplayscanbesurface,flushorbracketmounted.
1.Trunnionbracketmounting(usedformountinguprightonasurfaceor
canbeusedformountingoverhead).Forinstallationdetailsreferto:
p.41—Trunnionmounting
2.Surfacemounting(whensurfacemountedthedisplaybezelwill
protrudefromthemountingsurface).Forinstallationdetailsreferto:
p.46—Surfacemounting
3.Flushmounting(whenflushmountedthefrontglassofthedisplaywill
sitflushwiththemountingsurface).Forinstallationdetailsreferto:
p.44—Flushmounting
LegacyMFDadaptorplatesarealsoavailabletoenableyoutoeasilyswap
outolderdisplaysfornewAxiom®2Prodisplays.Foralistofavailable
adaptorsreferto:Legacyadaptorplates
40
 Loading...