Note:
R
eplacingatrunnionmountedorsurfacemountedAxiom®Prodisplaywith
anewAxiom®2Prodisplay,withtheexceptionofthepowercable,isa
straightswapwithnoholedrillingorcuttingrequired.
8.3T
runnionmounting—Axiom®2Pro9and
Axiom®2Pro12
Toolsrequired(trunnionmountinstallations)
Thefollowingtoolsarerecommendedformountingusingatrunnionbracket:
1.P owerdrill.
2.Screwdriver(appropriateforyourfixings).
3.Drillbit(suitableforthematerialofthemountingsurfaceandthe5.75mm
(0.23in)diametermountingholesinthetrunnionbracket.
Trunnionbracketmounting
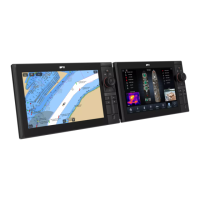
Axiom®2Prodisplayscanbemountedonatrunnionbracket.Axiom®2
Pro9andAxiom®2Pro12displaysaresuppliedwithatrunnionbracket.
AnoptionaltrunnionbracketkitisavailablefortheAxiom®2Pro16(part
number:A80722).
Note:
Fixingstothesecurethetrunnionbrack
ettoamountingsurfacearenot
provided.5xselftappingscrewsarerequired.Thescrewsshouldbe
suitableforthemountingsurfacematerialandthe5.75mm(0.23in)
diametermountingholesinthetrunnionbracket.
Ensureyouhavechosenasuitablemountinglocationforyourdisplay,which
hassufficientheadroomtoallowthedisplay’sangletobeadjustedorthe
displaytoberemovedifnecessary.Ifinstalling‘abovehead’takeextracare
toensuretheknobsaretightenedsufficientlytopreventthemcomingloose
duetovibrationwhenunderway.
1.Checktheundersideofthemountingsurfacetoensurenodamagewill
becausedbydrilling.
2.Checkthethicknessofthemountingsurfacetoensureitissufficientto
supportthedisplay
.
Installation
41
 Loading...