10 Pathfinder Smart Heading System - Owner’s Handbook
2 Installation
Mounting the GyroPlus 2 unit
Fit the GyroPlus 2 unit to the vertical surface as follows:
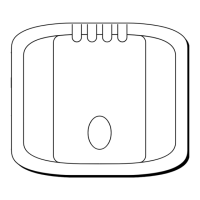
1. Remove the outer cover (as shown below).
2. Temporarily hold the GyroPlus 2 unit in the required position so you
can mark the centers of the two fixing holes.
3. Use a 3 mm (
1
/
8
in) drill bit to make two pilot holes.
4. Screw one of the self-tapping screws provided (No 8 x 1 in) into each
hole, so each screw-head is at least 15 mm from the surface.
5. Place the fixing holes over the screw heads, then move the GyroPlus
2 unit down so the screw heads are at the top of the keyhole slots.
6. Tighten the screws to secure the GyroPlus 2 unit.
Note: Replace the outer cover after you have connected all cables.
D5918-2
a
b
D5919-1
a
a
b
b
81198_1.book Page 10 Monday, February 11, 2002 8:36 AM
 Loading...