52
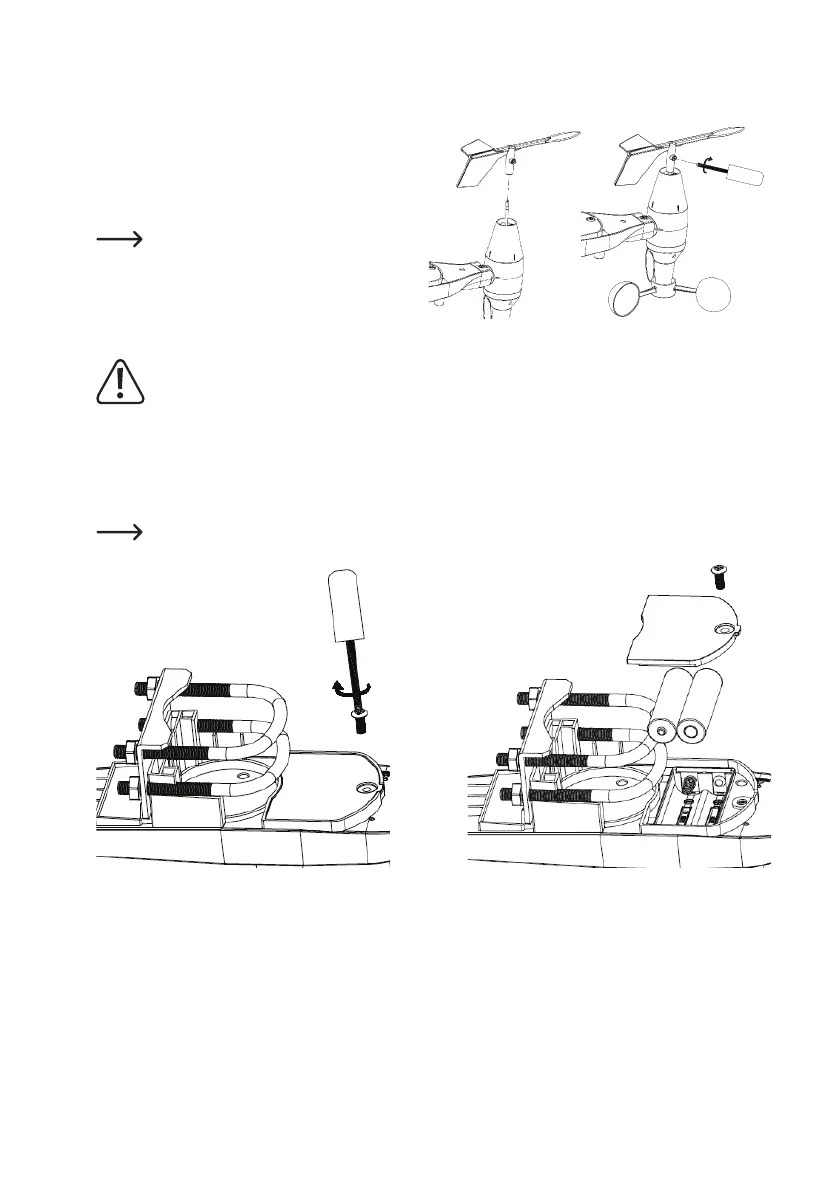
c) Install wind vane
• Push the wind vane onto the shaft on the opposite
side to the wind cups, until it goes no further.
• Tighten the set screw using a cross head screwdriv-
er (size PH0) until the wind vane cannot be removed
from the axle.
Make sure the wind vane can rotate freely.
There is a small amount of friction helps pro-
vide steady wind direction measurements.
d) Install Batteries
Take care not to reverse the polarities when inserting the batteries as this may permanently damage the
sensor.Lithiumbatteriesarerecommendedforcoldweatherclimatesandalkalinebatteriesaresufcient
for most climates. Rechargeable batteries have lower voltages and should not be used.
• Remove the battery compartment using a cross head screwdriver as shown.
• Insert 2x AA batteries matching polarities shown inside the compartment.
• TheLEDindicatoronthebackofthesensorpackagewillturnonforfoursecondsandthenashonceevery48
seconds indicating sensor data transmission. This is the sensor transmission update period.
If the LED does not light up or is on permanently, check that the batteries are inserted correctly.