53
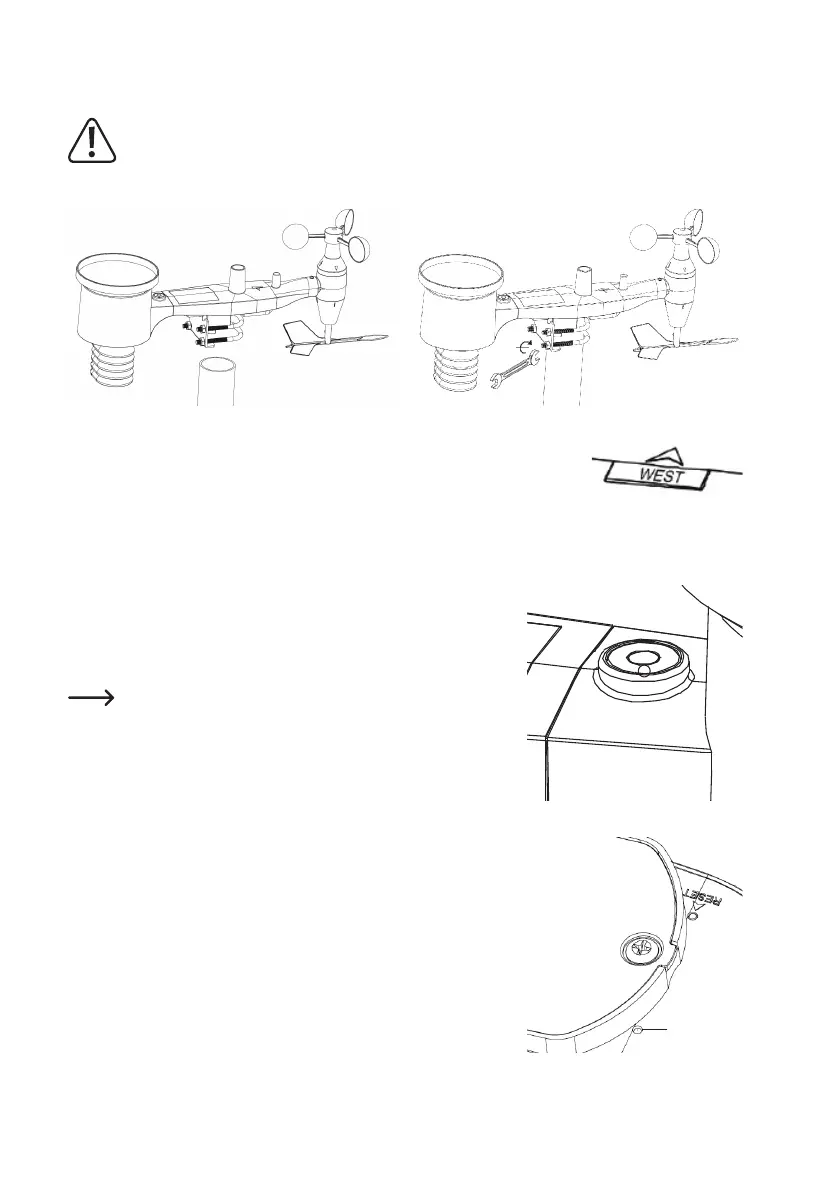
e) Mounting the outdoor sensor
Before mounting the sensor, check that the base station can receive the data from outdoor sensor. Make
sure the assembled outdoor sensor package is within range and close enough to make troubleshooting and
adjustments easier. It will also avoid any distance or interference related issues during the setup process.
Themountingassemblywilltarounda2.5-5cm(1to2inches)diameterpole(notincluded)asshown.
Use the “WEST” indicator to make sure the sensor is facing the correct direction.
• The sensor body has an arrow with the word “WEST”, this should be facing in the
direction of west. Use a compass if needed (west - compass bearing 270°).
• If the outdoor sensor is not facing the correct direction, wind data readings will not
be accurate.
Make sure the sensor is leveled using the bubble level.
• Use the bubble level to make sure the sensor is leveled; the bubble should
be fully inside the red circle.
• If the sensor is not leveled, wind direction, wind speed, and rain readings
may not function correctly and be inaccurate.
If the bubble is close but not exactly inside the circle, try adjusting
the mounting pipe.
If you cannot adjust the mounting pipe, try a small wood or heavy
cardboard shim, placed in between the sensor package and the
top of the mounting pole (this will require loosening the bolts and
some experimentation).
f) Reset Button and Transmitter LED
• Using a bent-open paperclip, press and hold the RESET button and let go
when the LED turns on.
• The LED should then resume as normal (ashing approximately once
every 48 secs).
LED