41
RPB-IOM (06-22) 131782-B
c. Pull main burners horizontally away from injection opening and lift out.
d. Remove manifold bracket screws and remove manifold.
e. Remove burner orifices.
f. Remove screws and lift out pilot burner.
3. Clean burner rack in accordance with instructions in Cleaning Pilot and Burners section.
4. Re-assemble and re-install burner rack by reversing above steps, being careful not to create any unsafe conditions.
Cleaning Pilot and Burners
⚠ WARNING ⚠
To prevent injury when cleaning pilot and burners, wearing eye protection is recommended.
⚠ CAUTION ⚠
To prevent damage to pilot orifice, do not ream the orifice.
If the pilot flame appears short and/or yellow, check the pilot orifice for blockage caused by lint or dust accumulation.
1. Remove the pilot orifice and clean it using compressed air.
2. Check and clean the aeration slot in the pilot burner.
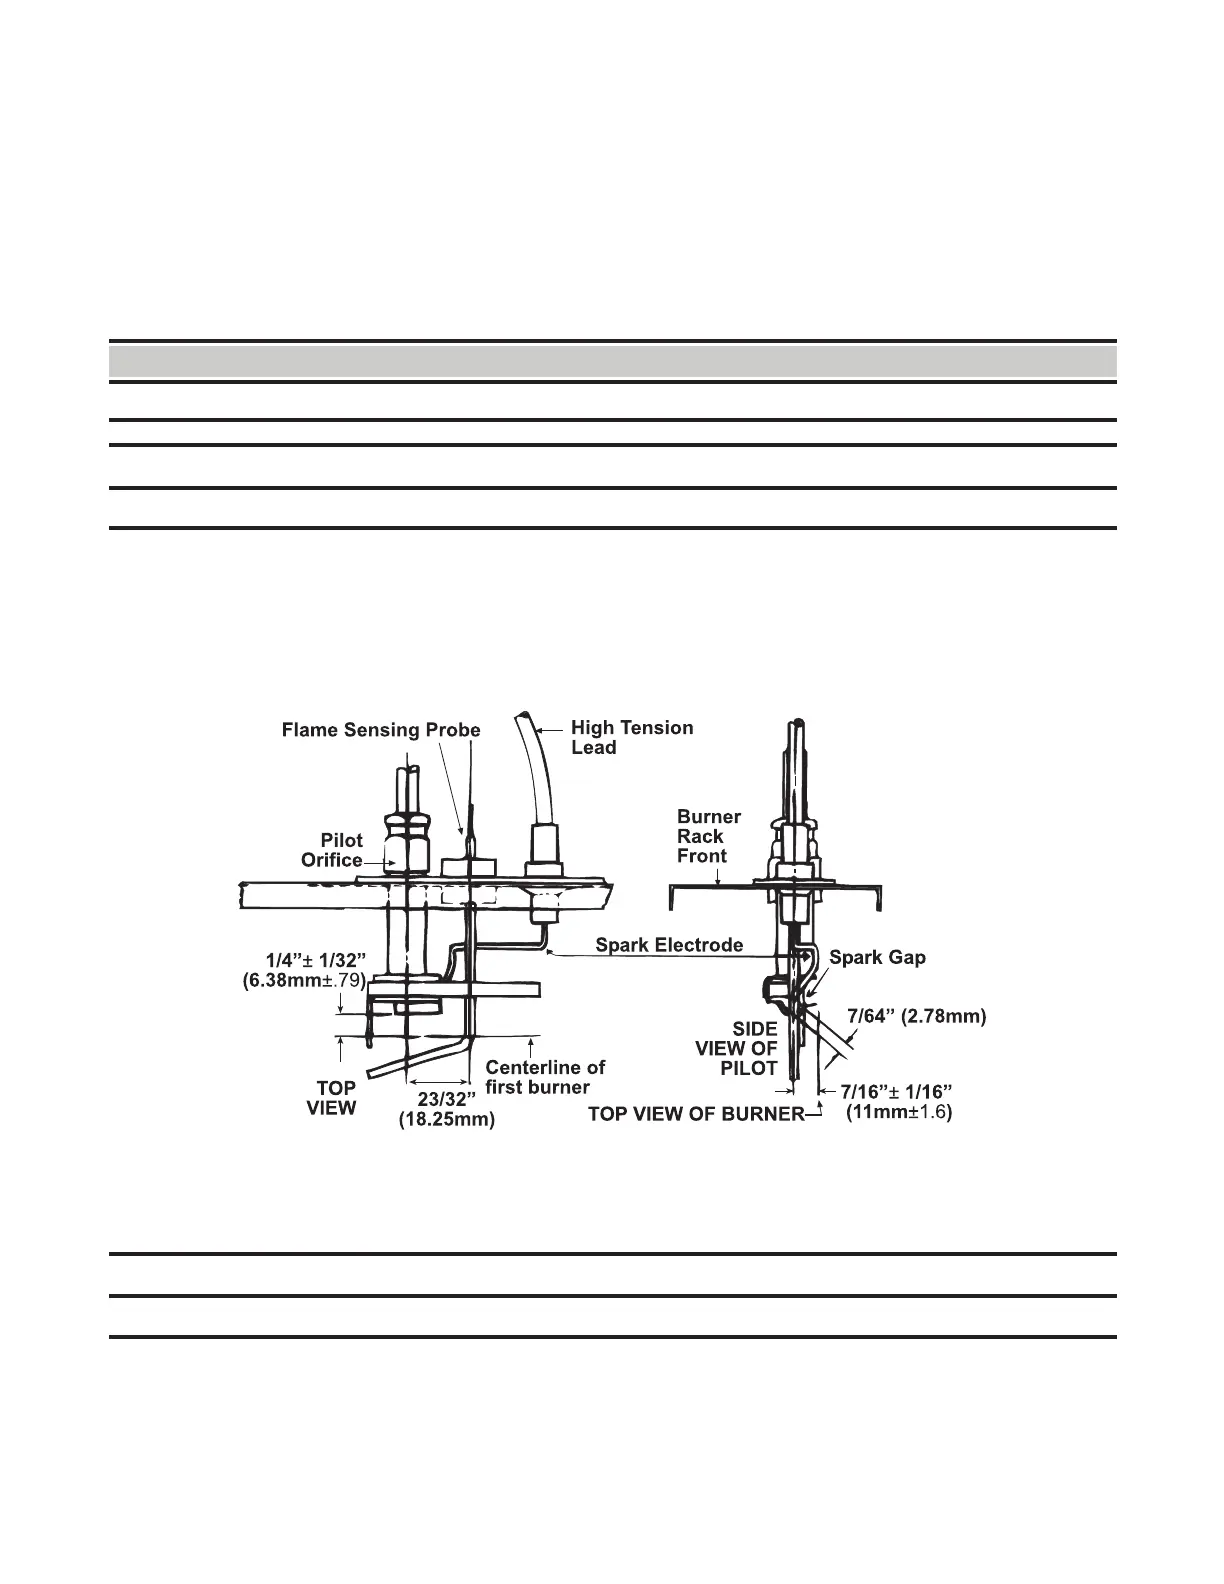
3. Clean the metal sensing probe and the pilot hood with an emery cloth and wipe off the ceramic insulator.
4. Check the spark gap (see Figure 23), which should be maintained to 7/64 inch.
Figure 23. Pilot Assembly Spark Gap
5. After the pilot is cleaned, blow away any dirt using compressed air.
6. Clean the main burners and burner orifices using compressed air.
⚠ CAUTION ⚠
When cleaning burner ports, do not use anything that might change the port size.
7. Use an air nozzle to blow out scale and dust accumulation from the burner ports. Alternate blowing compressed
air through the burner ports and then through the venturi. Use a fine wire to dislodge any stubborn particles from
the burner ports.
8. Clean the burner rack carryover systems using compressed air.