14
RPB-IOM (06-22) 131782-B
INSTALLATION—CONTINUED
Duct Connections—Continued
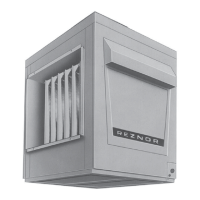
100% Outside Air Hood (Option AS2)
⚠ CAUTION ⚠
It is recommended that the inlet to the outside air hood NOT be facing into the prevailing wind.
Allow a minimum clearance of 14 inches (356 mm) from the bottom of the air hood to the mounting
surface.
Option AS2 is a weatherized, screened hood designed to be field-assembled and installed around the horizontal
inlet air opening of the blower cabinet. The air hood includes factory-assembled louvers designed to help eliminate
moisture from the inlet air. Complete installation instructions are packaged with the air hood and are listed in Table 1.
Screened Air Hood for 30% Outside Air Opening
The outside air hood included in the air inlet options that have a 30% outside air opening (options AR6 and AR7) is
shipped separately for field-installation. Complete installation instructions are packaged with the air hood and are
listed in Table 1.
Evaporative Cooling Module (Option AS3, AS4, AS5, or AS8)
The evaporative cooling module is factory assembled, installed and wired. No additional roof mounting is necessary.
Refer to the installation manual listed in Table 1 to field-connect the water supply and to make necessary checks
and adjustments before operating the cooling module.
Discharge Air Temperature Sensor Installation
• Makeup air option AG3 has a ductstat with a capillary sensor that is factory-installed in the unit discharge.
• Makeup air options AG8, AG9, AG15, AG39, and AG40 require field installation of the sensor in the discharge
ductwork.
• Option AG15 includes a box and sensor holder. Options AG8, AG9, and AG39 include a sensor and mixing tube.
• On units with option AG40, the discharge sensor is field-supplied.
• Follow the instructions below to install the sensor in the ductwork.
1. Determine distance of sensor from unit:
a. Ensure that there is sufficient distance from outlet to have good mixture of discharge air temperature.
NOTES:
• According to the latest edition of AMCA Standard 201, in straight ducts, the air is typically well
mixed a minimum of five equivalent duct diameters from the discharge of the unit with equivalent
duct diameter defined as equal to the square root of 4AB/3.14 (A and B are duct cross-sectional
dimensions).
• Locate the sensor a minimum of 96 inches (2,435 mm) from the outlet of the unit.
• If the length of the discharge duct is less than 8 feet (2.4 meters), a mixing vane is recommended
for mixing the discharge air. Do not mount the sensor in the ductwork after a split in the supply
as this will cause loss of control in the duct that does not house the sensor.
b. Refer to following formula for calculating sensor placement. This example assumes cross-sectional dimensions
for supply ductwork of 24 × 12 inches (610 × 305 mm):