9
RPB-IOM (06-22) 131782-B
Optional Curb (Option CJ1 or CJ2) Assembly
NOTE: Curbs are shipped unassembled. Field-assembly and mounting on the roof are the respon-
sibility of the installer. All required hardware necessary to complete the assembly is provided.
1. Position and connect cross rails and side rails as shown in Figure 3.
2. Check assembly for squareness—adjust as neccesary so that diagonal measurements are equal within ±1/8-inch
(±3-mm) tolerance.
⚠ CAUTION ⚠
Curb must be leveled in both directions with no twist end-to-end to ensure good weather-tight seal
between unit’s curb cap and curb.
3. Level curb as necessary using shims.
4. Secure curb to roof deck using hardware provided.
5. Install field-supplied flashing.
NOTE: The system can have a variety of configurations that affect installation. Figure 3 shows a
unit with an option AQ5 or AQ8 downturn plenum, which is factory-installed as part of the packaged
system. If the system does not have a downturn plenum, the discharge is horizontal.
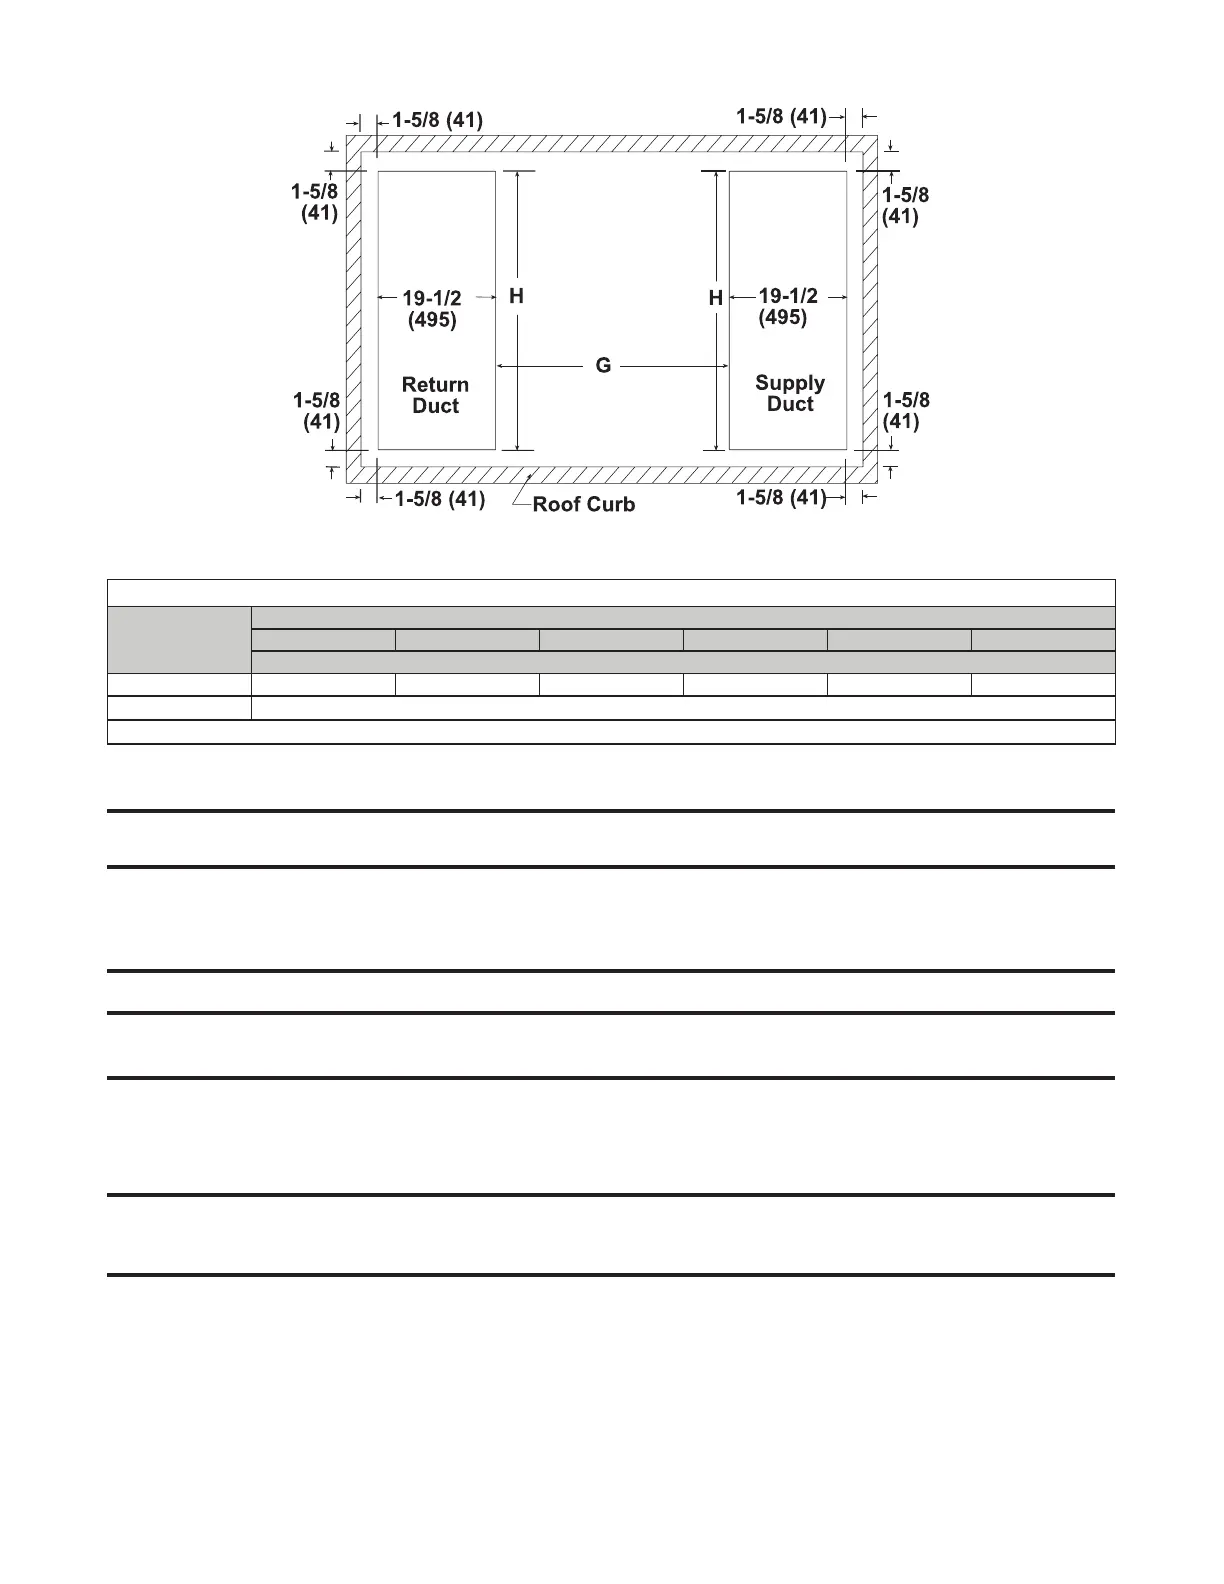
Figure 2. Duct Opening Dimensions (Refer to Table 6)
Table 6. Duct Opening Dimensions
Dimension
(See Figure 2)
Unit Size
125 150, 175 200, 225 250, 300 350 400
Inches (mm)
H 17-3/8 (441) 22-7/8 (581) 28-3/8 (721) 36-5/8 (930) 42-1/8 (1070) 47-5/8 (1210)
G*
38-5/8 (981)
*With downturn plenum (option AQ5 or AQ8).