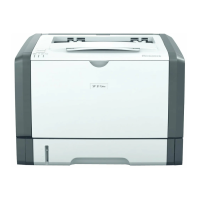
RICOH SP 311SFNw B&W Multifunction Laser Printer
Getting Started Guide
12
9. Confirm that an IP address has been assigned to the printer. Press [User Tools] [Network
Settings] [IPv4 Configuration] [IP Address]. Write the IP address down. To exit, press [Escape]
[User Tools].
Note:
• The printer’s IP address is also on the Configuration Report. See Appendix B: Print Configuration
Report.
10. Check wireless connection status. Press [User Tools] [Network Settings] [Wi-Fi] [Wi-Fi
Status]. Display should read, Connected. To exit, press [Clear/Stop].
Note:
• Also see Appendix A: Check Wi-Fi Connection Status.
11. Next, install Network Printer/Scanner Drivers. See 3.2 Network Quick Install.
PIN Method
You can enable wireless communication by registering the device’s PIN through the router’s web page.
This method is used when the wireless router supports WPS, but does not have a dedicated WPS
button. In order to successfully connect using this method, you need the device’s PIN (instructions
below) and the router’s URL/IP address. You’ll need to log in to the router’s web page, so have your
user name and password ready. Once logged in, you can enter the device’s PIN, thus establish the
printer as a client on your wireless LAN.
Important:
• For assistance with the router web page URL/IP address and login credentials, please contact your Wi-Fi
installer, corporate Help Desk or router manufacturer.
• NETGEAR’S router web page is used for illustration purposes.
To connect using the PBC Method, proceed as follows:
1. Get PIN
a. Press [User Tools].
b. Scroll down [] to [Network Settings], and press [OK].
c. Select [Wi-Fi], and press [OK].
d. Select [WPS], and press [OK].
e. Select [PIN], and press [OK].
f. Write down [PIN]. Do not exit screen.
2. Enter PIN via Router Web Page
a. Launch web browser from computer connected to router.
b. Enter router URL/IP address, e.g., http://www.routerlogin.net.
c. Enter User Name.
d. Enter Password.
e. Press [OK].
 Loading...