32DF9T02.C
2 - 6
WARNING!
•• WEAR PROTECTIVE CLOTHING AND EYE PROTECTION AT ALL TIMES. BATTERIES
CONTAIN ACID THAT CAN BURN. IF ACID COMES INTO CONTACT WITH SKIN, IM-
MEDIATELY FLUSH AFFECTED AREA WITH WATER AND WASH WITH SOAP.
•• ALWAYS WORK IN A PROPERLY VENTILATED AREA. DO NOT SMOKE OR USE
OPEN FLAME IN THE VICINITY OF BATTERY.
•• DO NOT LAY ANYTHING ON TOP OF BATTERY.
c. Disconnect positive battery cable at vehicle battery compartment.
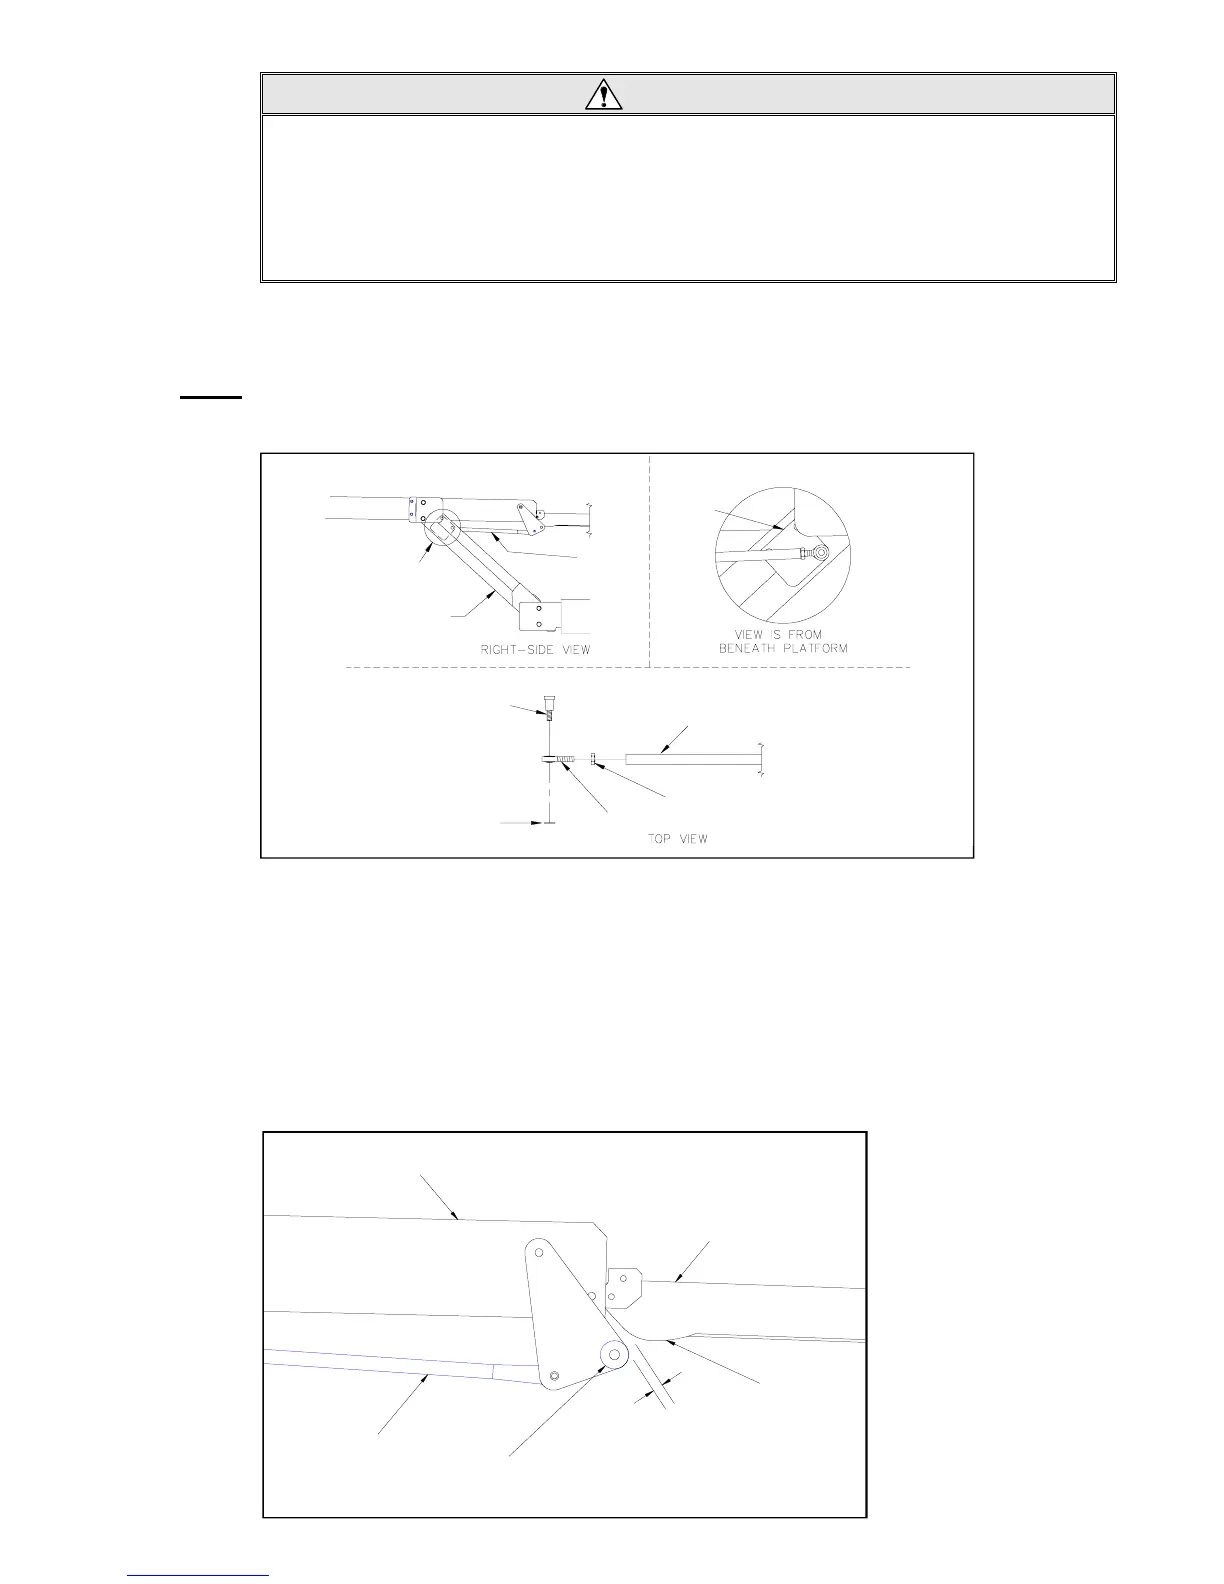
d. Refer to
Figure 2-2. Locate rod-end portion of actuator rod assembly at right-side of platform
(between junction of lifting frame and platform). Loosen rod-end jam-nut.
NOTE: The actuator rod-ends are left-hand threaded. Turning one clockwise will lengthen actuator rod,
and counter-clockwise will shorten it; lengthening actuator rod will delay unfolding of bridgeplate
and shortening speeds up unfolding.
e. Remove shoulder bolt that fastens actuator rod-end to mounting plate (on traveling frame); catch
spacer as it falls.
f. Locate rod-end portion of actuator rod assembly at left-side of platform (between the junction of
the traveling frame and platform). Loosen rod-end jam-nut.
g. Remove shoulder bolt that fastens actuator rod-end to mounting plate (on traveling frame); catch
spacer as it falls. Lower bridgeplate to floor by hand.
h. Refer to
Figure 2-3. Turn left-side rod-end to achieve a clearance of 1/8" - 3/16" between
bridgeplate cam and bridgeplate cam follower when shoulder bolt and spacer are installed.
Tighten shoulder bolt, then tighten rod-end jam-nut.
1/8" - 3/16"
BRIDGEPLATE
PLATFORM
BRIDGEPLATE
CAM FOLLOWER
RIGHT-SIDE VIEW
CAM
BRIDGEPLATE
ROD
ACTUATOR
ASSEMBLY
FIGURE 2-3: BRIDGEPLATE ADJUSTMENT
SHOULDER BOLT
JAM-NUT
ROD-END
ACTUATOR
ROD
ASSEMBLY
SPACER
ACTUATOR
ASSEMBLY
ROD
VIEW A
MOUNTING
PLATE
LIFTING
FRAME
FIGURE 2-2: BRIDGEPLATE ACTUATOR ROD ASSEMBLY
 Loading...