32DF9T02.C
4 - 4
CAUTION!
The manual rollstop control knob is made from a brittle material. Handle accordingly.
4) Use a 1/8" punch to remove retaining pin from manual rollstop control knob. Remove con-
trol knob.
5) Remove right rollstop actuator bracket and left rollstop release bracket.
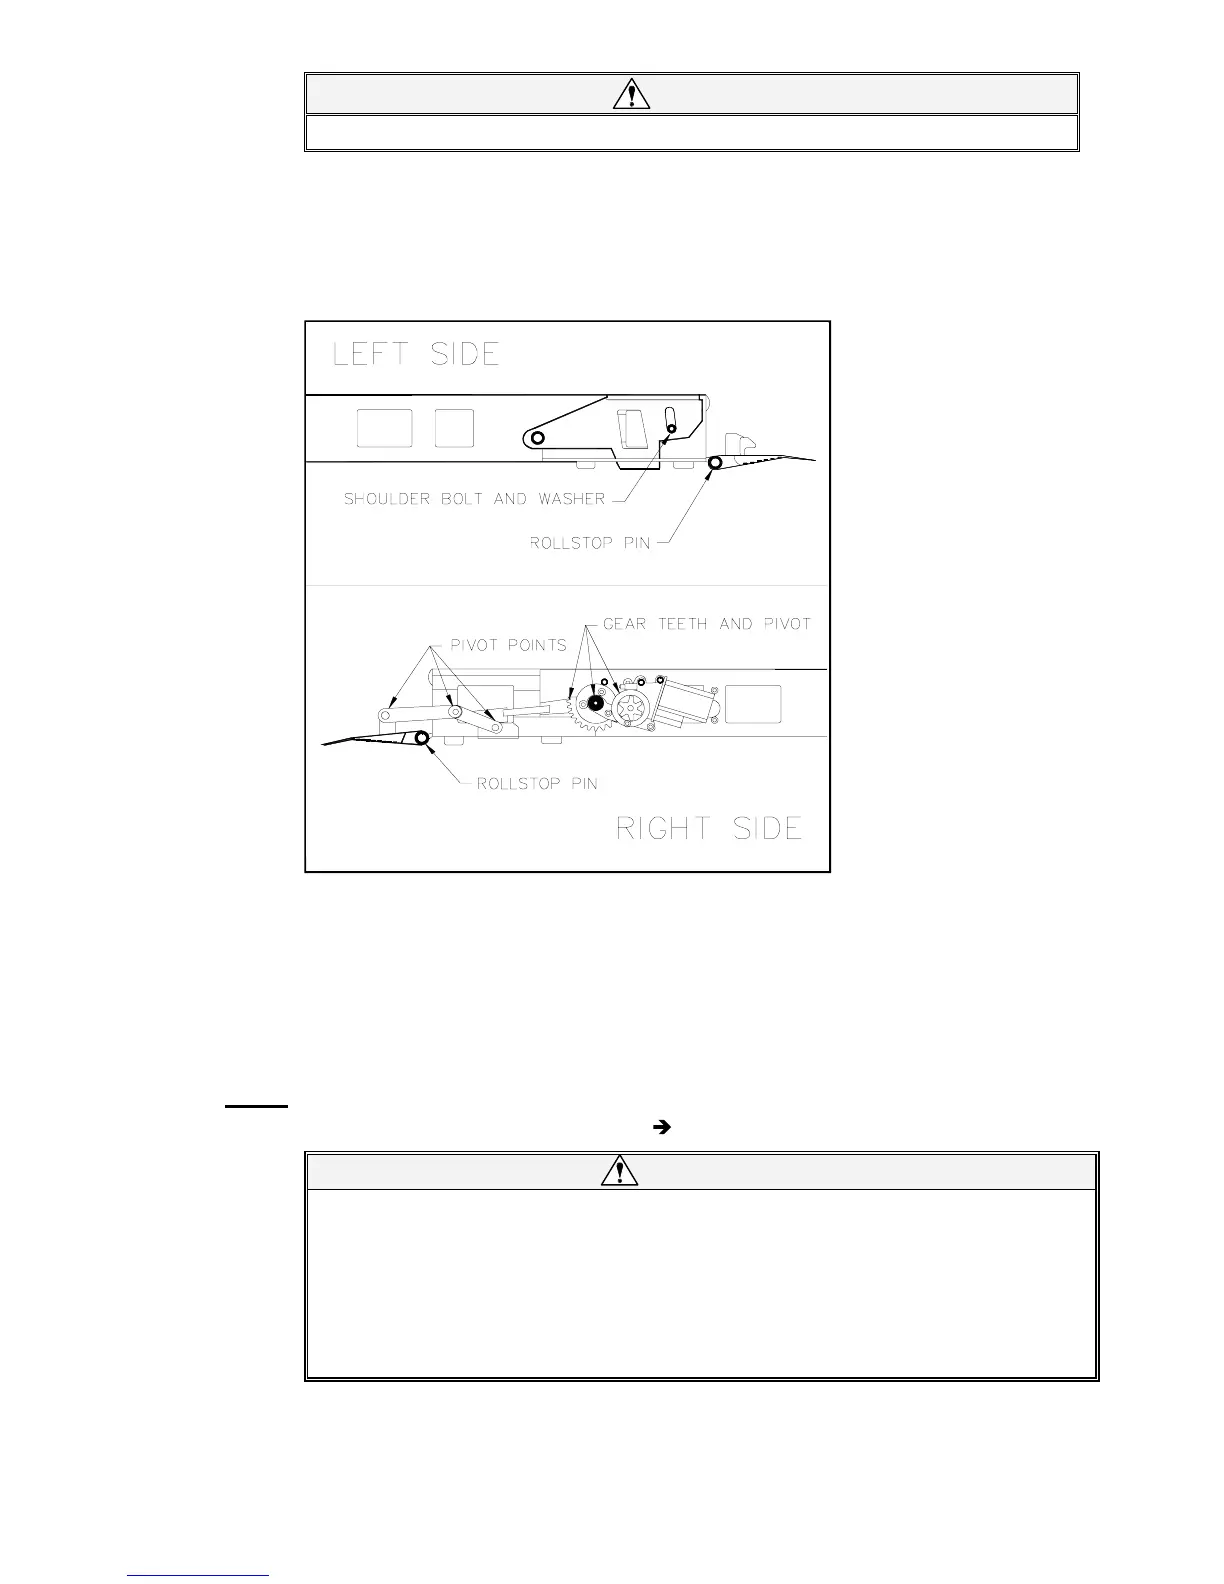
6) Refer to
Figure 4-4. Lubricate rollstop pivot points and gears (both sides of platform) using
light grease (ZEP PLS, p/n 497C, Curtisol® Red Grease p/n 88167, or equivalent). Wipe
off excess grease.
7) Re-install right rollstop actuator bracket and left rollstop release bracket.
8) Re-install right and left rollstop covers.
9) Re-install manual rollstop control knob.
10) Reconnect positive battery cable at vehicle battery compartment.
b. Rollstop “Open” Switch Adjustment
NOTE:
Refer to Electrical Controls section if replacement of rollstop “Open” switch is necessary.
1) Deploy platform using control pendant (
/OUT), and then support.
WARNING!
•• WEAR PROTECTIVE CLOTHING AND EYE PROTECTION AT ALL TIMES.
BATTERIES CONTAIN ACID THAT CAN BURN. IF ACID COMES INTO CON-
TACT WITH SKIN, IMMEDIATELY FLUSH AFFECTED AREA WITH WATER AND
WASH WITH SOAP.
•• WORK IN A PROPERLY VENTILATED AREA. DO NOT SMOKE OR USE AN
OPEN FLAME IN THE VICINITY OF BATTERY.
••• •
DO NOT LAY ANYTHING METALLIC ON TOP OF BATTERY.
2) Disconnect positive battery cable at vehicle battery compartment.
3) Remove left rollstop cover (four screws and washers).
4) Remove left rollstop release bracket.
FIGURE 4-4: ROLLSTOP LUBRICATION POINTS
 Loading...