32DF9T02.C
4 - 20
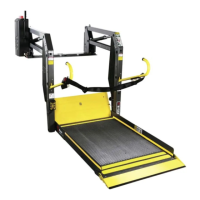
b. Intermediate Shaft and Final Driveshaft Installation
INTERMEDIATE SHAFT–
NOTE: Refer to Intermediate Shaft Removal section if an intermediate shaft is present.
1) Press new bushings into intermediate shaft support, if necessary. Bearing flange is on out-
side of support.
2) Slide intermediate shaft sprocket onto intermediate shaft. Align hole in sprocket hub with
corresponding hole in intermediate shaft.
3) Drive new rollpin into sprocket hub and intermediate shaft.
4) Slide intermediate shaft assembly through bushings of intermediate shaft support. Refer to
Figure 4-17 and verify that orientation of intermediate shaft assembly matches illustration
(sprocket is near
outside of carriage).
5) Refer to Torque Limiting Clutch Installation section. Install and adjust clutch.
6) Refer to Carriage Installation section and install carriage into enclosure.
FINAL DRIVESHAFT–
NOTE: Refer to Final Driveshaft Removal section if a final driveshaft is present.
1) Refer to
Figure 4-17. Slide driveshaft sprocket onto driveshaft. Align roll pin-hole in
sprocket hub with hole in driveshaft.
2) Drive new roll pin into sprocket hub and driveshaft.
3) Press new bushings into driveshaft support arms, if necessary. Bearing flange is on inside
of support arms
NOTE: Spring retaining pins on driveshaft support arms must point downward.
4) Slide collar, spacers, and driveshaft support arms onto driveshaft.
5) Slide pinion gears onto driveshaft. Align holes in gear hubs and collar with corresponding
holes on driveshaft.
6) Drive new rollpins into gear hubs, collar, and driveshaft.
7) Position driveshaft assembly in carriage, and fasten support arms with two shoulder bolts
and related hardware.
8) Locate compression springs over spring retaining pins on carriage. Rotate support arms
down onto springs. Verify that both ends of each spring are held by spring retaining pins.
9) Locate intermediate shaft bracket (with intermediate shaft assembly) on top of carriage and
install screws and lock washers. Tighten sufficiently to lock the washers.
10) Refer to Drive Chain Installation section and install the primary and final drive chains.
11) Refer to Carriage Removal section and install carriage into enclosure by reversing removal
steps. Heed all warnings and precautions.
 Loading...