Rinnai 13 I Series Evap AC IM
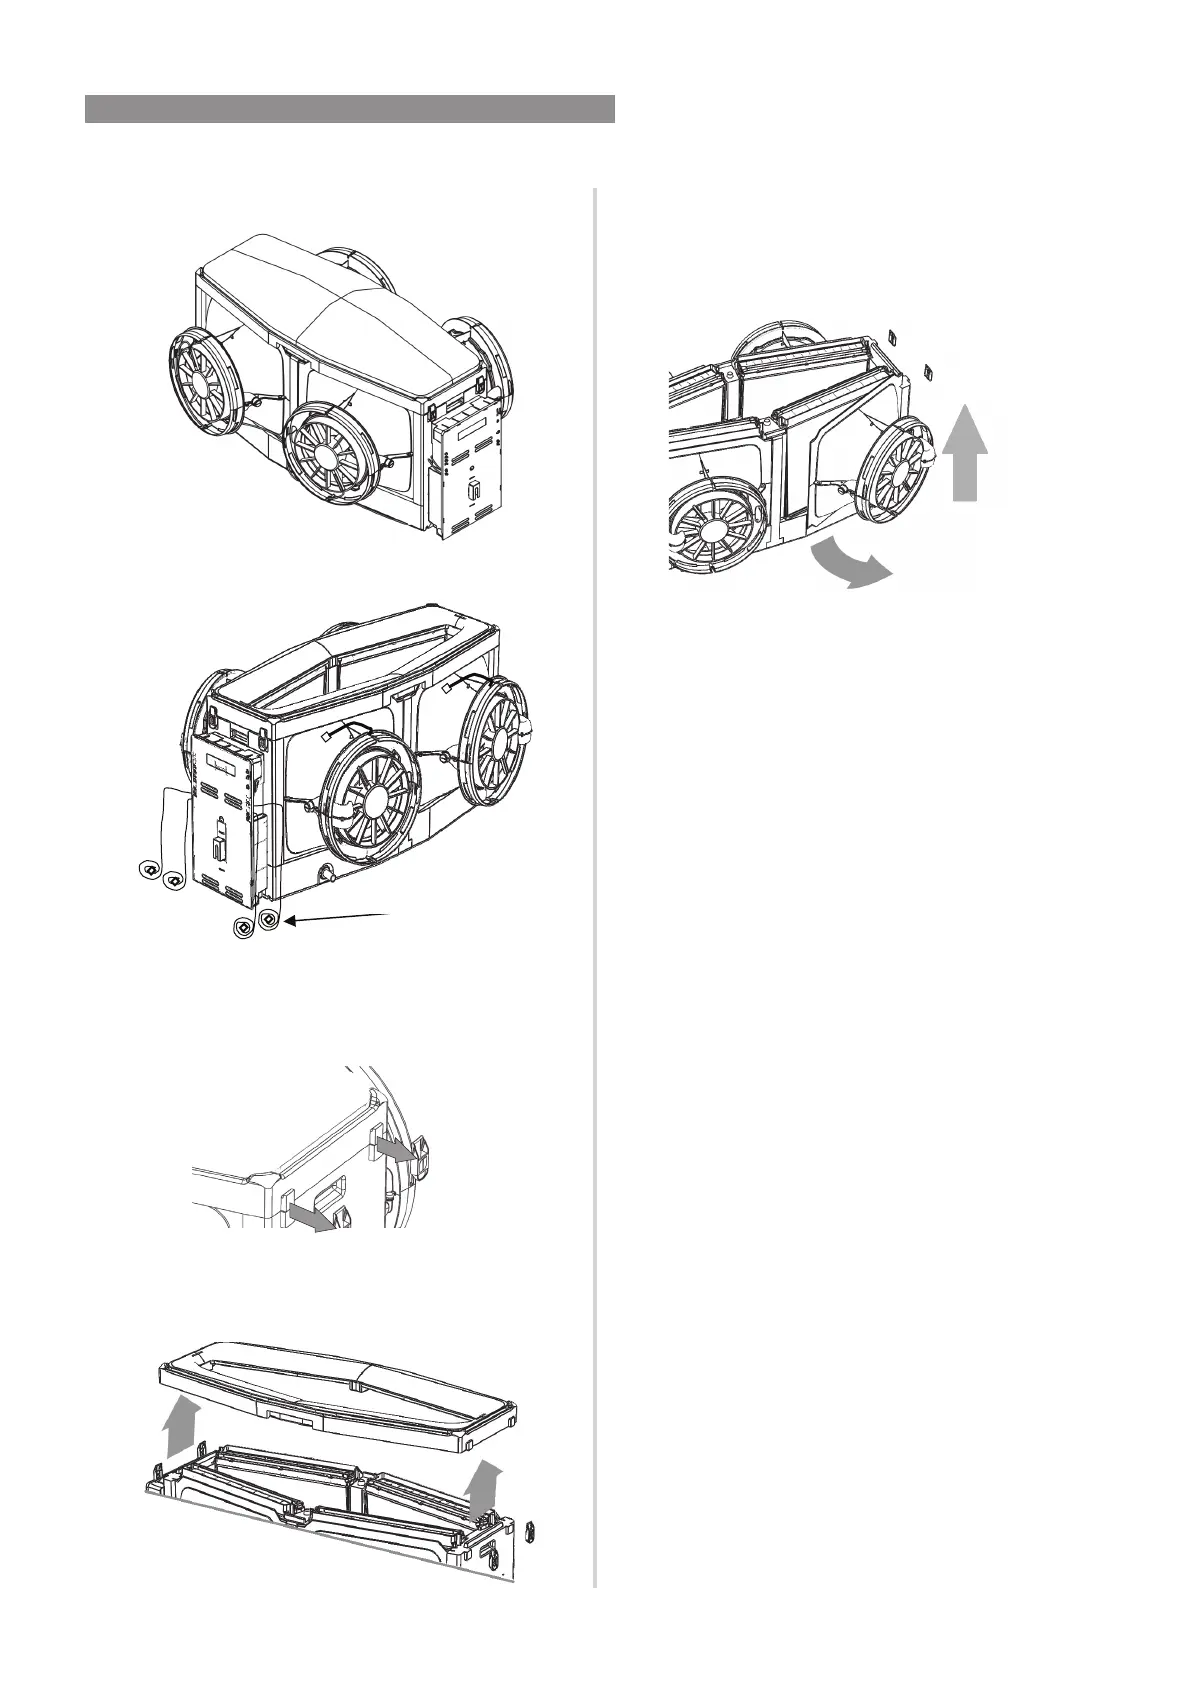
5.6 REMOVE FAN ASSEMBLIES
1� Remove Evaporator Module from packaging�
2� Disconnect motor looms at quick connect�
3� Remove the four “Toggle Clips”, two each end,
connecting “Evaporator Module Top” to the
“Evaporator Module Base”� Pull from the bottom
of the clip and rotate to remove�
4� Lift “Acoustic Cooling Chamber – Top” vertically
to remove and place down ensuring not to
damage the “Inlet Mesh”�
5� Remove all “Fan Assemblies” from the
Evaporator Module:
5�1 Lift “Fan Assembly” 40mm vertically and rotate
away from centre�
6� Re-assemble the “Acoustic Cooling Chamber –
Top”, repeat step “4” in reverse�
7� Re-assemble the “Toggle Clips”, repeat step “3”
in reverse�
8� The “Evaporator Module” is now ready to lift into
the roof space�
There is a handle at each end of the unit to assist
with this�
As the “Cooling pads” are now exposed be careful
not to damage during the lift and positioning of
the “Evaporator Module”�
9� With the “Evaporator Module” in position on the
“Safety Tray” lift the fan assemblies into the roof
space and reassemble�
Repeat steps 7 through to 1 in reverse�
Motor Loom
Quick Connect
5. EVAPORATOR MODULE INSTALLATION

 Loading...