Utility Software Guides
<Column> About RISO-PRINT
38
<Column> About RISO-PRINT
Using RISO-PRINT - TCP/IP direct print port creation
You can create a TCP/IP direct print port, which is essential for peer-to-peer printing on the TCP/IP network, in your
computer with easy steps using the RISO-PRINT.
This procedure is not necessary when using the standard Windows LPR port or Standard TCP/IP port.
When you want to print in the LPR, IPP or Raw mode, install RISO-PRINT ()p.38) in your computer and make the
necessary settings.
Note:
• When using the Windows standard LPR port or Standard TCP/IP Port, refer to the user's guide for the printer driver
for more details.
When using LPR
You can send a print job to a printer on the LAN(Local Area Network) using this protocol, which is popular and accept-
able for most print servers.
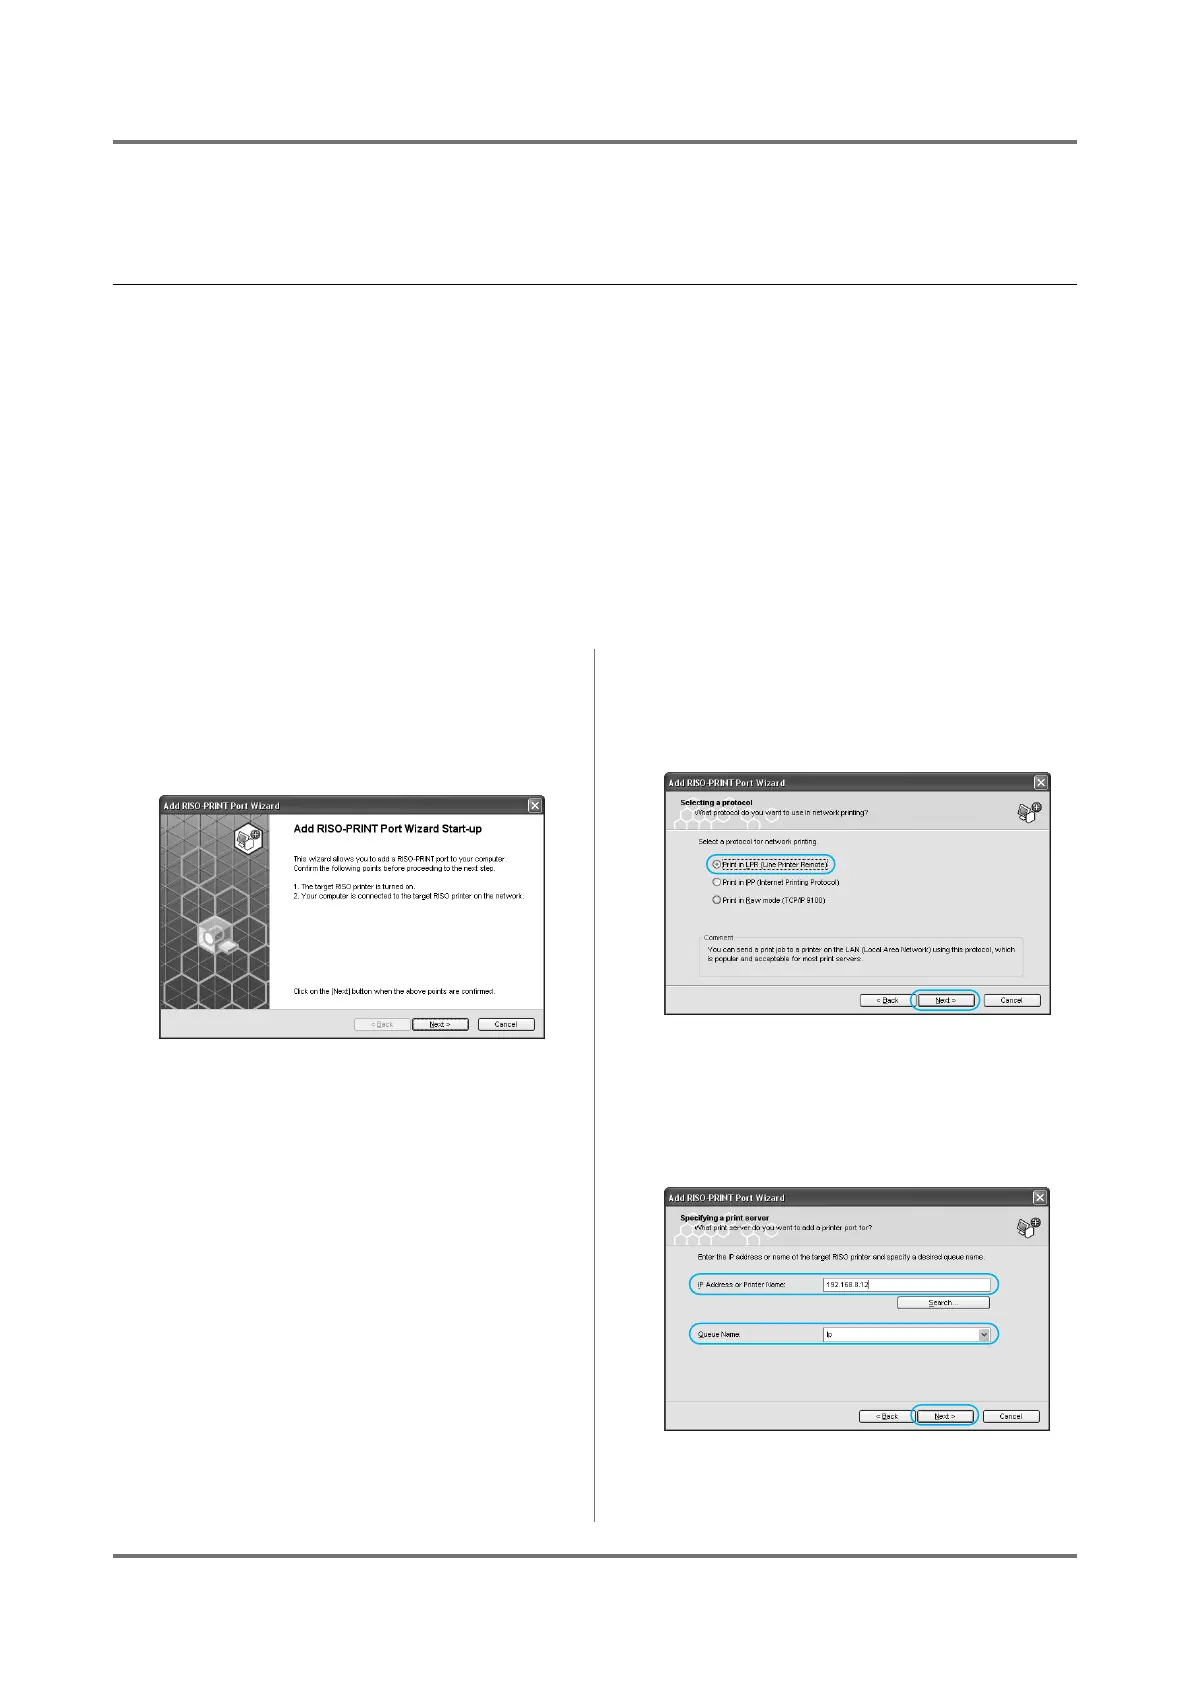
1
Select [RISO] - [RISO Network Card]
from the [Program] list in the [Start]
menu and click on [RISO-PRINT].
The [Add RISO-PRINT Port] Wizard will begin.
2
Check that your RISO printer is on
and connected to the network, then
click on the [Next] button.
3
Select [Print in LPR (Line Printer
Remote)], and click on the [Next]
button.
4
Type in an [IP Address or Printer
Name], and click on the [Next] but-
ton.