E-mail sending functions using RISO Network Card
E-mail Sending Setup
46
E-mail Sending Setup
Configuration is required before using the e-mail sending function.
Important!:
• Connect your RISO printer to the network, specify the netword configuration for your printer, the “RISO-ADMIN”.
See the “System configuration” section of the RISO Network Card user’s guide stored on the RISO Network Card
SOFTWARE CD-ROM.
1
Start up the “RISO-ADMIN” on your
computer.
2
Select [Network Configuration] from
the [Configuration] menu.
3
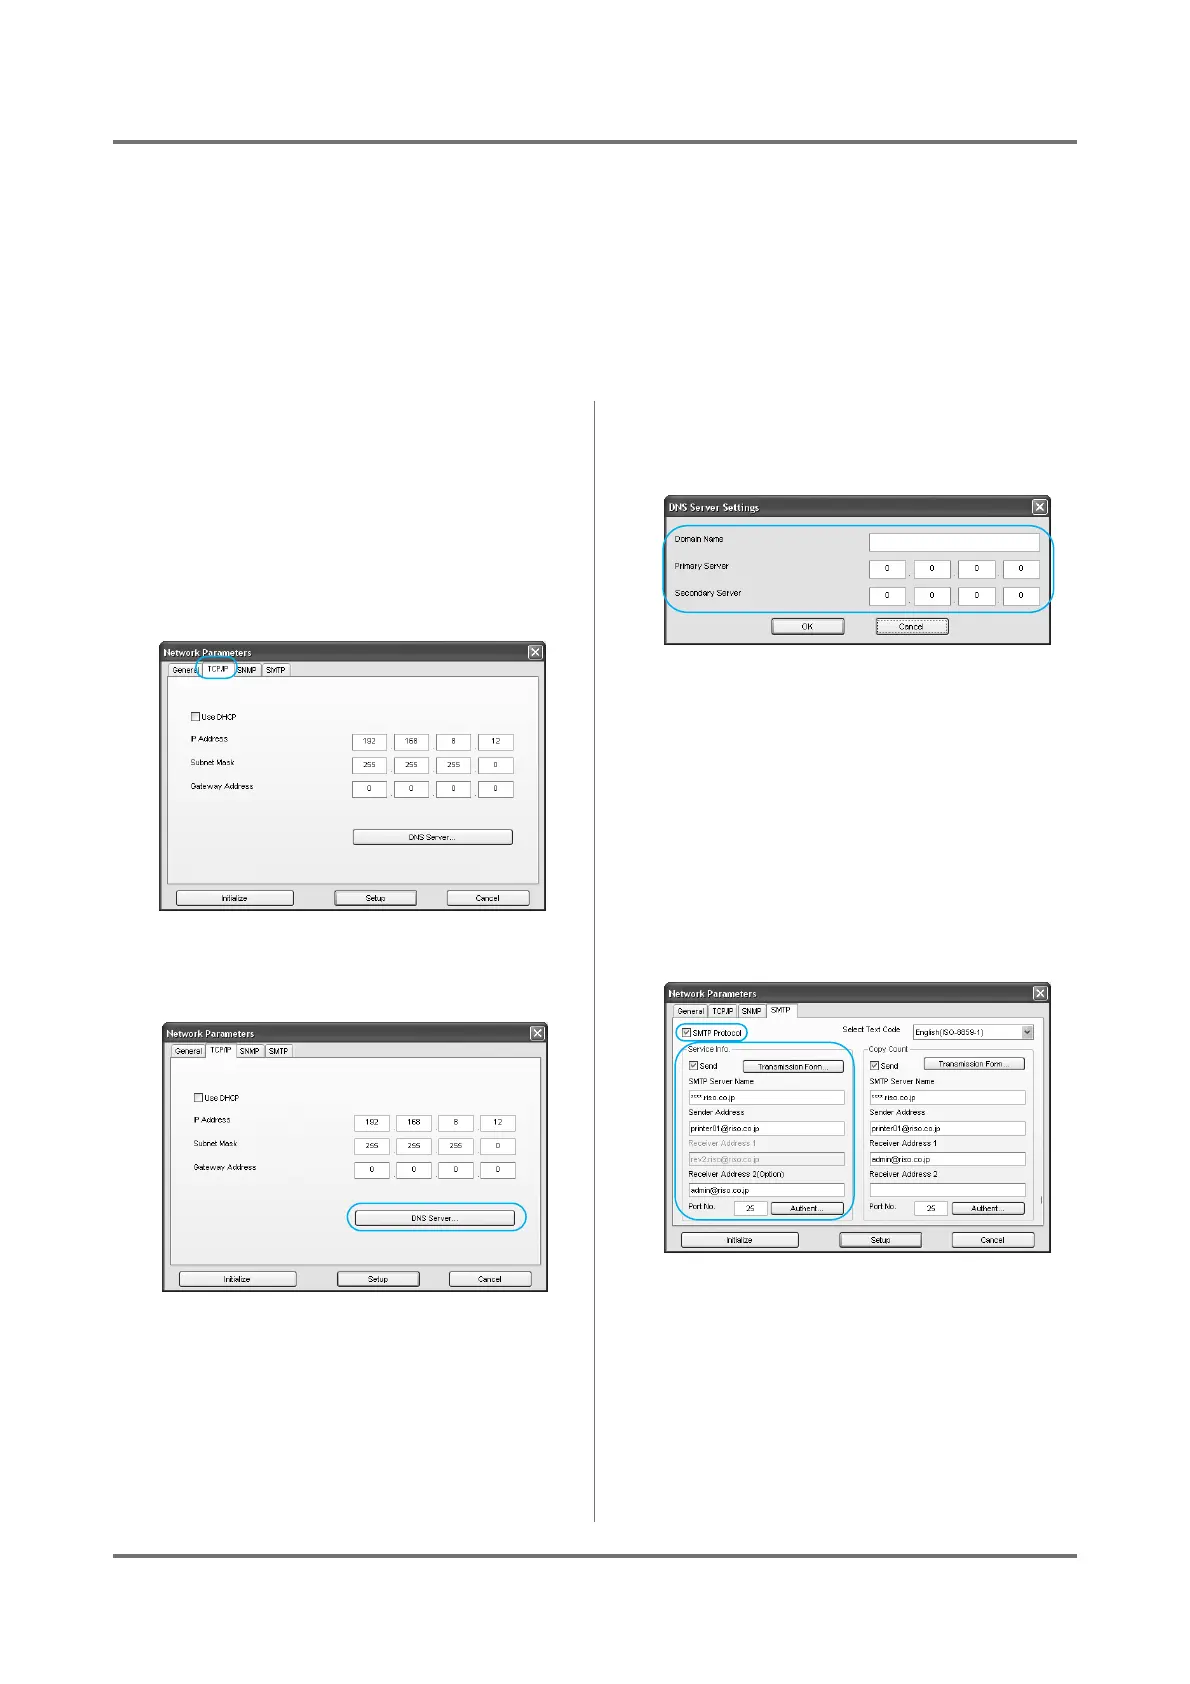
Click the [TCP/IP] tab.
4
Click the [DNS Server] button.
5
Configure the [Domain Name], [Pri-
mary Server] and [Secondary Server].
Note:
• Consult with your network administrator for help
configuring the DNS server.
6
Click the [SMTP] tab.
Continue on to set the “Service Info.”.
If you do not set the “Service Info.”, skip to step 8
on )p.47.
7
Set the [Service Info.].
• SMTP Protocol
Check “SMTP Protocol” in order to specify the
“Service Info.” and “Copy Count” settings.
• Send
Check the Service Info. Mail function if desired.
Note:
• The [Admin.] - [System] - [ID Counter
Report] on your RISO printer are configured
all together.