9-2-2
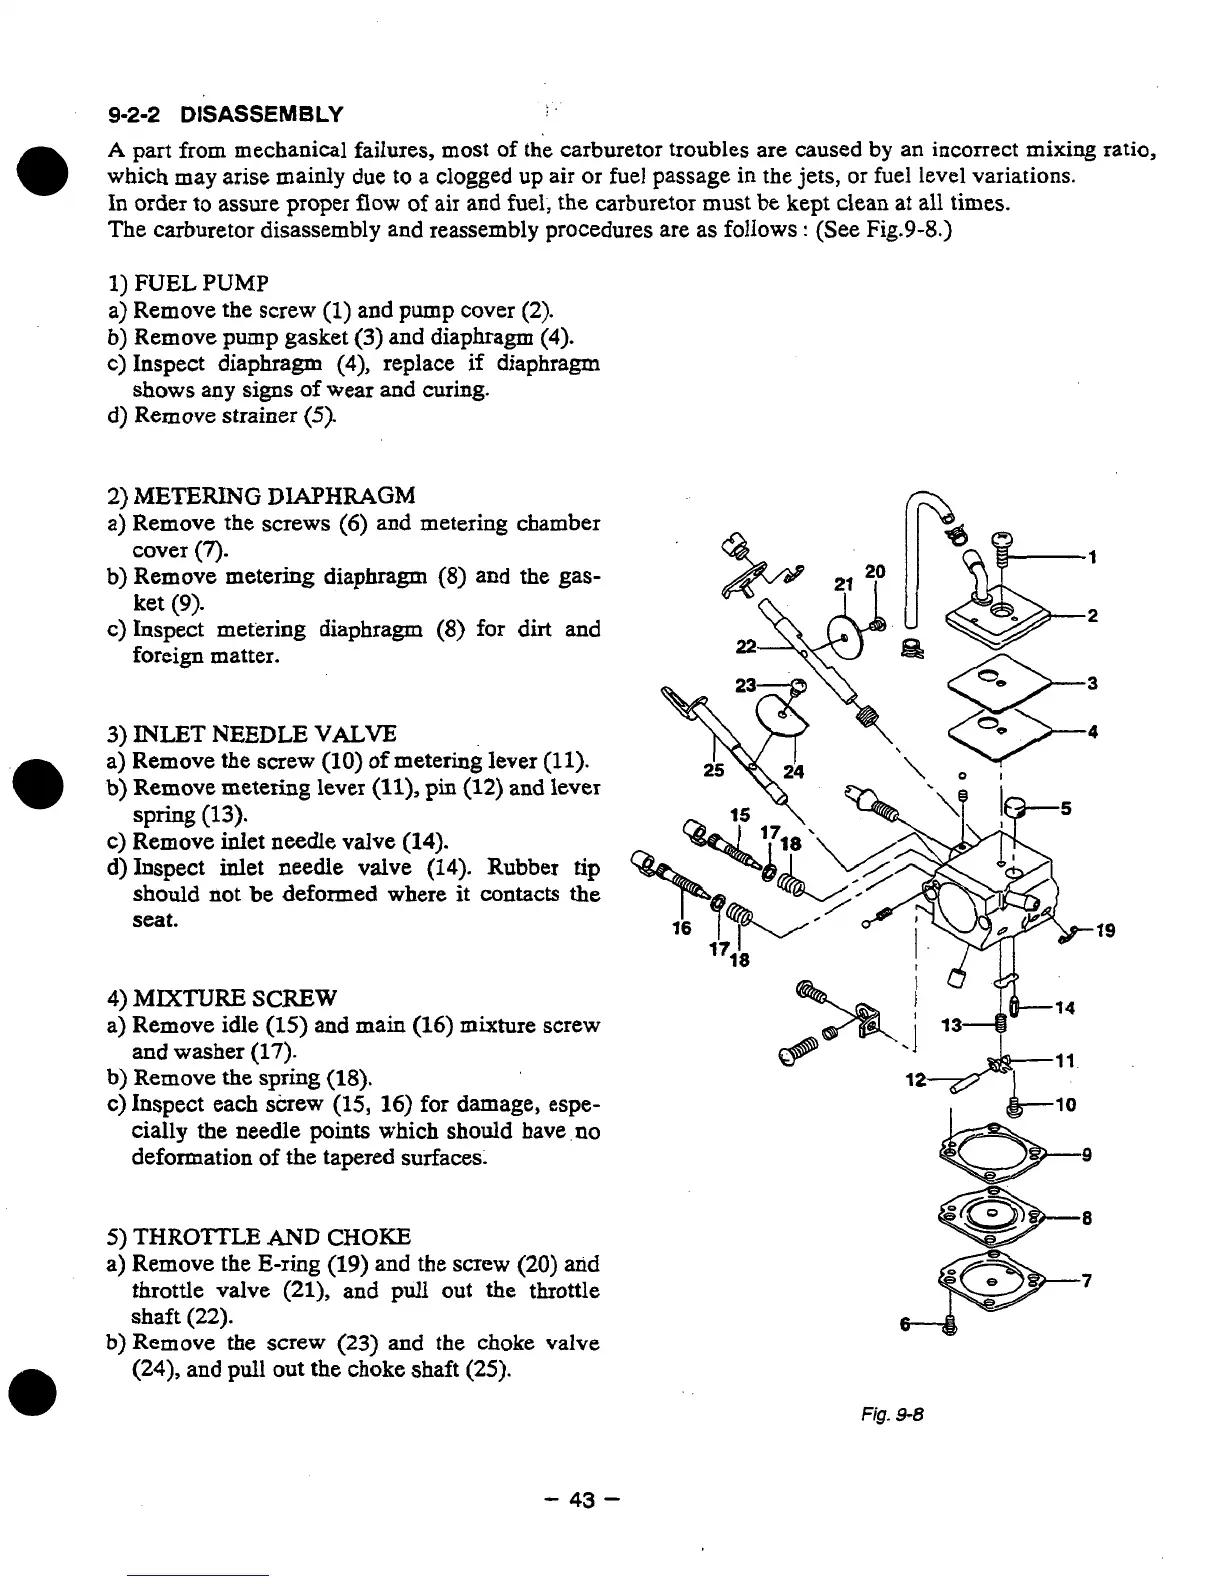
DISASSEMBLY
I.
A
part from mechanical failures, most of the carburetor troubles are caused
by
an incorrect mixing ratio,
In order
to
assure proper
flow
of air and fuel; the carburetor must
be
kept clean at all times.
The carburetor disassembly
and
reassembly procedures are
as
follows
:
(See
Fig.9-8.)
which may arise mainly
due
to
a
clogged
up
air or fuel passage in the jets,
or
fuel level variations.
1)
FUEL
PUMP
a)
Remove the screw
(1)
and
pump
cover
(2).
b)
Remove pump gasket
(3)
and diaphragm
(4).
c)
Inspect diaphragm
(4),
replace
if
diaphragm
d)
Remove strainer
(5).
shows
any
signs
of
wear
and
curing.
2)
METERING
DIAPHRAGM
a) Remove the screws
(6)
and metering chamber
b) Remove metering diaphragm
(8)
and the
gas-
c)
Inspect metering diaphragm
(8)
for
dirt
and
cover
(7).
ket
(9).
foreign matter.
3)
INLET
NEEDLE
VALVE
a) Remove the
screw
(10)
of
metering lever
(11).
b)
Remove metering lever
(ll),
pin
(12)
and lever
spring
(13).
c)
Remove inlet needle valve
(14).
d) Inspect inlet needle valve
(14).
Rubber tip
should
not
be deformed where
it
contacts
the
seat.
4)
MIXTURE
SCREW
a) Remove idle
(15)
and main
(16)
mixture screw
and
washer
(17).
b)
Remove the spring
(18).
c)
Inspect each screw
(15,
16)
for damage, espe-
cially the needle
points
which should have.
no
deformation of the tapered surfaces.
5)
THROTT'LE
AND
CHOKE
a)
Remove the E-ring
(19)
and
the screw
(20)
and
throttle valve
(21),
and pull
out
the throttle
shaft
(22).
b)
Remove
the
screw
(23)
and
the choke valve
8
7
a
(24),
and pull
out
the choke shaft
(25).
-
43
-
Fig.
9-8