To save the file again after editing the zero point, click [File Save].
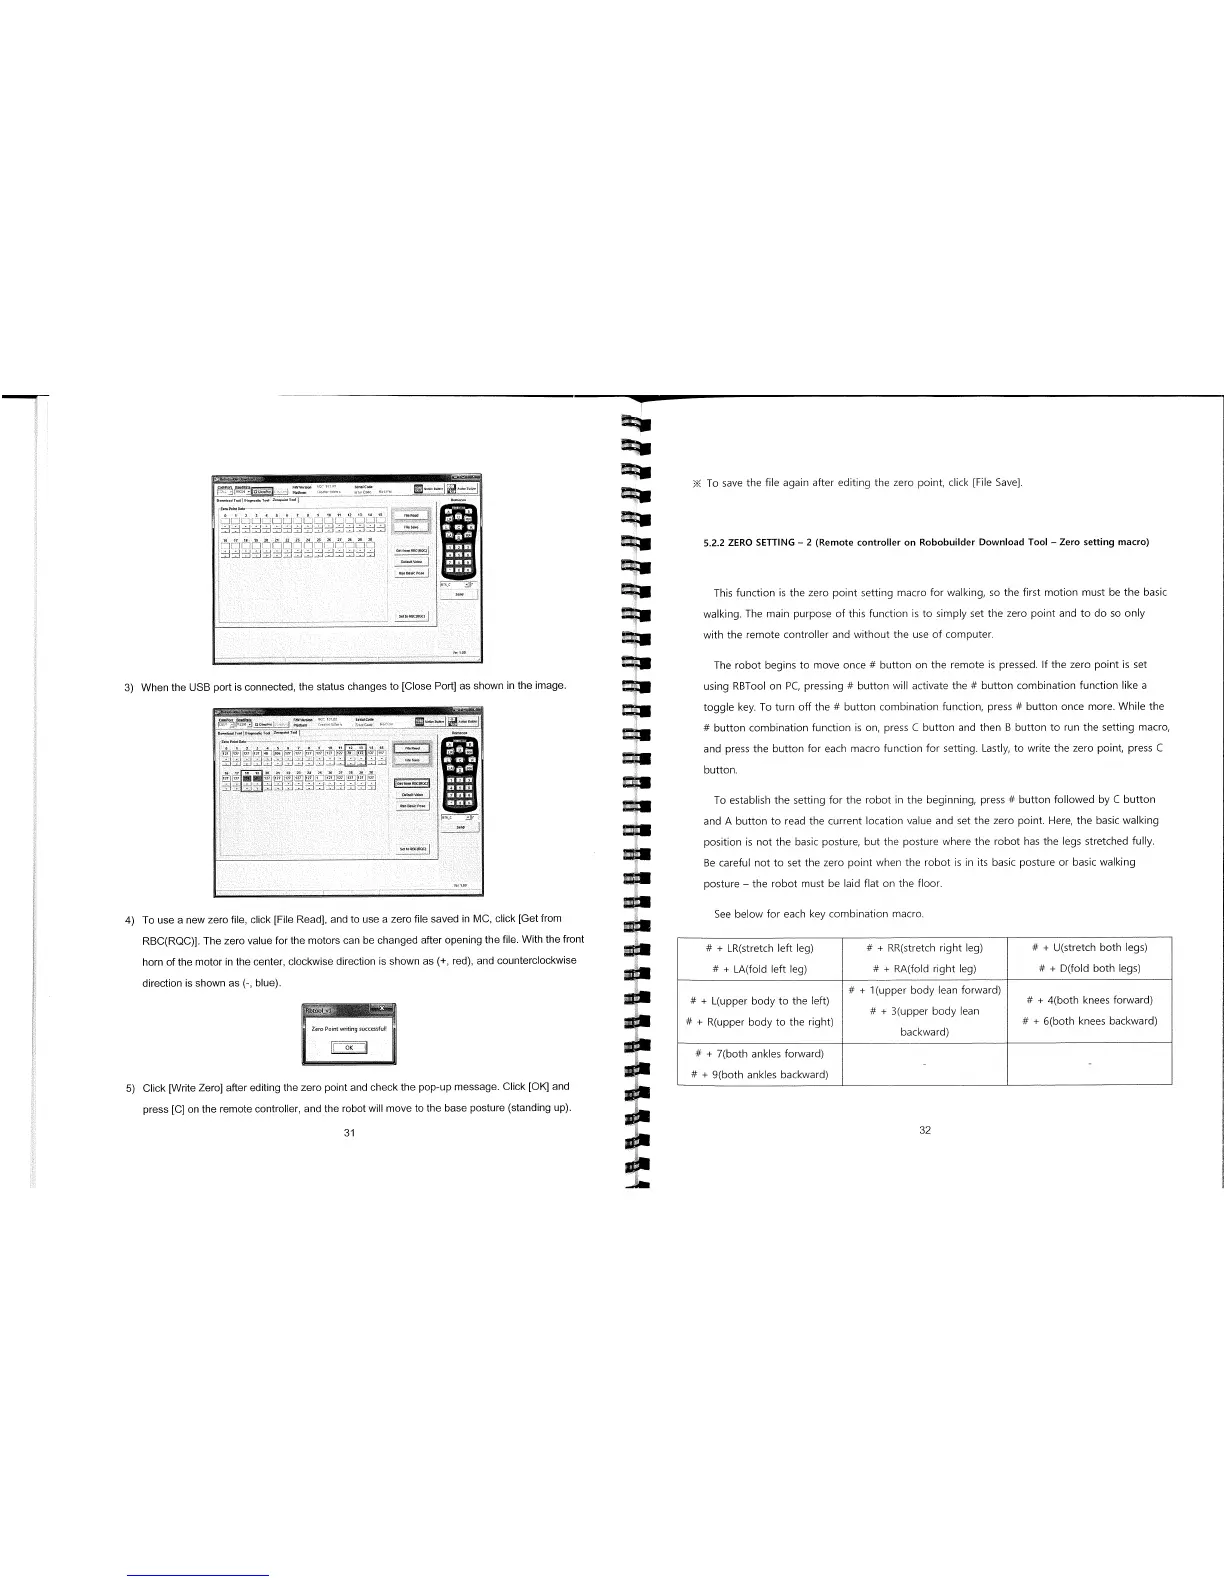
3) When the USB port is connected, the status changes to [Close Port] as shown in the image.
The robot begins to move once # button on the remote is pressed. If the zero point is set
using RBTool on PC, pressing # button will activate the # button combination function like a
srn2S
5357335103
333511C033
051331550 130I
0l,g,o3i
Ts&
Z1050037
11.11
7007531301
051n3703
0
70
0
1001
02
1314
IS
Lj
.1LJ
A
B
1[flTE1
I[
11[
B
0
I
7
Bun 00017 P030
SO3B 13713071
5.2.2 ZERO SETTING
-
2 (Remote controller on Robobuilder Download Tool
-
Zero setting macro)
toggle key. To turn off the # button combination function, press # button once more. While the
# button combination function is on, press C button and then B button to run the setting macro,
and press the button for each macro function for setting. Lastly, to write the zero point, press C
button.
To establish the setting for the robot in the beginning, press # button followed by C button
and A button to read the current location value and set the zero point. Here, the basic walking
position is not the basic posture, but the posture where the robot has the legs stretched fully.
Be careful not to set the zero point when the robot is in its basic posture or basic walking
posture
-
the robot must be laid flat on the floor.
See below for each key combination macro.
#
+
LR(stretch left leg)
#
+
LA(fold left leg)
#
+
RR(stretch right leg)
#
+
RA(fold right leg)
#
+
U(stretch both legs)
#
+
D(fold both legs)
#
+
1(upper body lean forward)
#
+
L(upper body to the left)
#
+
4(both knees forward)
#
+
3(upper body lean
#
+
R(upper body to the right)
#
+
6(both knees backward)
backward)
#
+
7(both ankles forward)
#
+
9(both ankles backward)
31
__
32
This function is the zero point setting macro for walking, so the first motion must be the basic
walking. The main purpose of this function is to simply set the zero point and to do so only
with the remote controller and without the use of computer.
4) To use a new zero file, click [File Read], and to use a zero file saved in MC, click [Get from
RBC(RQC)]. The zero value for the motors can be changed after opening the file. With the front
horn of the motor in the center, clockwise direction is shown as (+, red), and counterclockwise
direction is shown as
(-,
blue).
Zero Point writing succesful!
5) Click [Write Zero] after editing the zero point and check the pop-up message. Click [OK] and
press [C] on the remote controller, and the robot will move to the base posture (standing up).