10
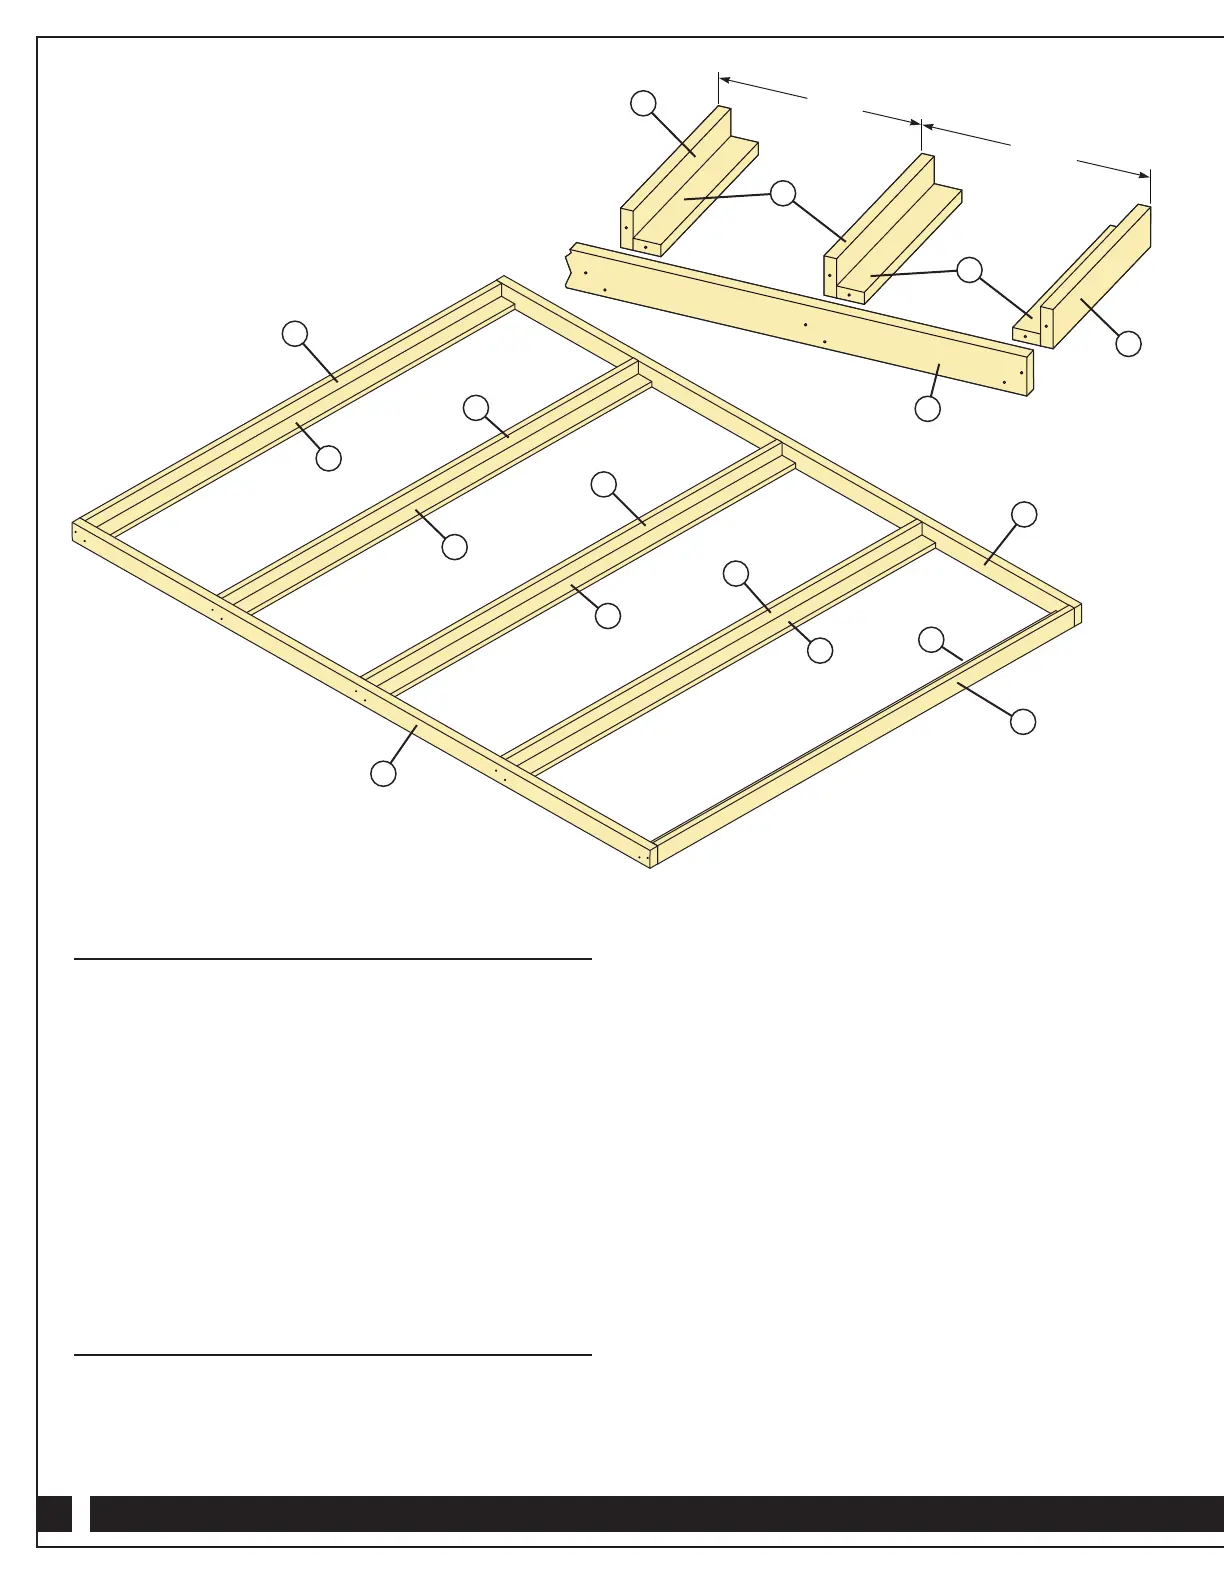
Build the Inner Bed Frame
1. Cut the Inner Frame Strut Pieces (A) to size and organize
them into pairs.
2. For each pair, lay one piece flat on its face and the other
on its long edge. Apply wood glue to the inside edge of
the piece lying flat; then bring the pieces together to form
an “L’ shape and make sure the ends are flush. Drill and
countersink 1/8" pilot holes about 8" apart and join the
pieces with #8 x 1
1
⁄2" coarse-thread screws. Make five
Frame Strut assemblies.
3. Position the Frame Strut assemblies between the Inner
Frame Sides (B) and space them 18
3
⁄4" apart. Fig. 1. Drill
and countersink 1/8" pilot holes through the Inner Frame
Sides into each end of the Frame Strut assemblies and attach
with #8 x 2" coarse-thread screws. Drive the screws so the
heads are flush with the surface.
Install the Pivoting Leg Hardware
1. Cut the Side Rails (C and D) to size. Mark the radius
on the top front edges of both Side Rails, as well as the
locations of the 5/8" holes on the Side Rails’ inside
faces. Shop Drawings.
2. Cut the rounded corners with a jigsaw and sand smooth.
Apply veneer edge banding along the top edges and rounded
ends of the Side Rails (C and D). Also apply edge banding
to the top edges of the Head Rail (E) and the Foot Rail (F).
Trim excess.
3. Drill the 5/8" diameter holes 1/2" deep on the inside faces
of the Side Rails (C and D). Fig. 2.
4. Position the Right Metal Pivoting Leg (1) in place on inside
face of the Right Side Rail (C), inserting the pivot in the hole
you just drilled. Make sure the pivot plate is square to the
edges of the Side Rail; then mark the locations of the bottom
two screw holes.
5. Remove the Right Metal Pivoting Leg (1) and drill 1/4"
diameter through holes at the two locations you just marked,
using a backer board to avoid tear-out.
6. From the outside face of the Right Side Rail (C), insert two
T-Nuts (4) in the two 1/4" holes. Align the holes in the plate
of the Right Metal Pivoting Leg (1) with the holes in the Side
Rail and secure with Machine Screws (5) threaded into the
T-Nuts. Drive #10 x 3/4" Black Screws (3) in the remaining
holes in each plate. Fig. 2.
Fig. 1
18
3
⁄4"
18
3
⁄4"
B
A
A
A
A
B
B
A
A
A
A
A
A
A
A
A
A