12
Attach Head, Foot and Side Rails to Frame
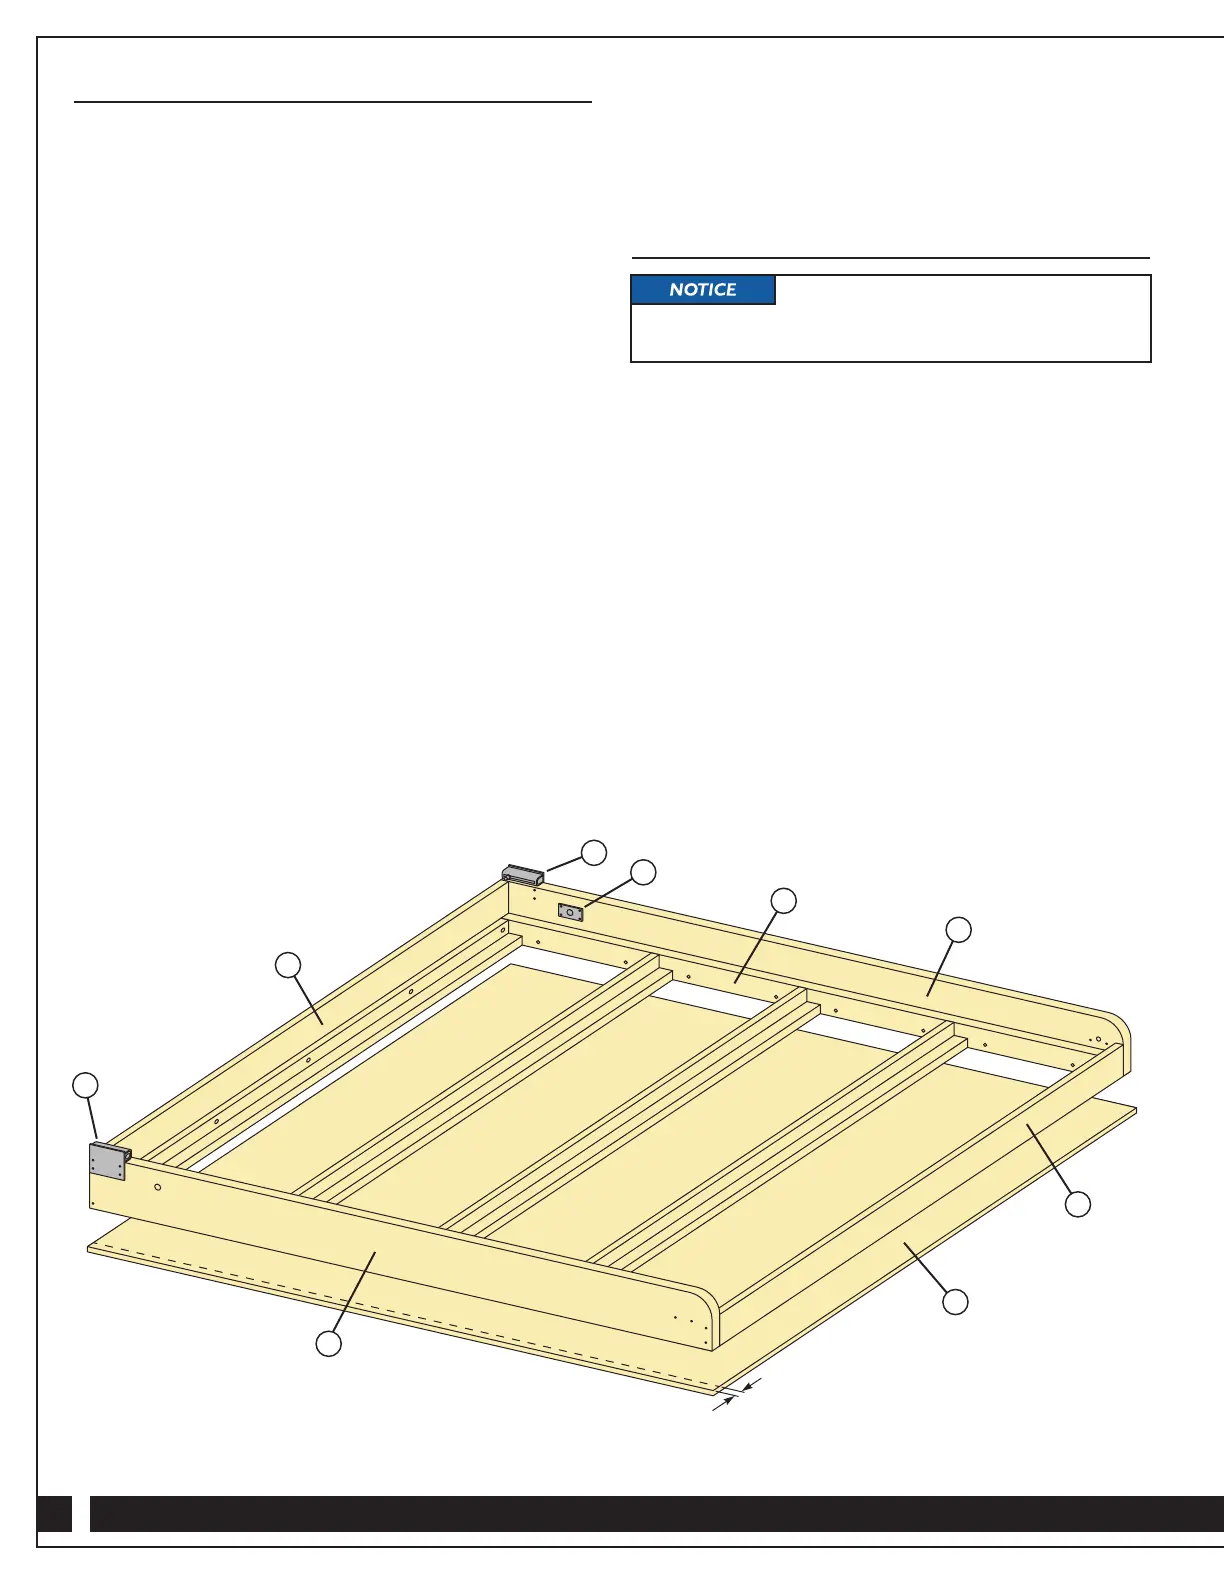
1. Position the Foot Rail (F) against the foot end of the
inner frame, making sure that the bottom edges are aligned
and that the ends of the Foot Rail are flush with the Inner
Frame Sides (B). Fig. 5.
2. Drill five evenly spaced 1/8" pilot holes through the Inner
Frame Strut (A) and into the inside face of the Foot Rail (F),
being careful not to drill all the way through the Foot Rail.
Attach with #8 x 1
1
⁄4" Coarse-Thread Screws.
3. Repeat Steps 1 and 2 for the Head Rail (E).
4. Position the left and right Side Rails (C and D) against the
Inner Frame Sides (B) so that the Female Pivot Plates (10)
are on the inside. Make sure that the front, back and bottom
edges of the Side Rails are flush with the frame. From the
inside, drill eight 1/8" pilot holes (two between each Frame
Strut) through the frame and into each Side Rail (C and D).
Attach with 1
1
⁄4" Coarse-Thread Screws (44). Fig. 5.
5. Drill two 1/8" diameter pilot holes through the outside
face of each Side Rail (C and D) into the Foot Rail (F).
Attach by driving #8 x 2" Coarse-Thread Screws flush
to the surface. Fig. 5.
6. Use the two unused screw holes toward the back of
the Right and Left Lower Ball Stud Plates (7 and 8) as a
guide to drill 1/8" diameter pilot holes through each Side
Rail (C and D) into the Head Rail (E). Also drill a third
1/8" diameter pilot hole toward the bottom of each
Side Rail into the Head Rail.
7. Attach the Side Rails (C and D) to the Head Rail (E)
by driving the included #10 x 1
5
⁄8" Screws (9) into the
open screw holes in the Right and Left Lower Ball Stud
Plates (7 and 8). Drive a #8 x 2" Coarse-Thread Screw
into the bottom pilot hole in each side rail until flush.
Attach the Face Panel
1. Choose the best face for the Bed Face Panel (G) and
position the panel on a non-marring surface with that face
down. Apply veneer edge banding to the outside edges
and to the edge that will show at the foot of the bed.
Trim excess. Fig. 5.
2. Measure 1/4" in from the long edges and draw a line the
full length on each side.
3. Lay the bed frame assembly on the Bed Face Panel (G) so
that the front of the Foot Rail (F) is flush with the veneered
end of the Bed Face Panel and the Side Rails (C and D) are
aligned with the lines you drew in Step 2.
Fig. 5
1/4"
G
F
C
B
10
7
E
8
D
To ensure that the bed is square, the
Foot Rail (F) MUST be flush with the end of the Bed
Face Panel (G).