13
4. To show where to apply glue, trace pencil lines along the
inside of the Inner Frame Struts (A) and Sides (B).
5. Remove the bed frame assembly and apply glue to the Bed
Face Panel (G) inside the trace lines you drew in Step 4.
6. Reposition the bed frame assembly on the Bed Face
Panel (G), again making sure that the front of the Foot
Rail (F) is flush with the veneered end of the Bed Face
Panel and the Side Rails (C and D) are aligned with the
lines you drew in Step 2.
7. Maintaining alignment, drill a 1/8" pilot hole through the
Inner Frame Strut (A) and into the Bed Face Panel (G) at
the location marked “X”, taking care not to drill all the way
through the panels. Secure with a #8 x 1
1
⁄4" Coarse-Thread
Screw. Fig. 6.
8. Maintaining flush edges, drill another 1/8" pilot hole
through the Inner Frame Strut (A) and into the Bed
Face Panel (G) at the location marked “Y”. Secure
with a #8 x 1
1
⁄4" Coarse-Thread Screw. Fig. 6.
9. Make sure the Side Rails (C and D) are aligned with
the line 1/4" in from the outside edges of the Bed Face
Panel (G). If they aren’t, hold them in line and then drill a
1/8" pilot hole at the locations marked “Z” and secure with
#8 x 1
1
⁄4" Coarse-Thread Screws. Check for square again.
An out-of-square assembly will cause major problems in
future steps. Fig. 6.
10. Once the assembly is squared, drill 1/8" pilot holes
every 6" through the remaining Inner Frame Struts (A)
and into the Bed Face Panel (G) and secure with #8 x 1
1
⁄4"
Coarse-Thread Screws. Wipe away any excess glue.
Prep the Bed Cabinet
Verticals and Bed Headboard
1. Apply veneer edge banding to the front edges of both Bed
Cabinet Verticals (I) and to the top and bottom edges of
the Bed Headboard (H). Trim excess.
2. If you are cutting notches in the back edges of the Bed
Cabinet Verticals (I) to accommodate base molding at
the installation site, mark and cut those notches.
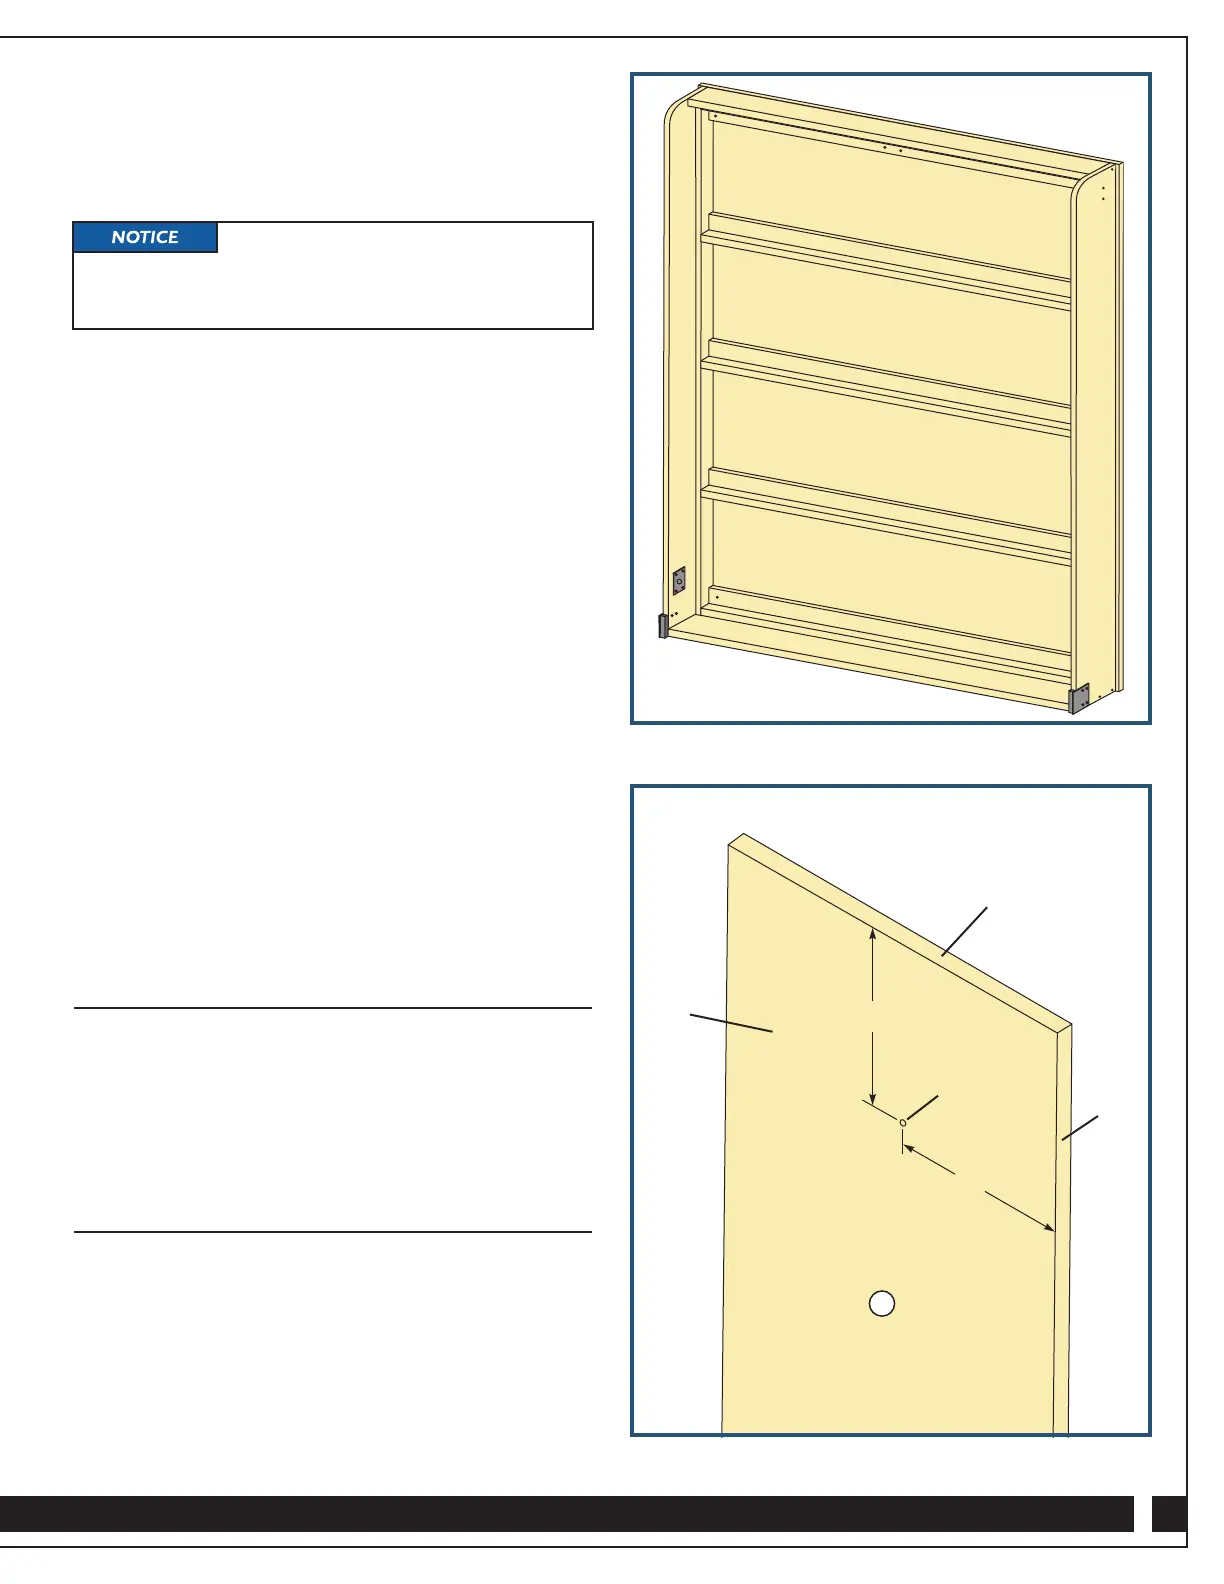
Install the Bed Stops
on the Bed Cabinet Verticals
1. Make a mark 7
3
⁄8" in from the front edge and 6" down
from the top edge on the inside face of each Bed Cabinet
Vertical (I). Fig. 7.
2. Drill a 5/16" diameter hole 1/2" deep centered on
these marks.
3. On each side, insert the pin on the Bed Stop (19) into that
hole, line up the Bed Stop so that the flat is parallel to the
front edge of the Bed Cabinet Vertical (I) and attach the
Bed Stop with a #10 x 3/4" Black Screw (3).
Fig. 7 - Top Edge of Bed Cabinet Verticals (I)
Fig. 6
X
Y
Z
Z
6"
5/16" diameter
1/2" deep
7
3
⁄8"
I
Top edge of Bed
Cabinet Verticals (I)
The edges of the Bed Face Panel (G)
MUST extend 1/4" past the edges of the assembled bed
frame on the long sides. The end of the Bed Face Panel
might extend 1/4" beyond the Head Rail (E).
Inside
face
Front
edge