19
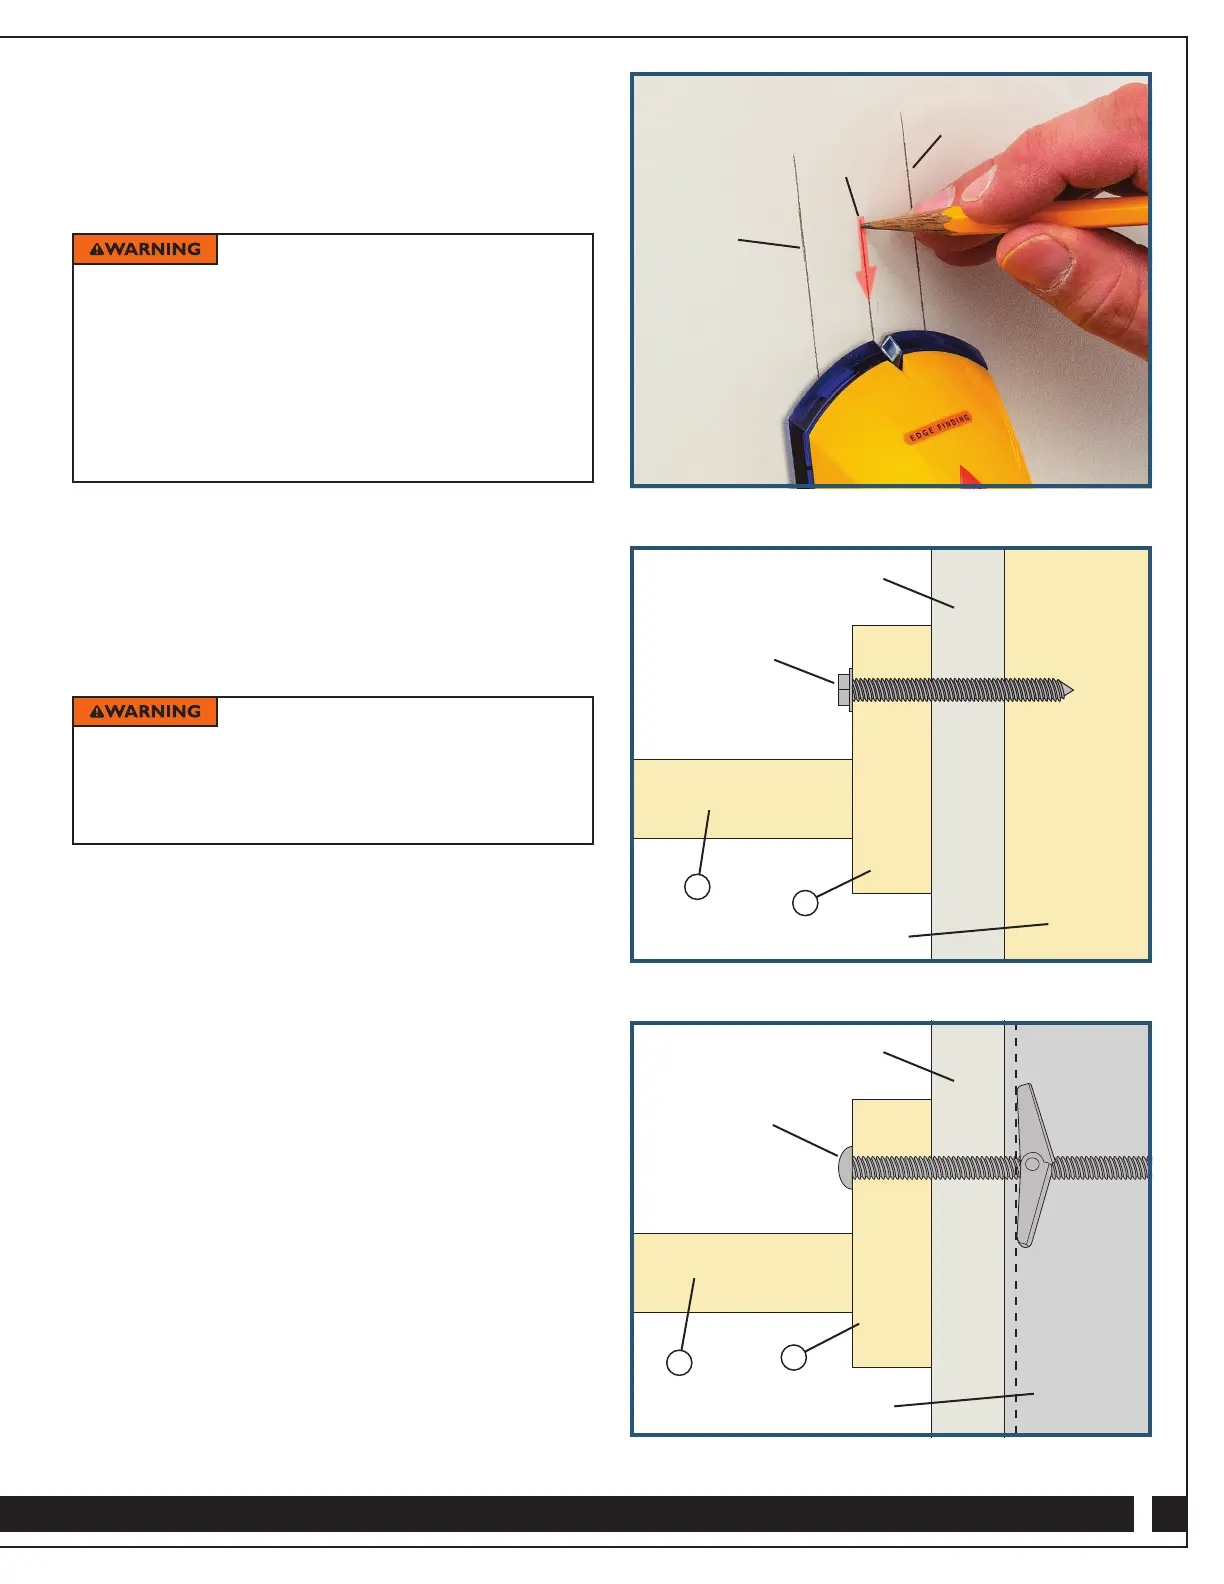
A. Use a stud finder to locate and mark the centers of
at least four studs. Fig. 15.
B. Drill 1/4" holes through the Top Header Rear Rail (L)
and into the wall at these locations.
C. With an adult helper, move the bed cabinet away
from the wall.
D. Use a 9/16" drill bit to widen and extend the pilot
holes, being sure to drill through the metal studs.
E. Insert toggle bolt screws in the holes in the Top Header
Rear Rail (L) and thread on the toggle wings.
F. Reposition the bed cabinet against the wall, carefully
inserting the toggle bolts into the pilot holes and
pushing the bolts in. Fig. 17.
G. Tighten the toggle bolts until the cabinet is secure
to the wall.
A. Use a stud finder to locate and mark the centers of
at least four wall studs. Fig. 15.
B. Drill 3/16" pilot holes through the Top Header Rear
Rail (L) at these locations.
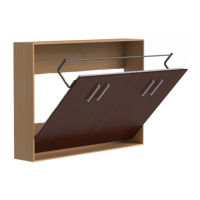
C. Attach securely with four 1/4" x 3" lag screws. Fig. 16.
For walls with metal studs:
3. Securely attach the bed cabinet to the wall using one of
the following methods. You will need to use at least three
fasteners to secure the cabinet.
For walls with wood studs:
You MUST attach the bed cabinet
assembly to the wall by driving at least three 1/4" x 3"
lag screws through the Top Header Rear Rail (L) into
2 x 4 or larger wooden wall studs. Failure to secure the
unit into wooden wall studs increases the chance that the
bed cabinet will detach and tip over, potentially resulting
in serious injury.
Do NOT use an impact driver to drive fasteners; the added
torque increases the risk of stripping the pilot holes and
weakening connections. Do NOT overtighten screws.
You MUST attach the bed cabinet
assembly to the wall with at least four 3/16" x 4" toggle
bolts secured through the Top Header Rear Rail (L) into
metal studs. Failure to secure the unit properly increases
the chance that the bed cabinet will detach and tip over,
potentially resulting in serious injury.
Fig. 15
Fig. 16 - Wall with Wood Studs
Fig. 17 - Wall with Metal Studs
Outer Edge
of Stud
Outer Edge
of Stud
Centerline
Wall
1/4" x 3"
Lag Screw
Wood Stud
L
J
Wall
3/16" x 4"
Toggle Bolt
Metal Stud
L
J