17
Attach the Top Header Assembly
to the Cabinet Verticals
1. With the bed frame assembly still on the floor with the
Face Panel (G) surface facing down and the pivoting
leg in the closed position, carefully rotate the Cabinet
Verticals (I) and Bed Headboard (H) upright.
2. Position the Top Header assembly (J,K, L and M) between
the Cabinet Verticals (I), making sure that the Top Header
Rear Rail (L) is at the back. Align everything so that the top
edges of the assembly are flush with the top edges of the
Cabinet Verticals and hold or clamp in place. Fig. 13.
3. Working from above the cabinet, drill four evenly spaced
pilot holes for #8 x 1
1
⁄4" Coarse-Thread Screws through
the solid-wood Top Header Mounting Cleats (M) into the
Cabinet Verticals (I) at each end of the Top Header (J),
taking care not to drill all the way through the Cabinet
Verticals. Fig. 13.
4. Attach the Top Header assembly at each end with four
#8 x 1
1
⁄4" Coarse-Thread Screws driven through the Top
Header Mounting Cleats (M) into the Cabinet Verticals (I).
Clamps can be used to hold the Top
Header assembly between the Cabinet Verticals, making
attachment easier.
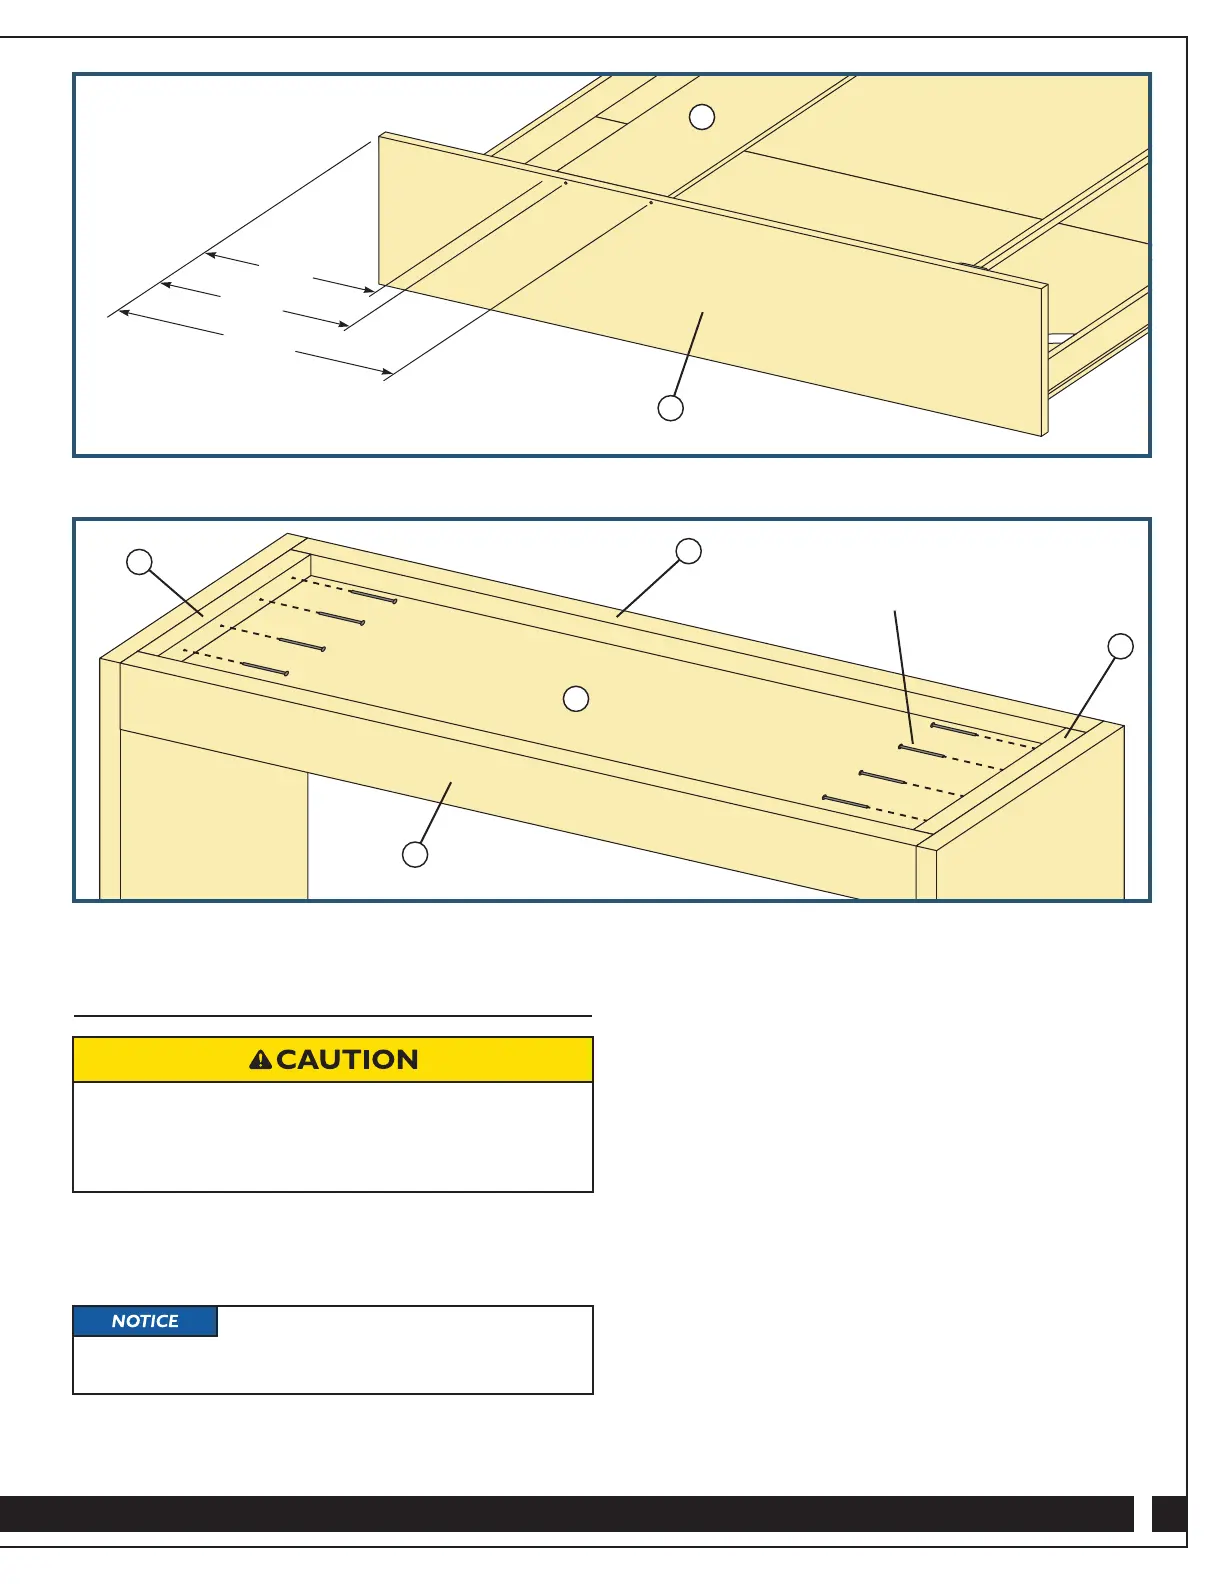
Fig. 13
Fig. 12
H
15"
18"
28"
I
> To prevent damage to the pivoting leg assembly,
make sure it is in the closed position when rotating the
Cabinet Verticals and Headboard to the upright position
during assembly.
J
K
M
M
L
#8 x 1
1
⁄4" Coarse-Thread Screws