Rockwell Automation Publication 2080-UM002N-EN-E - November 2022 195
Chapter 9 Motion Control
Scenario 2: Moving part on Lower Limit switch before homing starts
The homing motion sequence for this scenario is as follows:
1. Moving part moves to its right side (in Positive direction) in creep velocity to detect
Lower Limit switch On->Off edge;
2. Once Lower Limit switch On->Off edge is detected, start to detect first Ref Pulse signal;
3. Once the first Ref Pulse signal comes, record the position as the mechanical home
position, and decelerate to stop;
4. Move to the configured home position. The mechanical home position recorded during
moving back sequence, plus the home offset configured for the axis through the
Connected Components Workbench software.
Scenario 3: Moving part at left (negative) side of Lower Limit switch before homing starts
In this case, the homing motion fails and moves continuously to the left until drive or moving
part fails to move. User needs to make sure the moving part at the proper location before
homing starts.
MC_HOME_DIRECT
MC_HOME_DIRECT (4) homing procedure performs a static homing by directly forcing an actual
position. No physical motion is performed in this mode. This is equivalent to a MC_SetPosition
action, except that Axis Homed status will be on once MC_Home (mode = 4) is performed
successfully.
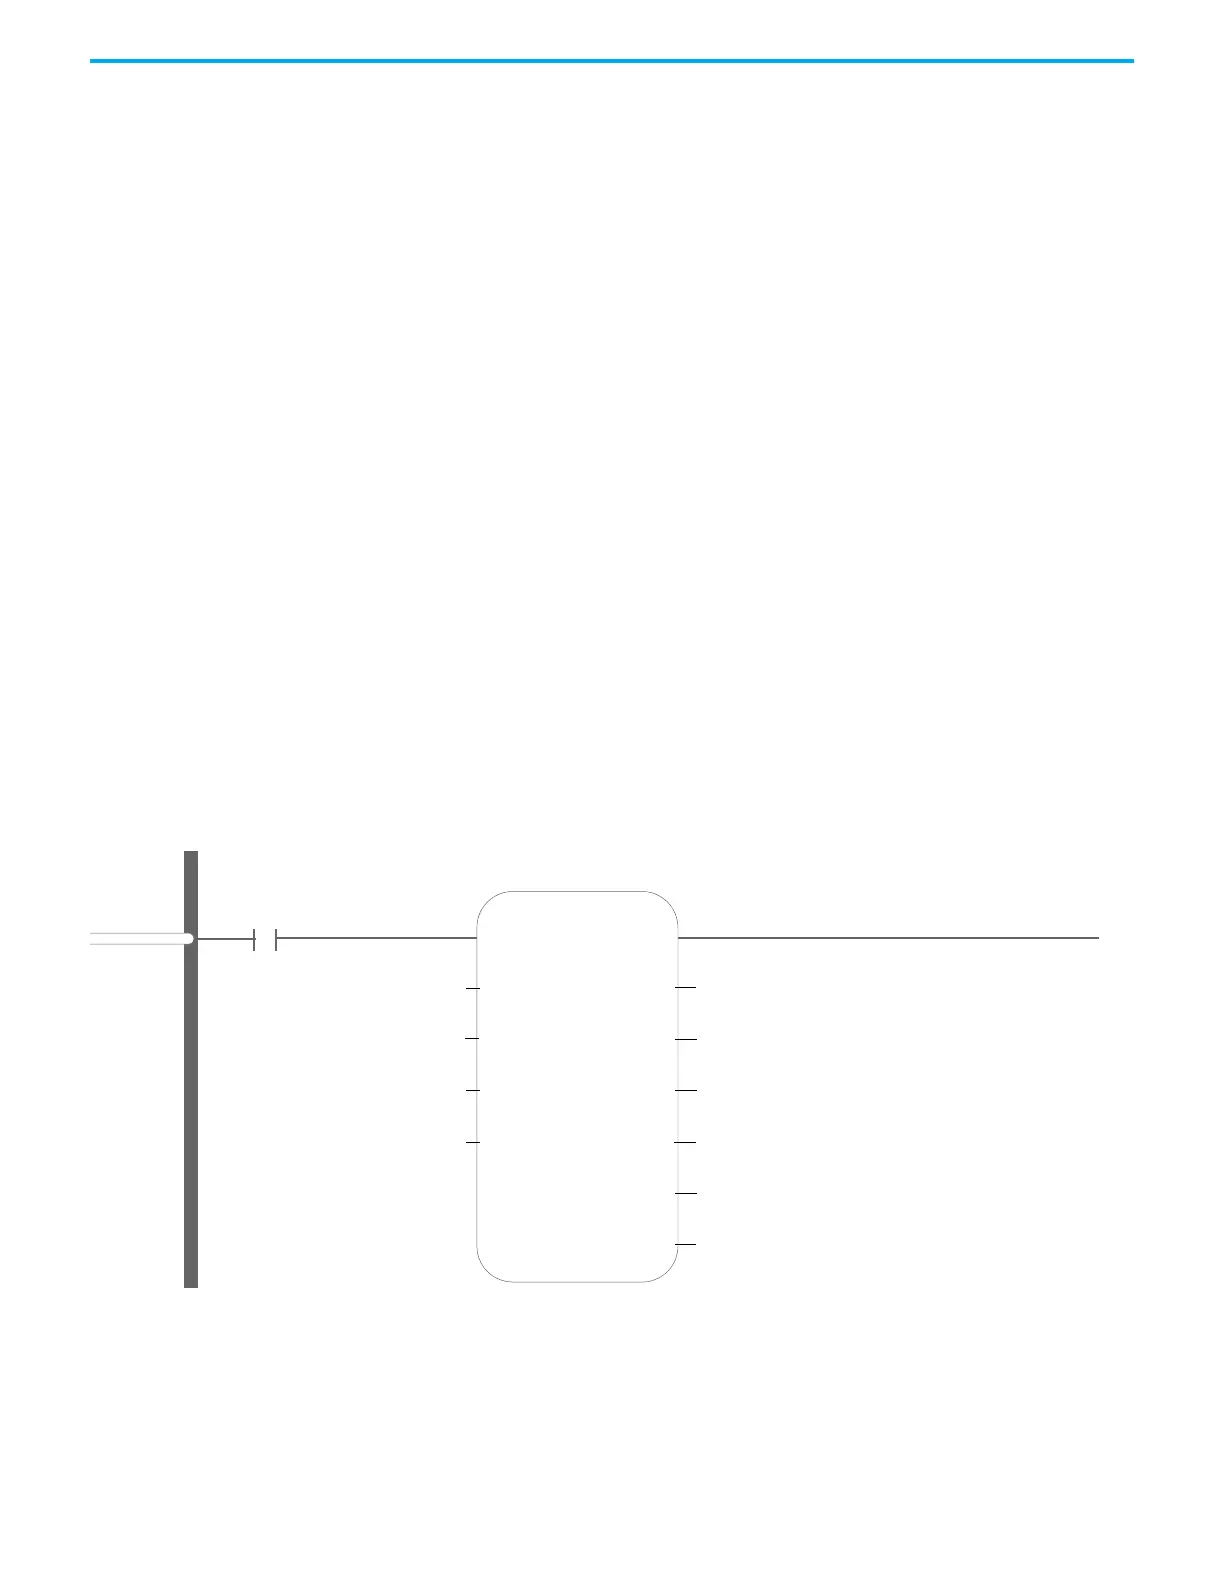
Use PTO for PWM Control The example shows in you how to use a PTO axis as a PWM.
Launch Connected Components Workbench and create the following ladder program.
Figure 15 - Example 1: PTO Axis as a PWM
MC_Power_1
MC_Power
EN
Axis
Enable_Positive
Enable
Enable_Negative
PWM0
TRUE
TRUE
TRUE
Axis
ENO
Status
Busy
Active
Error
ErrorID
1
Enable/power up the PWM axis immediately after going to RUN mode. PWM axis will remain powered ON (until Program mode, and so on).
__SYSVA_FIRST_SCAN
 Loading...