Rockwell Automation Publication 2080-UM002N-EN-E - November 2022 283
Appendix B Quickstarts
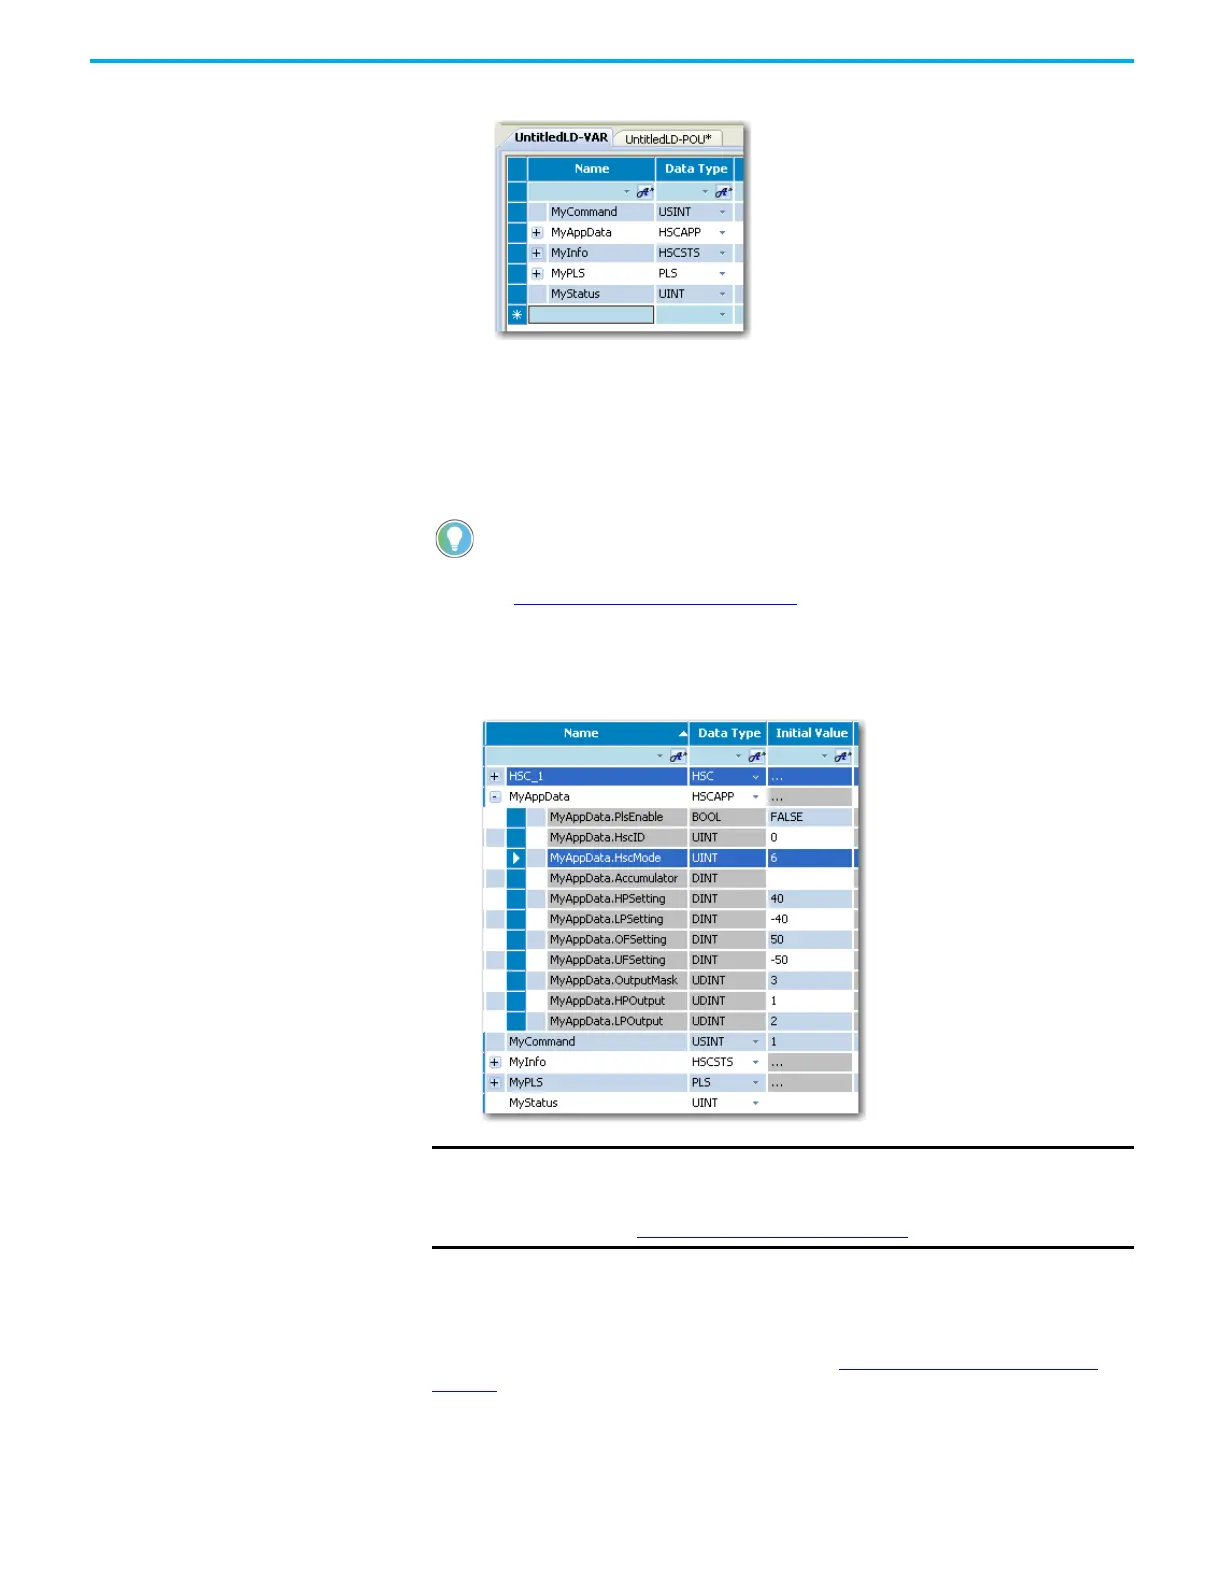
After adding the variables, your Local Variables table should look like this:
Assign Values to the HSC Variables
Next, you need to assign values to the variables you have just created. Typically, a routine is
used to assign values to your variables. For illustration purposes, this quickstart assigns
values through the Initial Value column of the Local Variables table.
1. On the Initial Value field for the MyCommand variable, type 1.
See HSC Commands (HScCmd) on page 216 for more information on the description for
each value.
2. Assign values to the MyAppData variables. Expand the list of MyAppData subvariables
clicking the + sign. Set the values of the different subvariables as shown in the
following screenshot.
MyAppData.PlsEnable allows the user to either enable o disable the PLS settings. It should be
set to FALSE (disabled) if the MyAppData variable is to be used.
MyAppData.HscID allows the user to specify which embedded inputs will be used depending
on the mode and the type of application. See the table HSC Inputs and Wiring Mapping
on
page 201 to know the different IDs that can be used as well as the embedded inputs and its
characteristics.
If ID 0 is used, ID 1 cannot be used on the same controller since the inputs are being used by
the Reset and Hold.
In a real program, you should write a routine to assign values to your
variable according to your application.
IMPORTANT MyAppData variable has subvariables that determine the settings of the
counter. It is crucial to know each one in order to determine how the
counter will perform. A quick summary is provided below but you can
also see HSC APP Data Structure
on page 202 for detailed information.
 Loading...