Publication 2098-IN005C-EN-P — March 2008
Commissioning Your Ultra3000 Drive 31
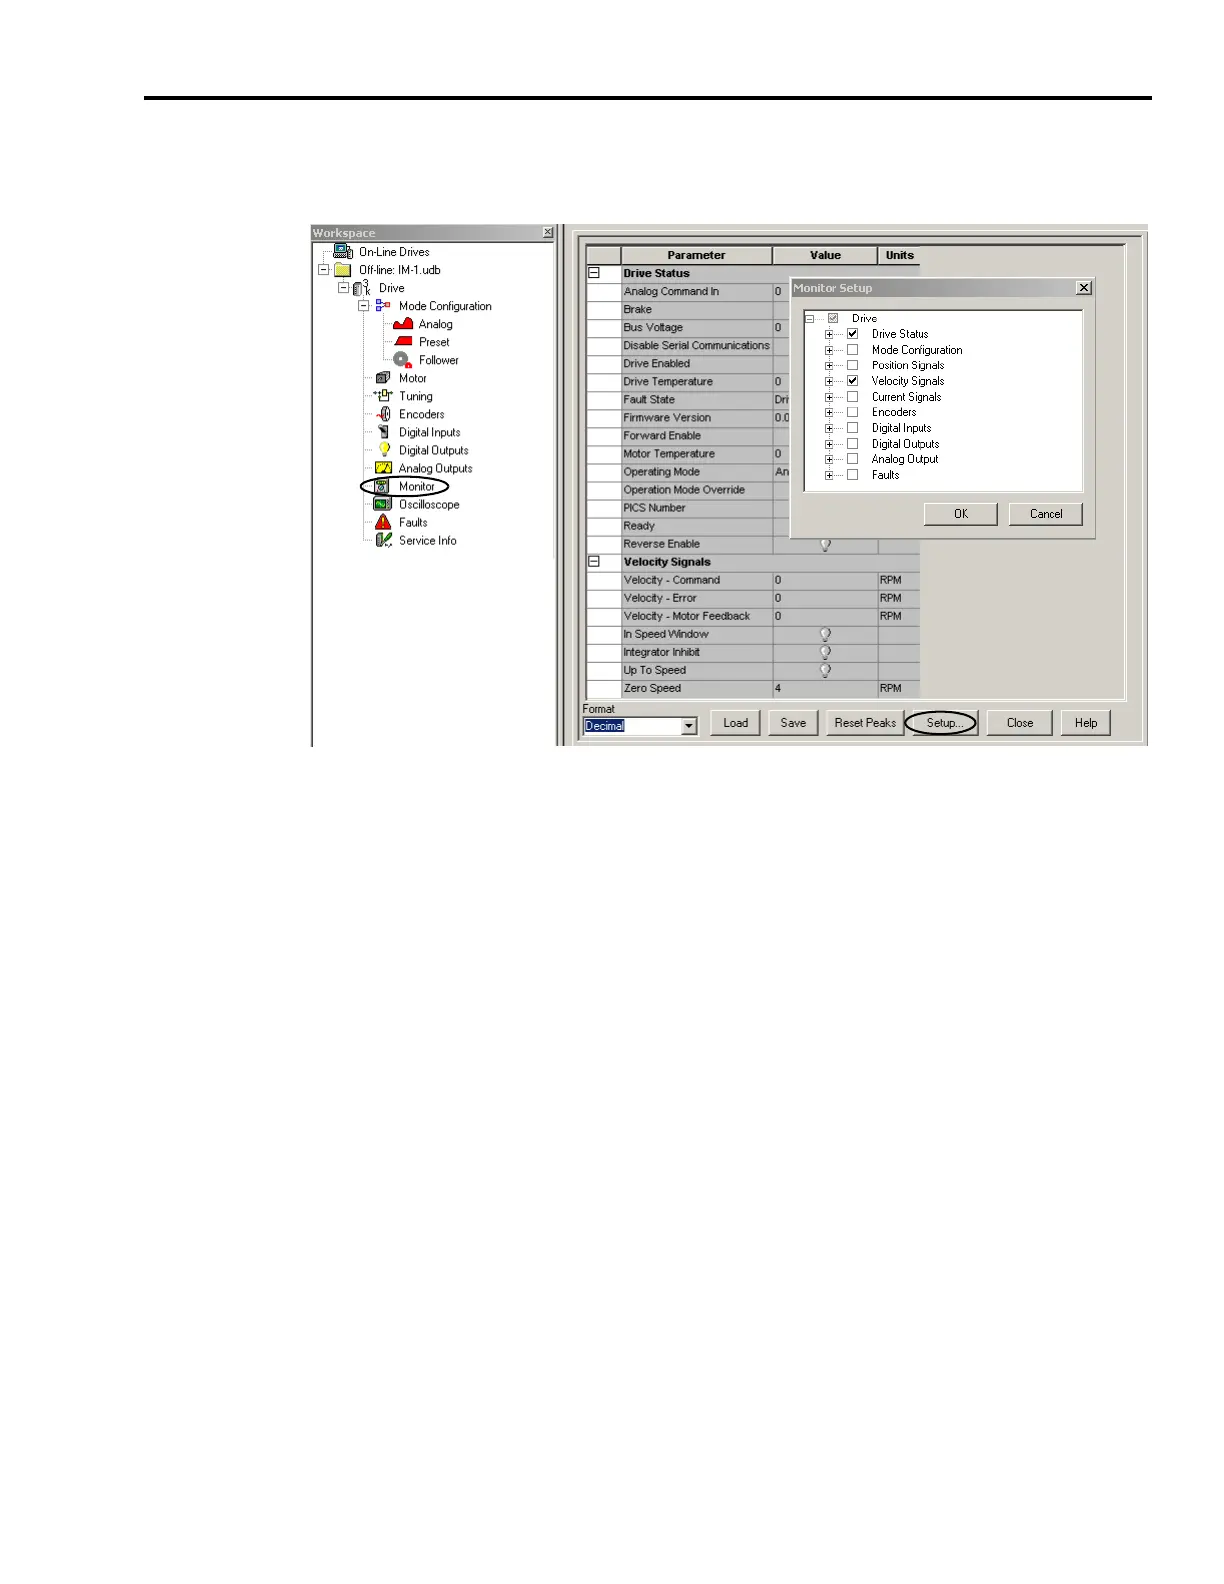
7. Double-click the Monitor branch.
The (default) Drive Status parameters display.
8. Click Setup.
The Monitor Setup dialog opens.
9. In the Monitor Setup dialog, check Velocity Signals.
10. Click OK.
The Monitor Status dialog closes.
11. Apply 12…24V dc to input 1.
Input 1 was configured as Drive Enable in a previous step. Make
sure the Enable icon in the toolbar is active. This means the drive
can enable.
12. Observe the drive responding to a 0…±10V dc analog signal
applied to CN1-25 and CN1-26 (1V dc = 300 rpm, per the setup).
• Analog Command voltage
• Velocity Command rpm (300 rpm/analog input voltage)
• Velocity - Motor Feedback
13. Remove the 12…24V dc (Drive Enable) from input 1.
14. Close the Monitor and Digital Inputs branch dialogs and the
Analog mode configuration dialog.
 Loading...