14
Getting Ready
MEMO
You can also press the [TRIGGER] button while holding down the
[KIT] button on the TD-50X to adjust the oset.
When rst connecting the VH-14D to the drum sound module,
the trigger parameters are set to the recommended values.
The trigger parameters may need to be adjusted depending on
the environment where the VH-14D is used, including how it is
mounted and the position in which it is set up.
&
“Data List” (PDF)
Settings for the VH-13
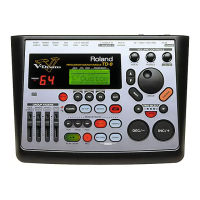
1. Press the [TRIGGER] button.
2. Press the PAGE [UP] button several times to display the
topmost page.
3. Press the [F4] (HI-HAT) button.
The TRIGGER HI-HAT screen appears.
4. Use the [-] [+] buttons or the dial to set Trig Type to
“VH13.”
5. Press the [F5] (OFFSET) button.
The VH OFFSET ADJUSTMENT screen appears.
6. Loosen the clutch screw of the VH-13 and let it sit on
the bottom hi-hat.
* Do NOT touch the hi-hats or the pedal.
7. Press the [F5] (EXECUTE) button.
The “VH Oset” parameter is set automatically (approx. 3 seconds).
The [TRIGGER] button ashes and then remains lit.
8. Press the [KIT] button to return to the DRUM KIT screen.
Make detailed adjustments to the parameters as necessary.
&
“Data List” (PDF)
Conguring the VH-11
(or VH-10)
This shows how to congure the VH-11. The steps are the same for the
VH-10, with only the model name being dierent.
1. With the hi-hat completely separated from the motion
sensor unit, power-on the TD-50X.
2. Loosen the clutch screw of the VH-11, so that the hi-hat
naturally rests atop the motion sensor unit.
3. Press the [TRIGGER] button.
4. Press the PAGE [UP] button several times to display the
topmost page.
5. Press the [F4] (HI-HAT) button.
6. Use the [-] [+] buttons or the dial to set Trig Type to
“VH11.”
7. Turn the VH oset adjustment screw on the VH-11 while
watching the meter on the right side of the TD-50X’s
screen.
Adjust the oset so that the appear in the meter.
8. Press the [KIT] button to return to the DRUM KIT screen.
Make detailed adjustments to the parameters as necessary.
&
“Data List” (PDF)

 Loading...