26
Recording
Deleting Your Recorded Data
Here’s how to delete recorded data.
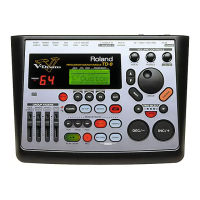
1. In the SONG screen (p. 18), press the [F3] (REC DATA)
button.
2. Turn the [R1] knob to select the recorded data to
delete.
3. Press the PAGE [DOWN] button.
4. Press the [F3] (DELETE) button.
A conrmation message appears.
If you decide to cancel, select “CANCEL” and press the [ENTER]
button.
5. Select “OK,” and press the [ENTER] button.
The recorded data is now deleted.
Naming Your Recorded Data
Here’s how to edit the names of the recorded data.
1. In the SONG screen (p. 18), press the [F3] (REC DATA)
button.
2. Turn the [R1] knob to select the recorded data.
3. Press the PAGE [DOWN] button.
4. Press the [F4] (NAME) button.
The SONG NAME screen appears.
5. Edit the name (p. 36).
You can use up to 16 characters for the song name.
6. Press the [F5] (EXIT) button to exit the SONG NAME
screen.
Exporting the Recorded Data to an SD Card
(SONG EXPORT)
You can export the data you’ve recorded and stored on this unit or on
an SD card as an audio le (WAV) or SMF to the SD card.
1. In the SONG screen (p. 18), press the [F3] (REC DATA)
button.
2. Turn the [R1] knob to select the recorded data.
3. Press the [F4] (EXPORT) button.
The SONG EXPORT screen appears.
4. Turn the [R1] knob to select the export type.
Indication Explanation
SMF
(DRUM ONLY)
Exports the drum performance to SMF
format.
WAV
(DRUM ONLY)
Exports the drum performance to an audio
le.
WAV (DRUM+SONG)
Exports the drum performance and song
audio to an audio le.
* You can’t select for data that was
recorded using the “DRUM only” setting.
ALL (WAV+SMF)
For data recorded as “DRUM only”
Exports the drum performance to both an
audio le and an SMF.
For data recorded as “with SONG”
Exports the drum performance as an audio
le and as an SMF, and also exports the
drum performance and song audio as an
audio le.
MEMO
Press the [F4] (NAME) button to add a name to the le for export.
5. Turn the [R2] or [R3] knobs to make the export setting
(only when exporting an audio le).
Parameter Explanation
Export Gain
Press the [
s
] button to play back a preview
of the recorded data (the export results). Adjust
the audio le volume while checking the output
level meters. Positive values increase the volume.
Post Export
Time
The tail end of the sound may get chopped o
when you export an audio le. If this happens,
increase this value to prevent this problem.
* The sound used for exporting audio les is the sound output from
the MASTER OUT jacks. Certain sounds may not be included in the
export, depending on the routing (p. 59) settings.

 Loading...