Bread slicer C42 – C42S – C52 – C52S – G42
(Original instructions) – Edit. A
17
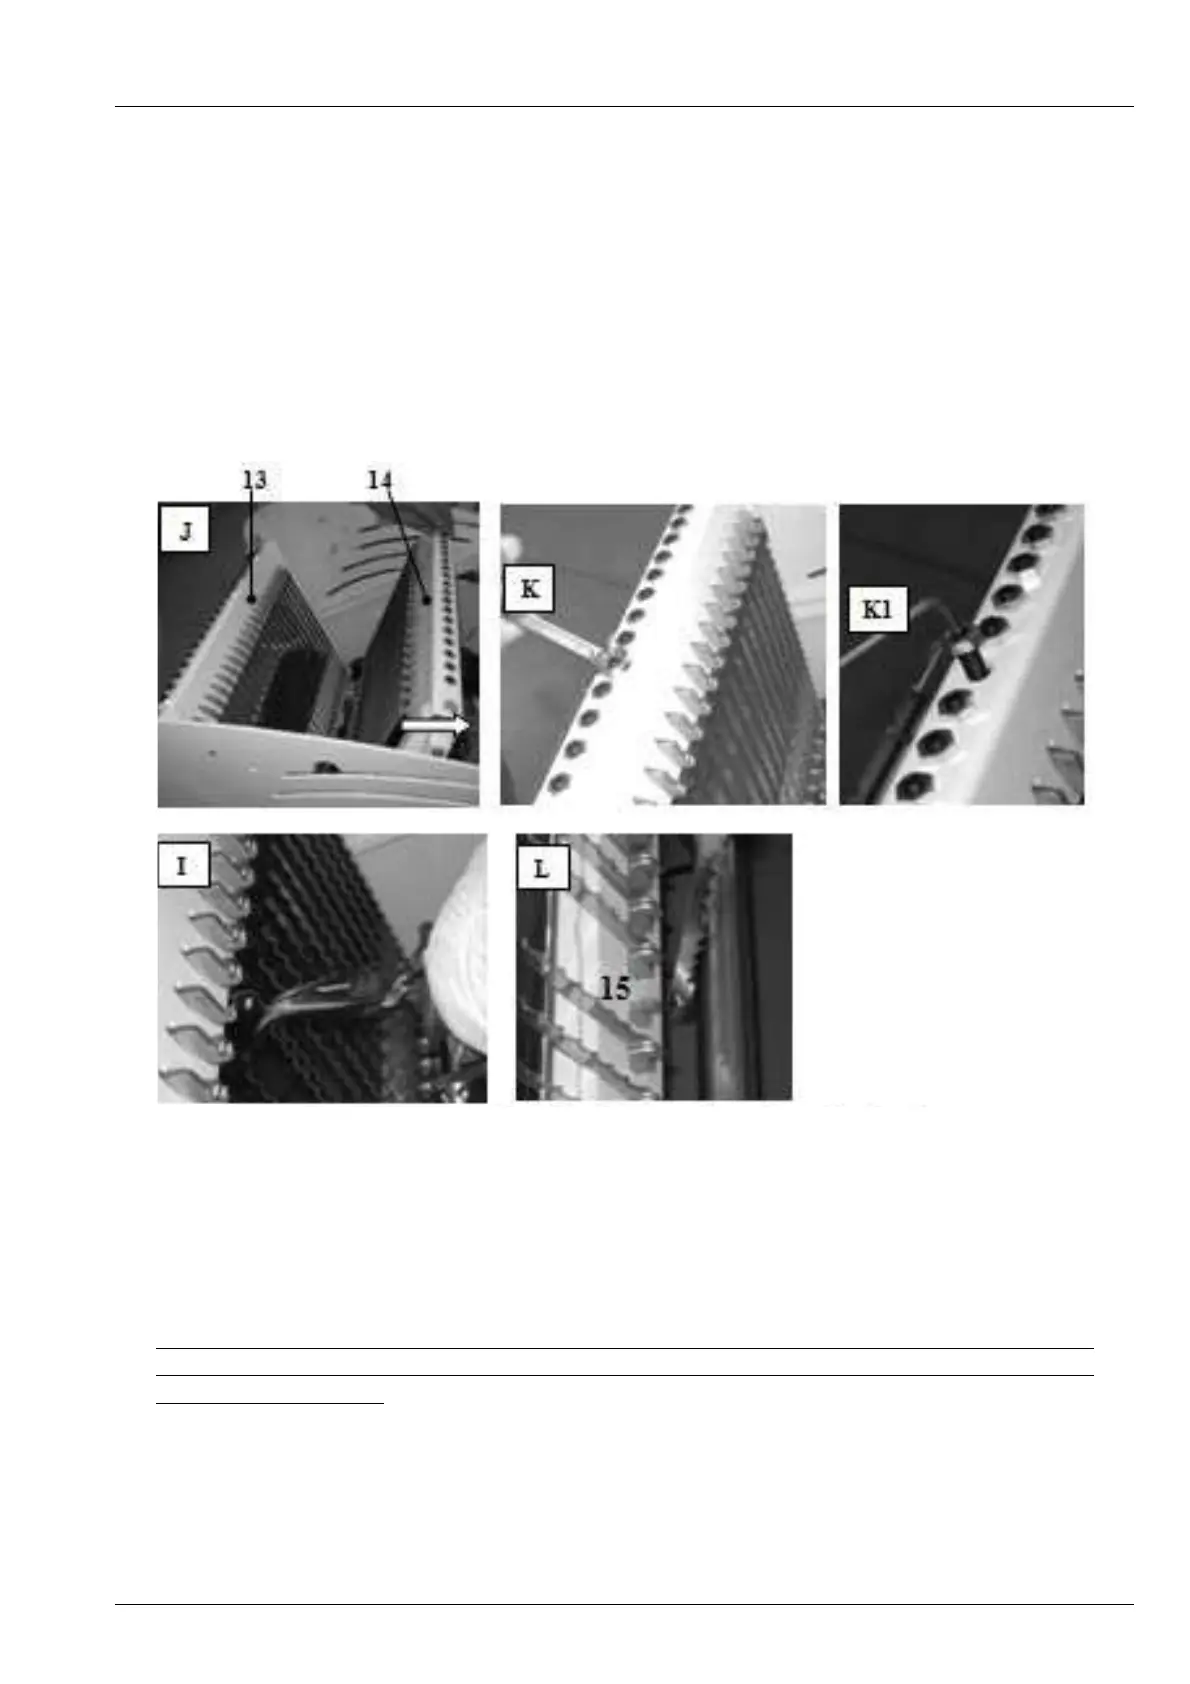
8. Open the two blade support frames, ref. 13 and 14 “like a book” as in Photo J, pushing back the
rear frame
9. Loosen the stop nut of the blade to be changed, Photo K, and, with an Allen wrench, loosen as
much as necessary the blade tightening screw, Photo K1
10. Grip the blade to be replaced with a pair of pliers and free it from the hooks, Photo I and L; put
the blade in a safe place so there can be no risk of cuts if it is touched accidentally.
REASSEMBLY sequence
11. Position the bottom pin of the new blade in the connecting slot ref. 15 Photo L Figure 16, then in
the top slot
12. Hold the blade in position and tighten it, fastening first the socket-head screw Photo K1, then the
stop nut, Photo K
Figure 16
13. Return the frame ref. 14 forward, against the frame ref. 13, Photo J
14. Reposition the screws 16 of the connecting rods on both sides, Photo M, without forgetting the
spacers. Firmly secure the nuts on the two outer sides.
15. Insert the comb (ref. 17, Photo N, taking care not to knock the blades and attach it at its ends to
the support pins ref. 18, Photo O.
Pay particular attention to the centring of the comb between the blades and do not forget the
washers at the sides! Otherwise the comb could move during use of the machine and touch the
blades, damaging them.
16. Put back the springs ref. 9 Photo E using a rounded pair of pincers and hook them into the slots
of the comb
17. Perform in inverse order all the removal steps from point 4 to point 1 of this same paragraph.