Important safety tips!
9
radio waves, install the projector away from such radio sources. In addition, you can use
a piece of metal foil or a metal conduit that is grounded at both ends to warp the regional
network cable connected to the terminal
●Lens focus adjustment
The high clarity projector lens is easily affected by the light from the light source, making
the focus unstable in the period just after switching on. It is recommended to adjust the
lens focus after continuing to project the image for at least 30 minutes.
●Do not install the projector at an elevations 2,700M (8858”) or higher above sea level.
●Do not use the projector in places where the ambient temperature is above 45°C (113°F).
Using the projector in places where the altitude is too high or the operating environment
is too hot may shorten the service life of the components or cause equipment failure.
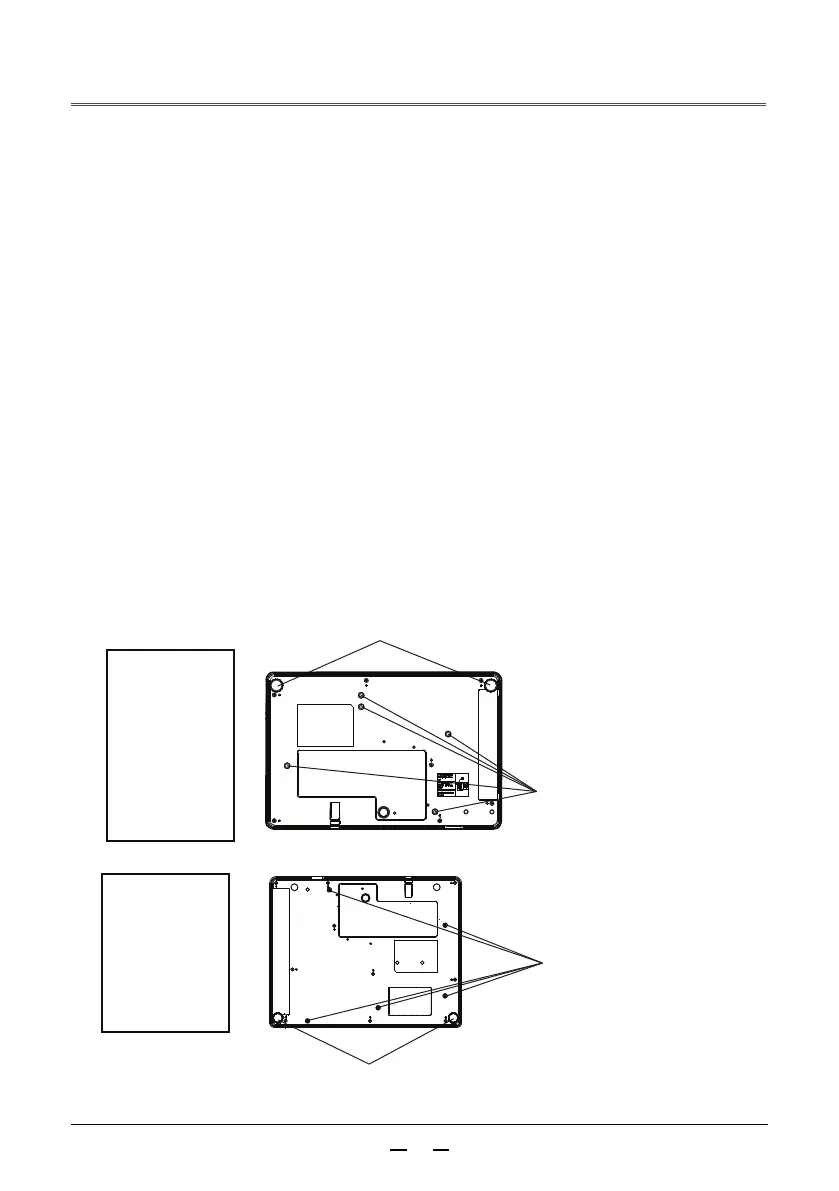
●Precautions when installing the projector
●The front leg adjusters are only used to mount on the floor and adjust the angle. Use
it for other purposes may damage the projector.
●When installing the projector, use the four screws of the ceiling mount bracket to
secure the projector, in addition to floor or ceiling installation with the front leg adjusters.
●(screw diameter: M4, screw hole depth inside the projector: 10mm (15/32’’),
●Screw locking torque: 4 ± 0.5 N.m.
Screw holes for
ceiling installation (M4)
Screw holes for
ceiling installation (M4)
Front leg adjusters
Front leg adjusters
Position of screw holes for ceiling installation and front leg adjusters
RL-A400X
RL-A500X
RL-A400W
RL-A500W
RL-A500U
RL-S380W
RL-S600W
RL-S380X
RL-S600X
RL-S380U
RL-S600U
 Loading...