Reference Manual
00809-0100-4792, Rev CA
August 2010
Rosemount 1495, 1496
4-2
1496 FLANGE UNION
COMPONENTS
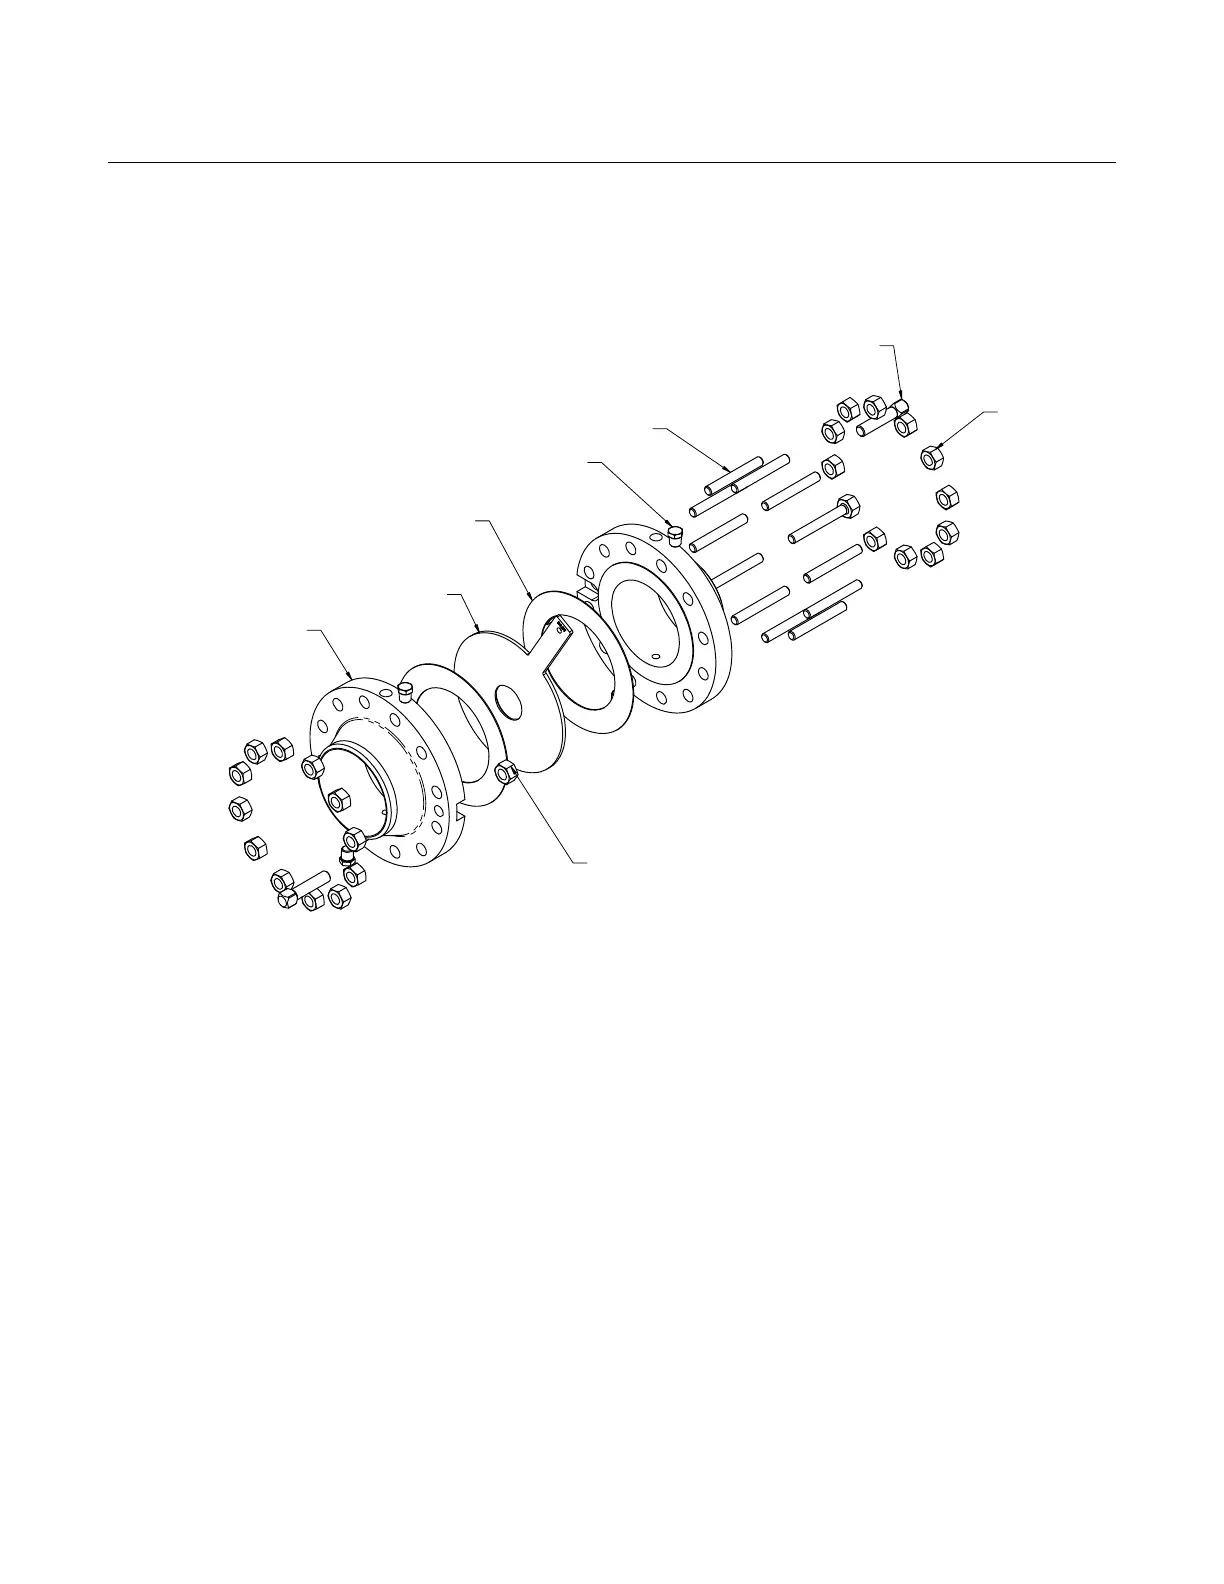
Figure 4-1 identifies the components of the Rosemount 1496 Flange Union.
See the actual installation instructions for proper positioning of the orifice
plate.
Figure 4-1. 1496 Flange Union Components
INSTALLATION
INSTRUCTIONS
Step 1: Determine the
Proper Placement
Determine the proper placement by ensuring adequate straight run. See
Appendix B: Recommended Installation Requirements.
Step 2: Determine the
Proper Orientation
To determine the proper orientation, see “Installation Configuration” on
page 2-2.
Step 3: Weld the Flange
Union
Follow these steps to weld the orifice flanges to the pipe.
1. Make sure the line is depressurized.
2. Prep the pipe ends as required.
3. Ensure that the orifice flange is the correct size and rating.
4. Make certain that the flange taps are aligned and level.
5. Weld the orifice flanges to the pipe.
6. To avoid serious burns allow the orifice flanges to cool before
installing the orifice plate per all applicable plant and local codes.
1495 (Not
Included)
Pipe Plugs
Nut
Tap P lug
Orifice
Flange
(2) Jackscrew
Stud
Gasket
(2) Jackscrew Nut