INSTALLATION
2.2 Revised 10/02/2012
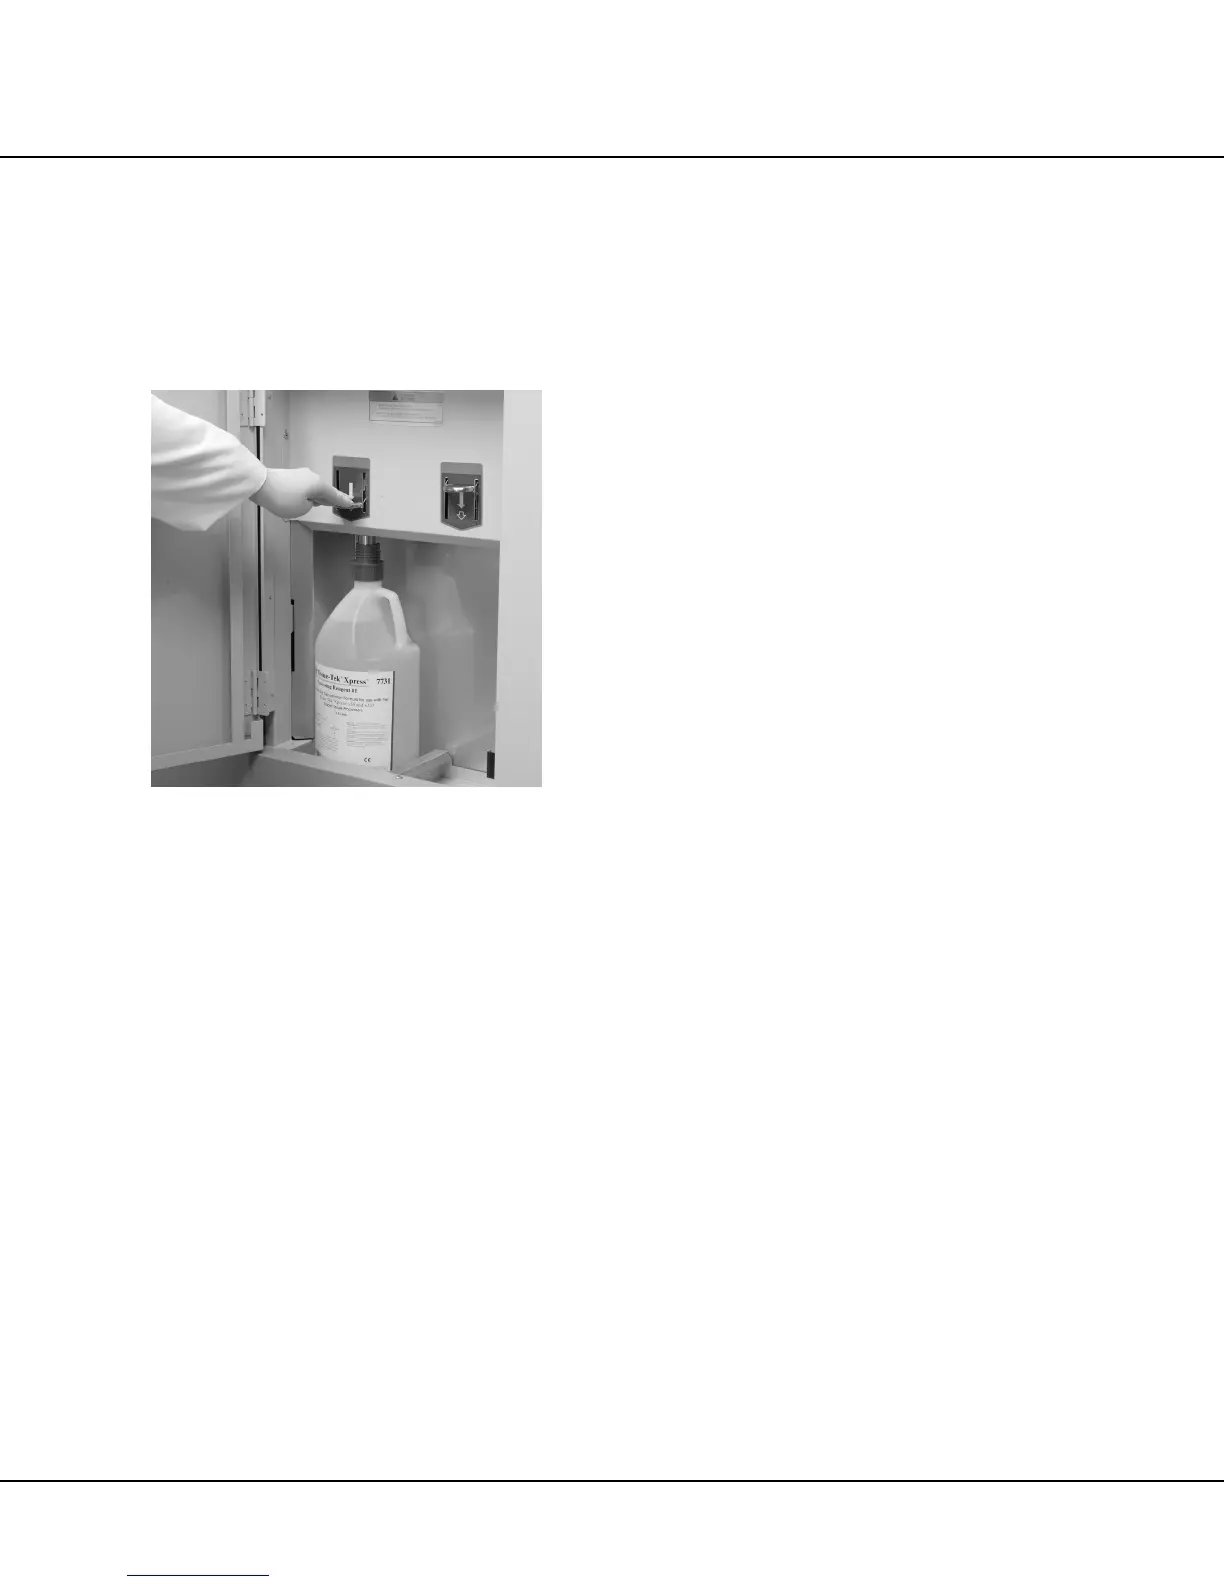
Set Reagent Bottle
1. Place the new reagent container in the reagent cabinet
in the appropriate position.
2. Press down on the reagent container locking lever until
it engages the “LOCKED” position, coupling the reagent
container with the reagent supply system (Figure 2-B).
Figure 2-B
Pre-Start Checks
Prior to the first processing run each day, perform the
following pre-start checks and services:
• Verify a new drip tray liner has been placed on the
Transfer Arm drip pan.
NOTE: If necessary, replace the drip tray liner on the
Transfer Arm drip pan (see “Drip Tray Liner Replacement”
on page 7.7 for details).
• Verify that the Loading Station container is filled
with Pre-Processing Solution (product code 7115).
• Verify the handle of the loading station container is
resting on the rim of the container.
• Verify the Transfer Arm is not holding a basket or
magazine set, and that there are no or magazines
baskets in the Loading Station, Unloading Station,
or in any retort.
• Verify that all retort lids are closed. If any lids are
open, close them manually.
• Verify both reagent containers are full. Ensure
both reagent containers are in their proper posi-
tions in the cabinet, and that locking levers for
both containers are in the locked position.
NOTE: If the reagent containers are not full, replace the
reagents prior to starting the system (see “Reagent
Replacement” on page 7.4 for details).
• Verify both paraffin ovens contain sufficient
amounts of paraffin.
If necessary, verify the Unloading Station retort contains
a sufficient amount of paraffin.
NOTE: If sufficient paraffin is not available in either paraffin
oven, replace the paraffin prior to starting the system (see
“Retort #3 and #4 Paraffin Replacement” on page 7.5 and
“Unloading Station Paraffin Replacement” on page 7.7 for
details).
NOTE: It is recommended to ensure proper processing of
tissue specimens, reagent sets MUST be changed at the
same time.
 Loading...