5-16 EB 8355-2 EN
Installation
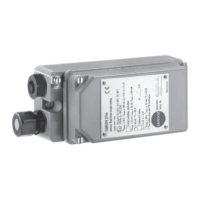
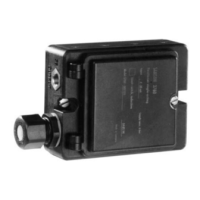
5.3.4 Reversing amplier for
double-acting actuators
For the use with double-acting actuators, the
positionermustbettedwithareversingam-
plier,e.g.theSAMSONType3710Revers-
ingAmplier(seeMountingandOperating
Instructions uEB8392).
The signal pressure of the positioner is sup-
plied at the output A1 of the reversing ampli-
er.Anopposingpressure,whichequalsthe
required supply pressure Z when added to
the pressure at A1, is applied at output A2.
The rule A1 + A2 = Z applies.
Ifadifferentreversingamplier(itemno.
1079-1118or1079-1119)isused,follow
themountinginstructionsdescribedbelow:
Signal pressure connections
A1:ConnectoutputA1tothesignalpressure
connection on the actuator that causes the
valve to open when the pressure rises.
A2:ConnectoutputA2tothesignalpressure
connection on the actuator that causes the
valve to close when the pressure rises.
Pressure gauge attachment
The mounting sequence shown in Fig.5-10
remains unchanged. Screw a pressure
gauge bracket onto the connections A1 and
Z.
Pressuregaugebracket:
− G¼:1400-7106
− ¼NPT:1400-7107
Pressure gauges for supply air Z and output
A1accordingtosection5.8.
Mounting
When using a reversing amplier, the pres-
sure regulator (9) must be turned as far as it
will go in the clockwise direction.
Remove the sealing plug (1.5) before mount-
ing the reversing amplier. The rubber seal
(1.4) must remain installed.
1. Screw the special nuts (1.3) from the ac-
cessoriesofthereversingamplierinto
the threaded connections of the position-
er.
2. Insert the gasket (1.2) into the recess of
thereversingamplierandslideboththe
hollowed special screws (1.1) into the
connecting boreholes A1 and Z.
3. Placethereversingamplierontothepo-
sitioner and screw tight using the two
special screws (1.1).
4. Use a screwdriver (8 mm wide) to screw
theenclosedlters(1.6)intotheconnec-
tion boreholes A1 and Z.
1.3 1.2 1.1 1
Output 38 Supply 9
A
1
1.5 1.6
Z
A
2
1.4
A
1
A
2
Output 38 Supply 9
1.3 1.21.1
1.6
Z
A
1
From the positioner
Control signals to the actuator
1 Reversingamplier
1.1 Special screws
1.2 Gasket
1.3 Special nuts
1.4 Rubber seal
1.5 Stopper
1.6 Filter
Fig.5-10: Mounting a reversing amplier
Note