EB 8355-2 EN 9-3
Servicing
4. Replace the cable gland (5) with the
pneumaticscrewtting(1).
5. Connect the silicone hose (2) and insert
the guard plate (4) into the housing.
6. Remount the holder with terminal block.
7. Change type designation (model num-
ber)onthenameplatetoType3766
Pneumatic Positioner.
For details on Type3766 Positioners, refer to
Mounting and Operating Instructions
uEB8355-1.
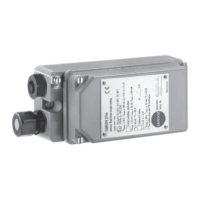
9.3 Installing the limit switches
Î Ordernumberforretrotkit
Index.03:1400-6389
Index.04/.05:1400-7573
Index.06andhigher:1400-8810
Î See Fig.9-2
1. Unscrew the bracket with plate (1).
2. Removethescrews(2)andreplacethe
entiresetpointcalibrator(3)witha
calibrator including limit switches. Make
sure the O-ring is inserted into the
housing.
3. Attach the terminal block for the limit sig-
nals41/42and51/52intheterminal
base.
4. Guide the connecting cable to the termi-
nals and fasten.
(brown = +, blue = –)
5. Refasten the bracket with plate (1) and
stick the adhesive label for the limit
switches on the housing cover.
6. Screw additional cable gland onto the
housing.
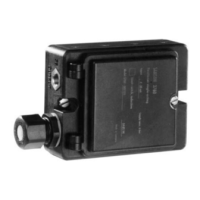
9.4 Installing the solenoid valve
Î Ordernumberforretrotkit
Index.05andlower:1400-7122
Index.06andhigher:1400-8808
Î See Fig.9-2
1. Push the plate (5) to one side.
2. Unscrewthefourscrews(7).Liftoffthe
black cover with the rubber gasket and
insert the solenoid valve (6). The rubber
gasket with the restriction is located in
the rear of the solenoid valve.
3. Unscrew the plate (1).
4. Attach the terminal block (10) for the so-
lenoid valve in the terminal base.
5. Insertthepanel(9)attherearofthepo-
sitioner and attach it to the set point cali-
brator using two screws.
6. Guide the connecting cable down behind
the mounted panel of the set point cali-
bratorandupagaintoterminals81/82
and fasten (brown = plus, blue = minus).
7. Screw on the bracket with plate (1).
8. Screw additional cable gland onto the
housing.
Note