EasyManuals Logo

Sanyo PLC-WL2500 Service Manual

Sanyo PLC-WL2500
104 pages
To Next Page IconTo Next Page
To Previous Page IconTo Previous Page
Page #14 background imageLoading...
Page #14 background image
-14-
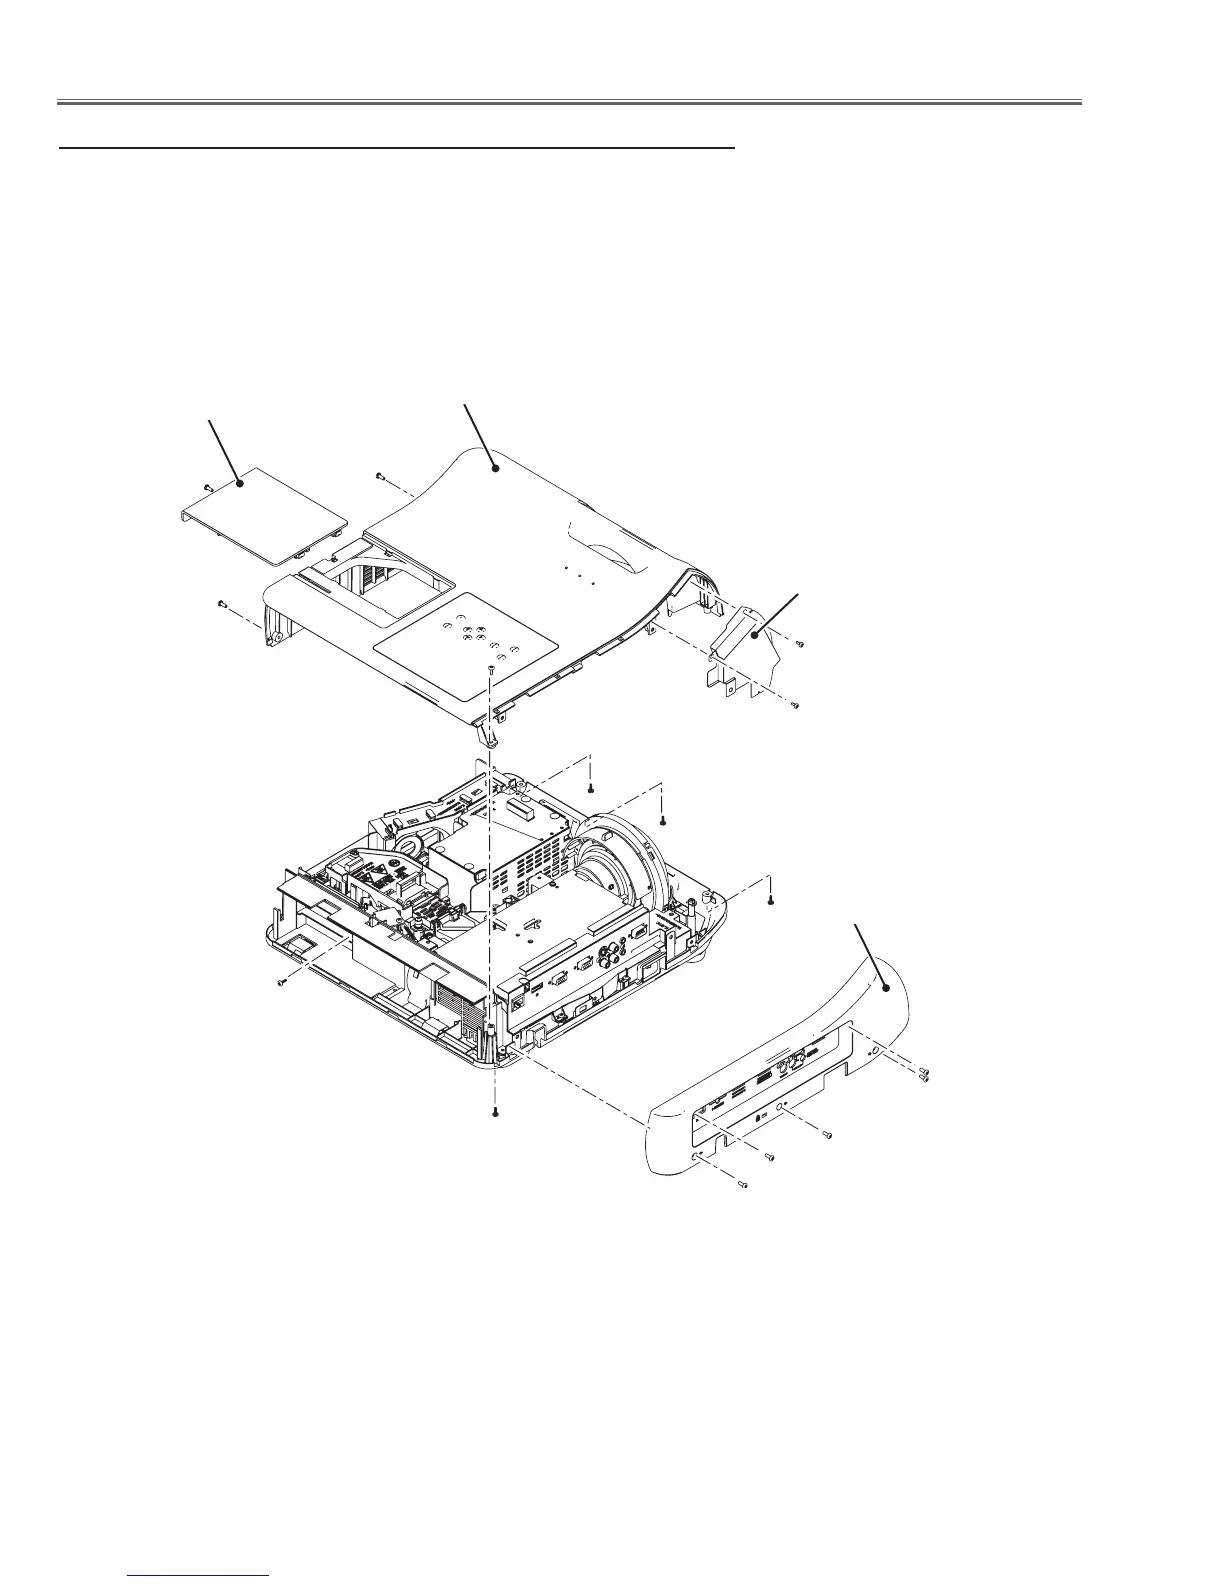
Mechanical Disassembly
1. Remove 5 screws A(M3x8) to remove the AV Panel.
2. Remove 3 screws B(T3x8), 1 screw C(T3x8), 2 screws D(M3x8) and 1 screw E(T3x8)
and 1 screw F(T3x8) to remove the Cabinet Top assy.
3. Loosen 1 screw G and remove the Lamp Cover in the arrow direction.
4. Remove 2 screws H(T3x8) to remove the Shield Plate.
Fig.2
x AV Panel and Cabinet Top removal
A
A
A
A
B
B
C
B
D
D
E
F
G
H
H
Lamp Cover
Cabinet Top
Shield Plate
AV Panel
A
(Located on the center of
the cabinet bottom.)

Table of Contents

Other manuals for Sanyo PLC-WL2500

Questions and Answers:

Question and Answer IconNeed help?

Do you have a question about the Sanyo PLC-WL2500 and is the answer not in the manual?

Sanyo PLC-WL2500 Specifications

General IconGeneral
BrandSanyo
ModelPLC-WL2500
CategoryProjector
LanguageEnglish

Related product manuals