-6-
Electrical Adjustments
1. Receive the 16-step gray scale computer signal with
Input 1 [COMPUTER] mode.
2. Enter the service mode.
3. Connect an oscilloscope to test point “TP531” (+) and
chassis ground (-).
4. Select group no. “5”, item no. “16” and change data
value to adjust the pedestal level and black level to be
the same level.
5. Connect an oscilloscope to test point “TP501” (+) and
chassis ground (-).
6. Select item no. “15” and change data value to adjust
the pedestal level and black level to be the same
level.
7. Connect an oscilloscope to test point “TP561” (+) and
chassis ground (-).
8. Select item no. “17” and change data value to adjust
the pedestal level and black level to be the same
level.
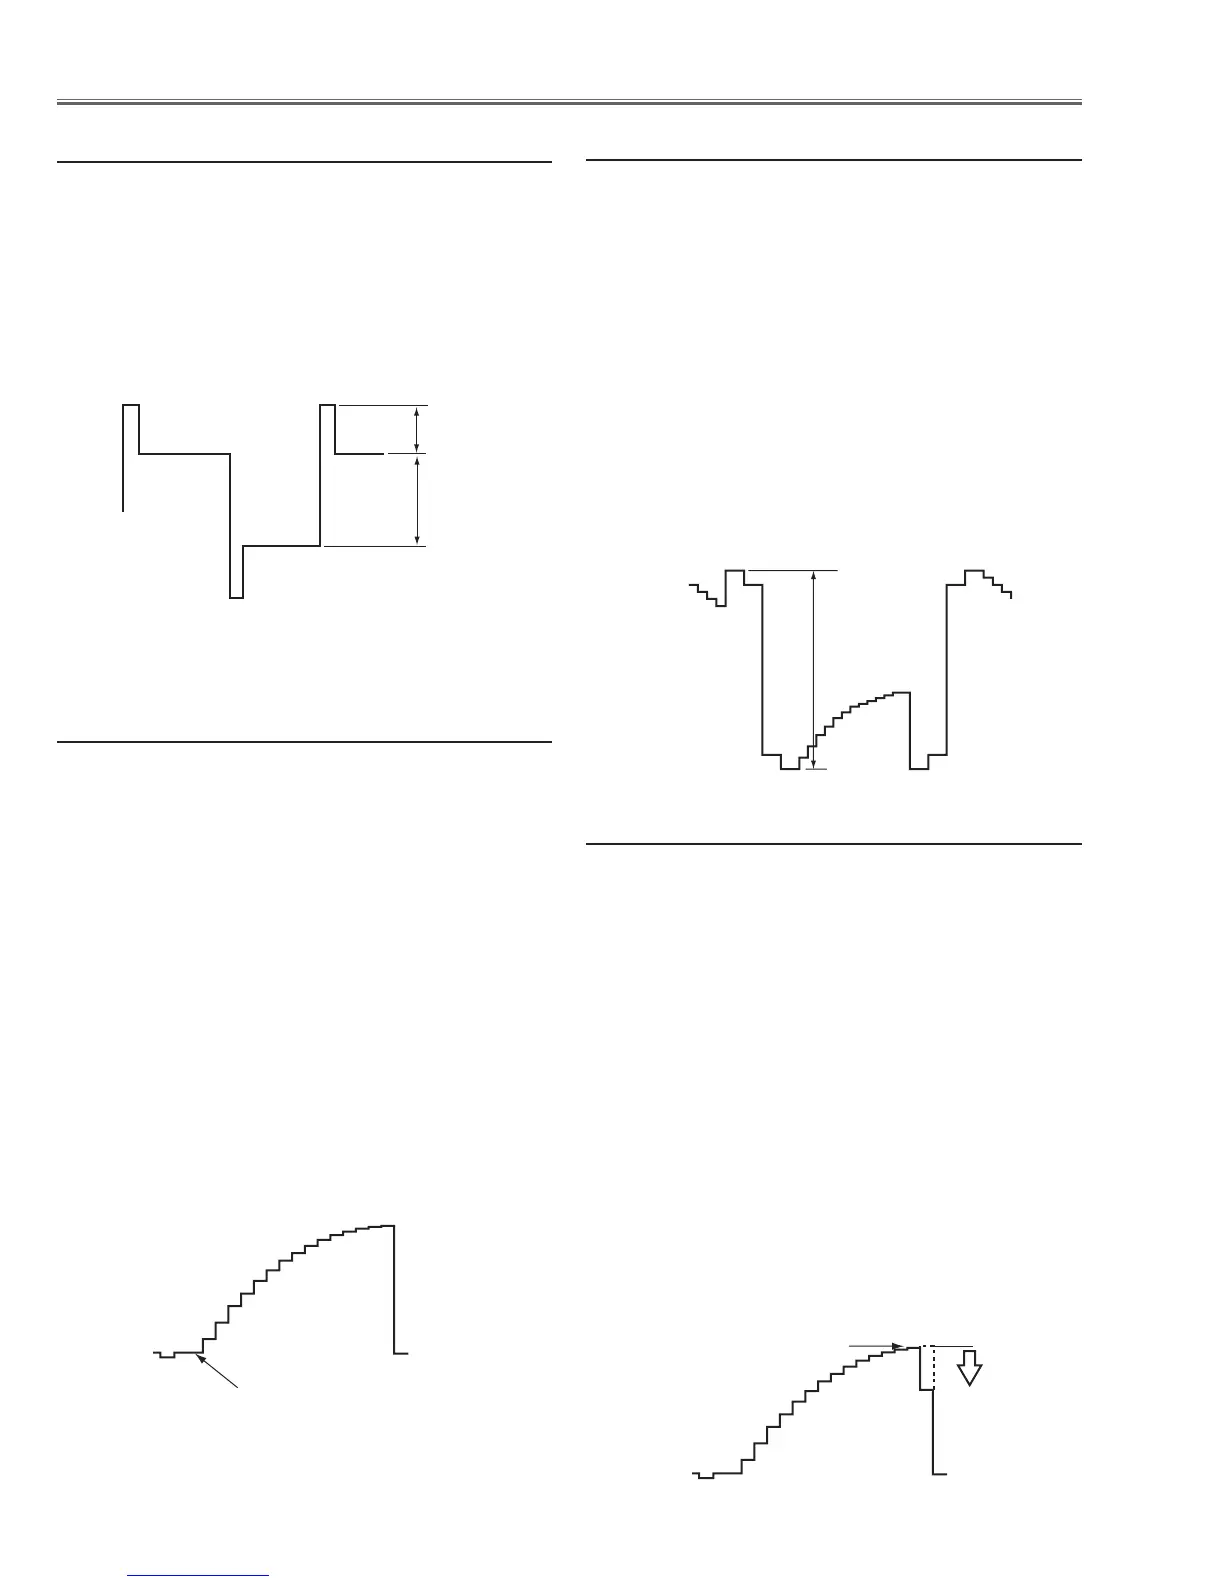
Pedestal Lebel = Black Lebel
PC Pedestal adjustment
1. Receive the 16-step gray scale computer signal with
Input 1 [COMPUTER] mode.
2. Enter the service mode.
3. Connect an oscilloscope to test point “TP531” (+)
and chassis ground (-).
4. Select group no. “5”, item no. “4” and change data
value to adjust amplitude “a” to be 10.0 ±0.1V.
5. Connect an oscilloscope to test point “TP501”(+)
and chassis ground (-).
6. Select item no. “3” and change data value to adjust
amplitude “a” to be 10.0 ±0.1V.
7. Connect an oscilloscope to test point “TP561”(+)
and chassis ground (-).
8. Select item no. “5” and change data value to adjust
amplitude “a” to be 10.0 ±0.1V.
(a)
black level
black level
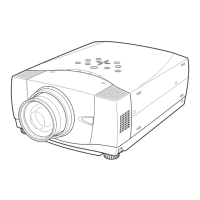
Black Level adjustment
1. Receive the 16-step gray scale computer signal with
Input 1 [COMPUTER] mode.
2. Enter the service mode.
3. Connect an oscilloscope to test point “TP531”(+)
and chassis ground (-).
4. Select group no. “4”, item no. “4” and set data value
to “600”, and then decrease data to adjust waveform
“a” to be minimum amplitude.
5. Connect an oscilloscope to test point “TP501”(+)
and chassis ground (-).
6. Select item no. “5” and set data value to “600”, and
then decrease data to adjust waveform “a” to be mini-
mum amplitude.
7. Connect an oscilloscope to test point “TP561”(+)
and chassis ground (-).
8. Select item no. “3” and set data value to “580”, and
then decrease data to adjust waveform “a” to be mini-
mum amplitude.
White Level
(a)
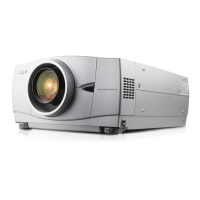
PC Gain adjustment
1. Receive the a6-step gray scale computer signal with
Input 1 [COMPUTER] mode.
2. Enter the service mode.
3. Connect an oscilloscope to test point “2551” (+) and
chassis ground (-).
4. Select group no. “5”, item no. “6” and change data
value to adjust amplitude “a” to be 3.8 ±0.1V.
5. Select item no. “8” and change data value to adjust
amplitude “b” to be 3.1 ±0.1V.
(a)
(b)