English 124
4 Select “SETTING”, and press the
SET button.
h The Date/Number Print Screen
appears.
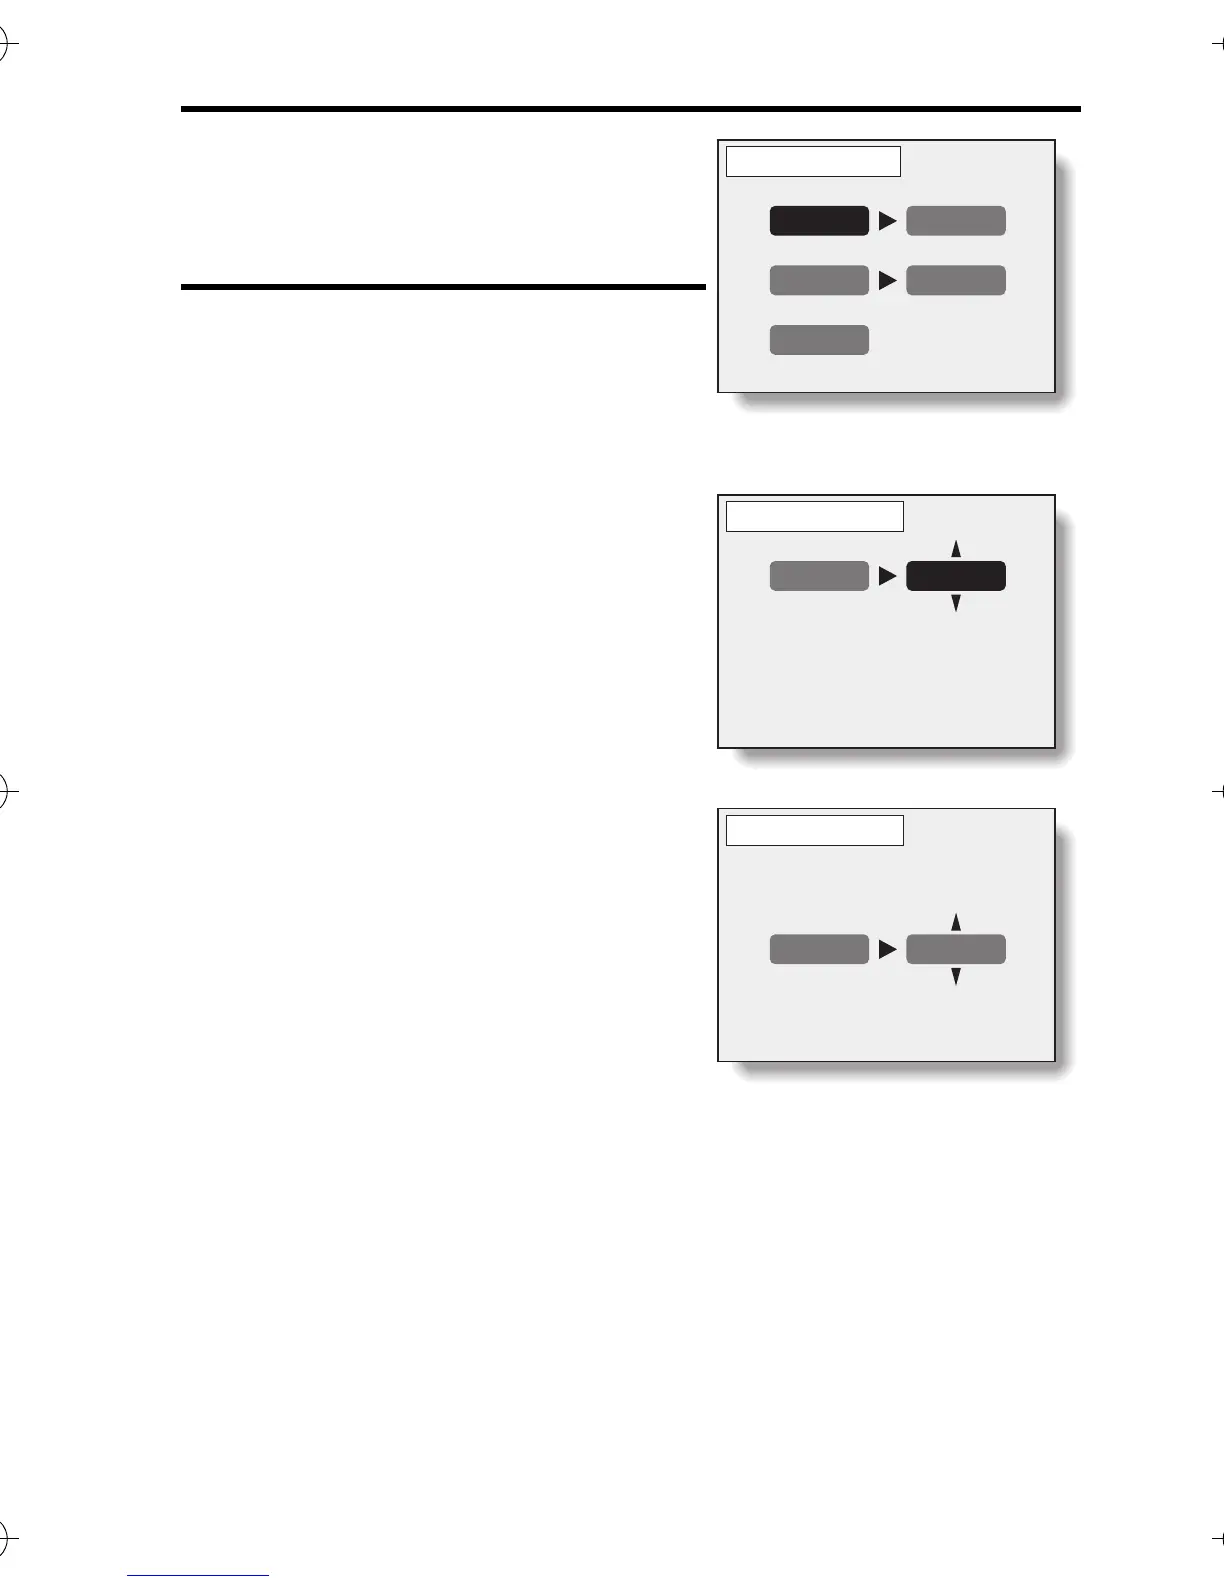
5 Specify whether the date is dis-
played on the print, and the number
of prints.
<Specifying dated prints>
1 Press the [] or [k] arrow button to
select “DATE”
2 Press the SET button.
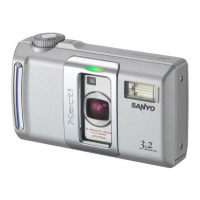
h The Print Date Screen appears.
3 Press [] or [k] to select the
desired option.
4 Press the SET button.
h You are returned to the Date/
Number Print Screen.
<Specifying the number of prints>
1 Press the [] or [k] arrow button to
select “COPIES”.
2 Press the SET button.
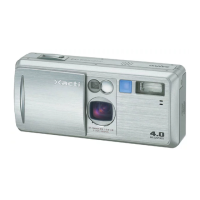
h The Print Number Screen
appears.
3 Press [] or [k] to specify the num-
ber of prints.
h Press [] or [k] until the desired
number of prints is displayed.
4 Press the SET button.
h You are returned to the Date/Number Print Screen.
YES: Print the date.
NO: Do not print the date.
DPOF
DATE NO
COPIES 0
EXIT
ALL IMAGES
<Date/Number Print Screen>
DPOF
DATE YES
ALL IMAGES
DPOF
COPIES 1
ALL IMAGES
Camera_EN.book Page 124 Sunday, August 31, 2003 3:48 PM