SATEL VERSA 17
– press twice any button on the keyfob
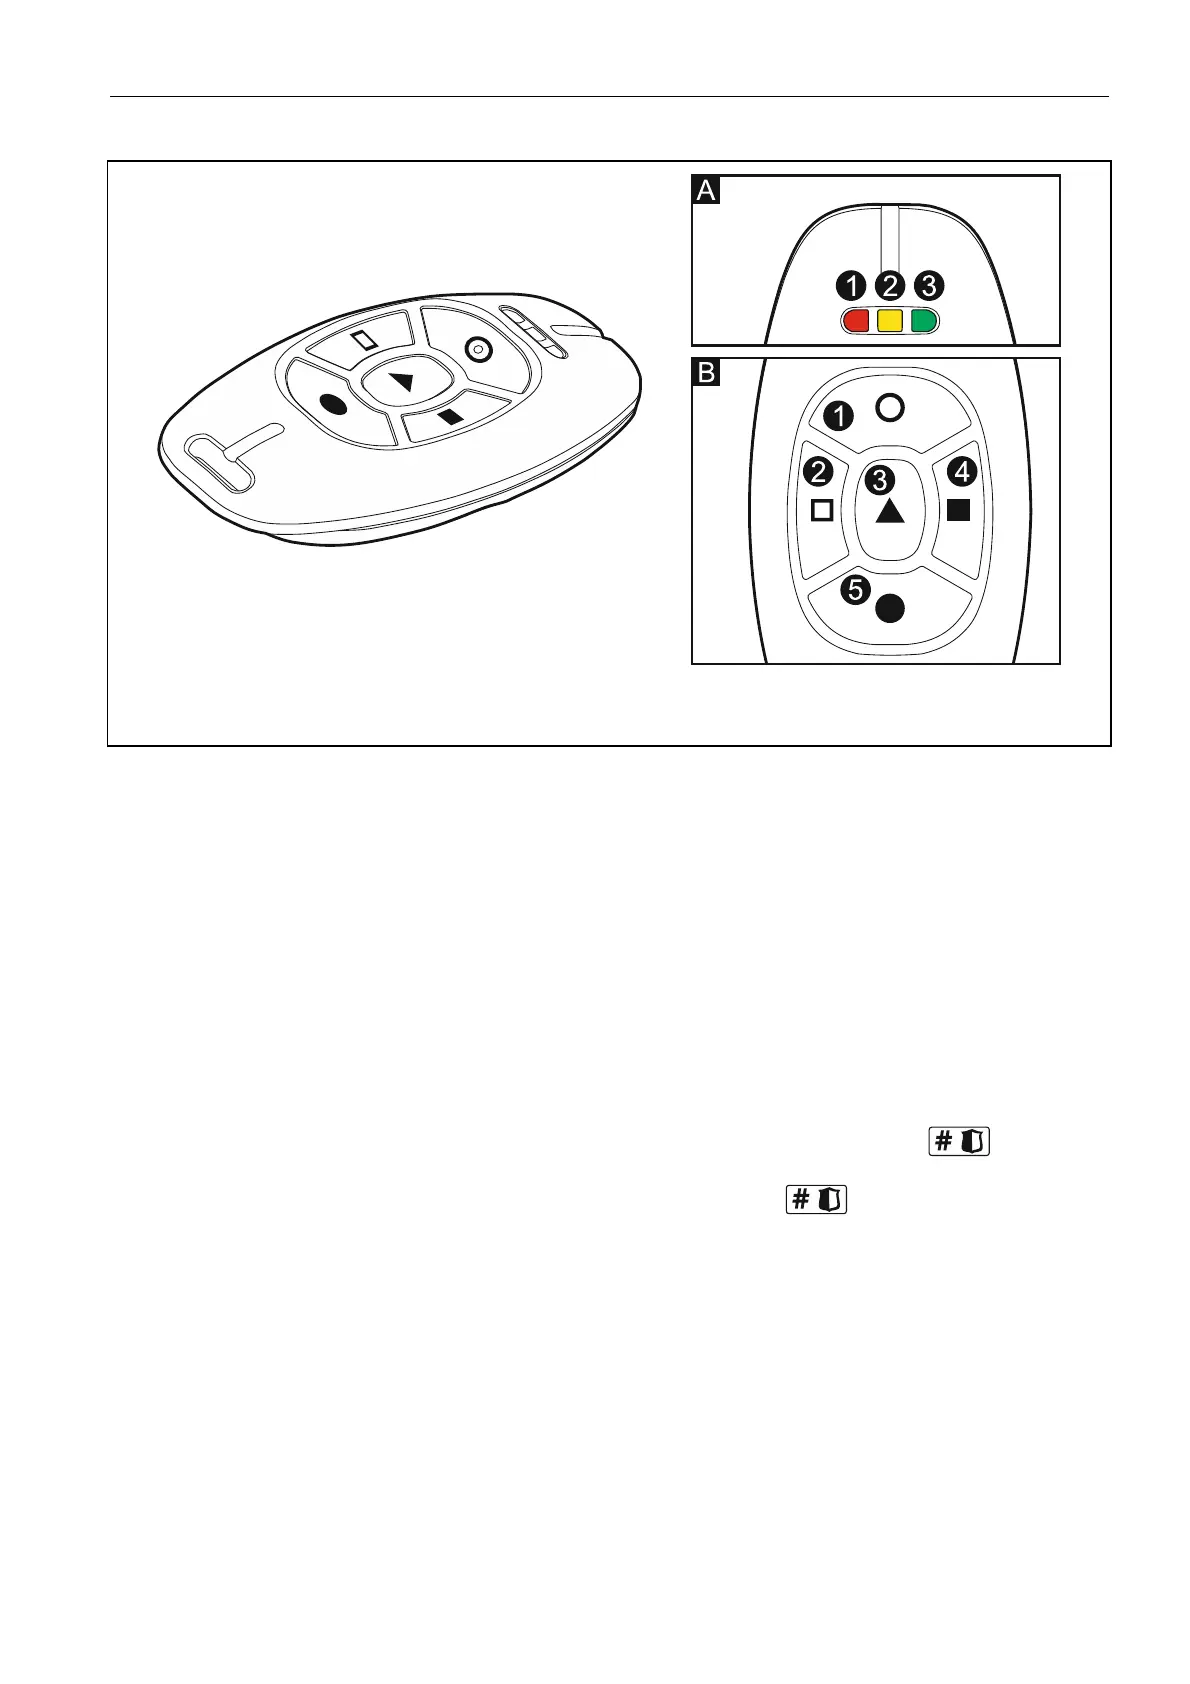
Fig. 5. APT-100 keyfob (gray enclosure). A – numeration of LEDs. B – numeration of keyfob
buttons (button 6 – pressing buttons 1 and 5 simultaneously).
17. Step 6c. Assigning function to APT-100 keyfob button 1. Proceed in the same way as
the same way as
f ton 4. Proceed in the same way as
in Step 5c.
18. Step 6d. Assigning function to APT-100 keyfob button 2. Proceed in the same way as
in Step 5c.
19. Step 6e. Assigning function to APT-100 keyfob button 3. Proceed in
Sin tep 5c.
key ob but20. Step 6f. Assigning function to APT-100
in Step 5c.
21. Step 6g. Assigning function to APT-100 keyfob button 5. Proceed in the same way as
in Step 5c.
22. Step 6h. Assigning function to APT-100 keyfob button 6 (two buttons pressed
simultaneously: 1 and 5). Proceed in the same way as in Step 5c.
23. Step 6i. Selecting confirmation for LED 1 in APT-100 keyfob. Press to confirm
the default method of confirmation (defined by the installer in the user schedule) or enter
the number of one of the following functions and then press :
0. On LED is on, when the control panel has acknowledged receiving
information on pressing a button
1. Output 1 state LED is on, when the selected output is active
2. Output 2 state
3. Output 3 state
4. Output 4 state
5. Output 5 state
6. Output 6 state
7. Output 7 state
8. Output 8 state
10. Output 10
11. Output 11 state
9. Output 9 state
state
 Loading...