Page 6-8
Section 6. Replacement Procedures
SATO CL608e/CL612e Service Manual
PN 9001079
Rev. B
Replacing the Fuses
Required: T3.15A, 250V Fuse or T1 Amp 250V Fuse
To remove and replace these fuse(s) do the following:
STEP PROCEDURE
1. Switch the printer OFF and disconnect the power cable.
2. Remove (3) screws holding the left side cover to the printer. Raise the
access door and loosen the (2) screws on the inside top of the printer.
Lift off the left side cover to expose the main PCB. Fig. 6-1
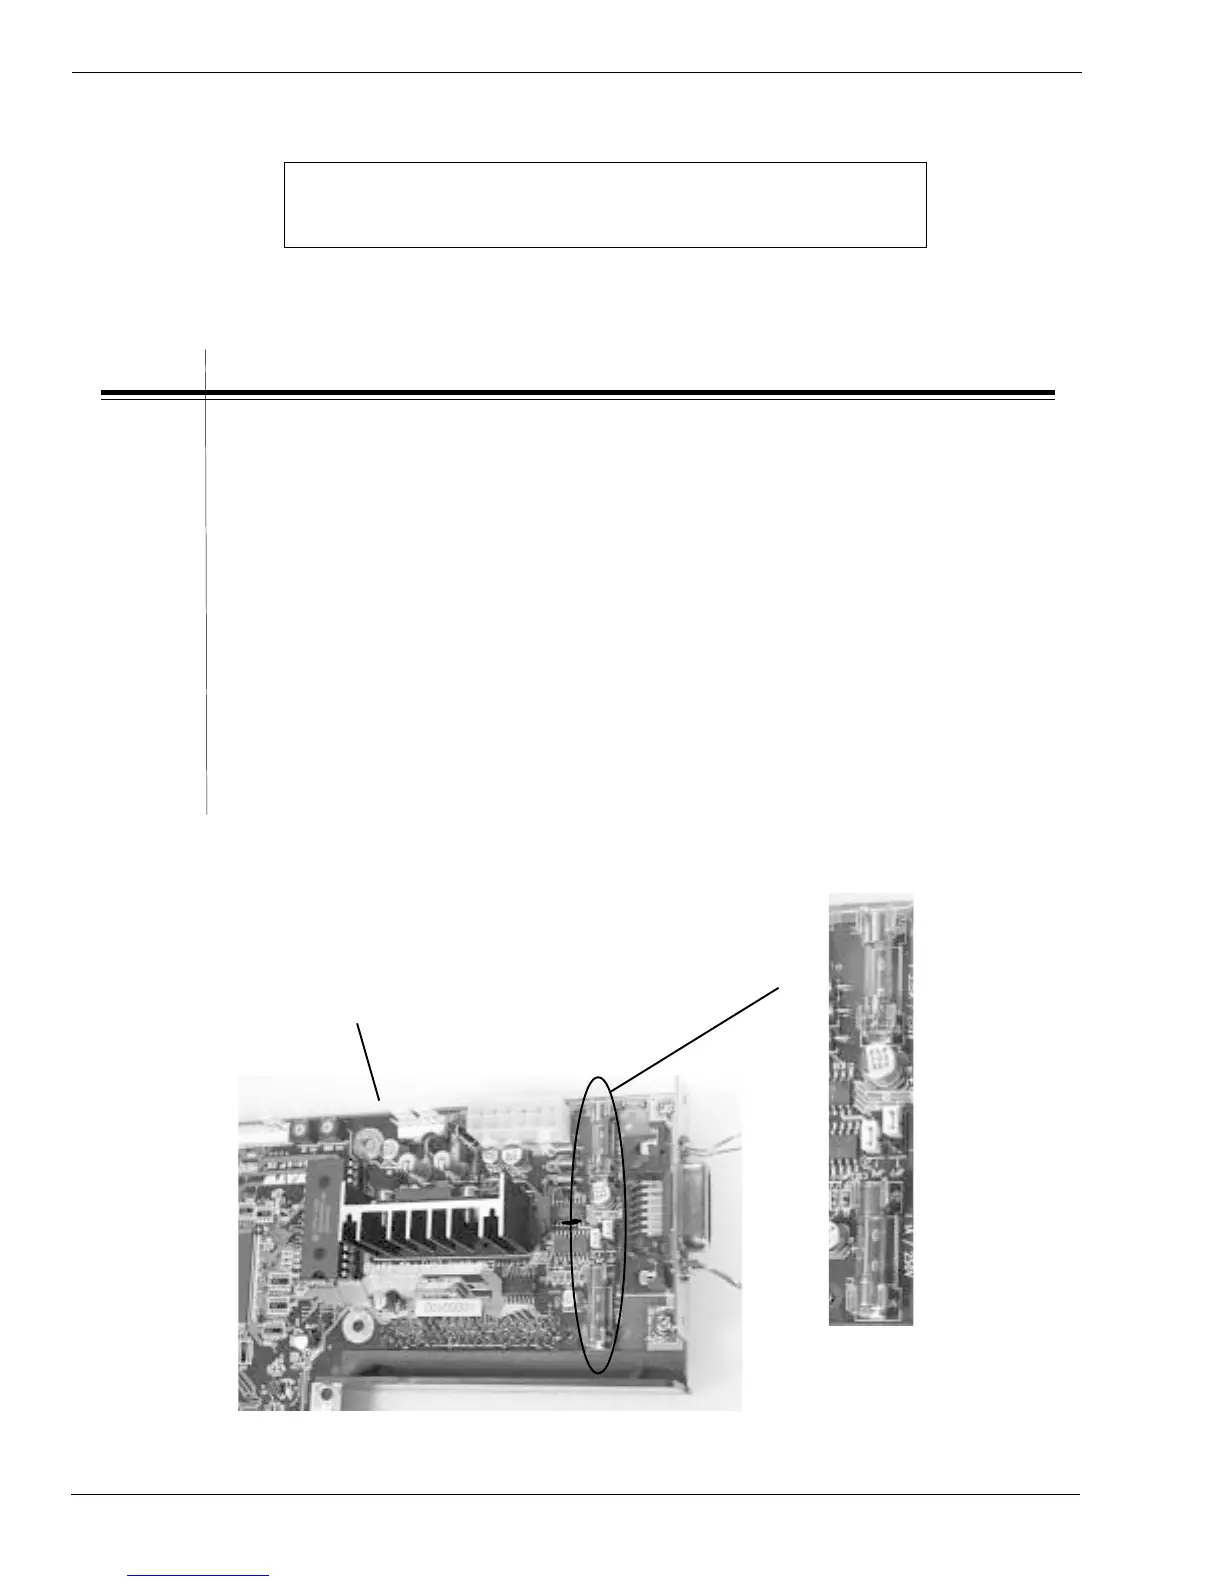
3. Refer to Fig. 6-7 and locate the appropriate fuse on the PCB.
4. Remove and replace the fuse(s) with one of equal rating. Do not use a
fuse with a higher rating.
5. Replace the cover and replace the screws.
6. Return the printer to service by reconnecting the power cable.
MAIN PC BOARD
FUSES
Figs. 6-7

 Loading...


