Installation Procedure
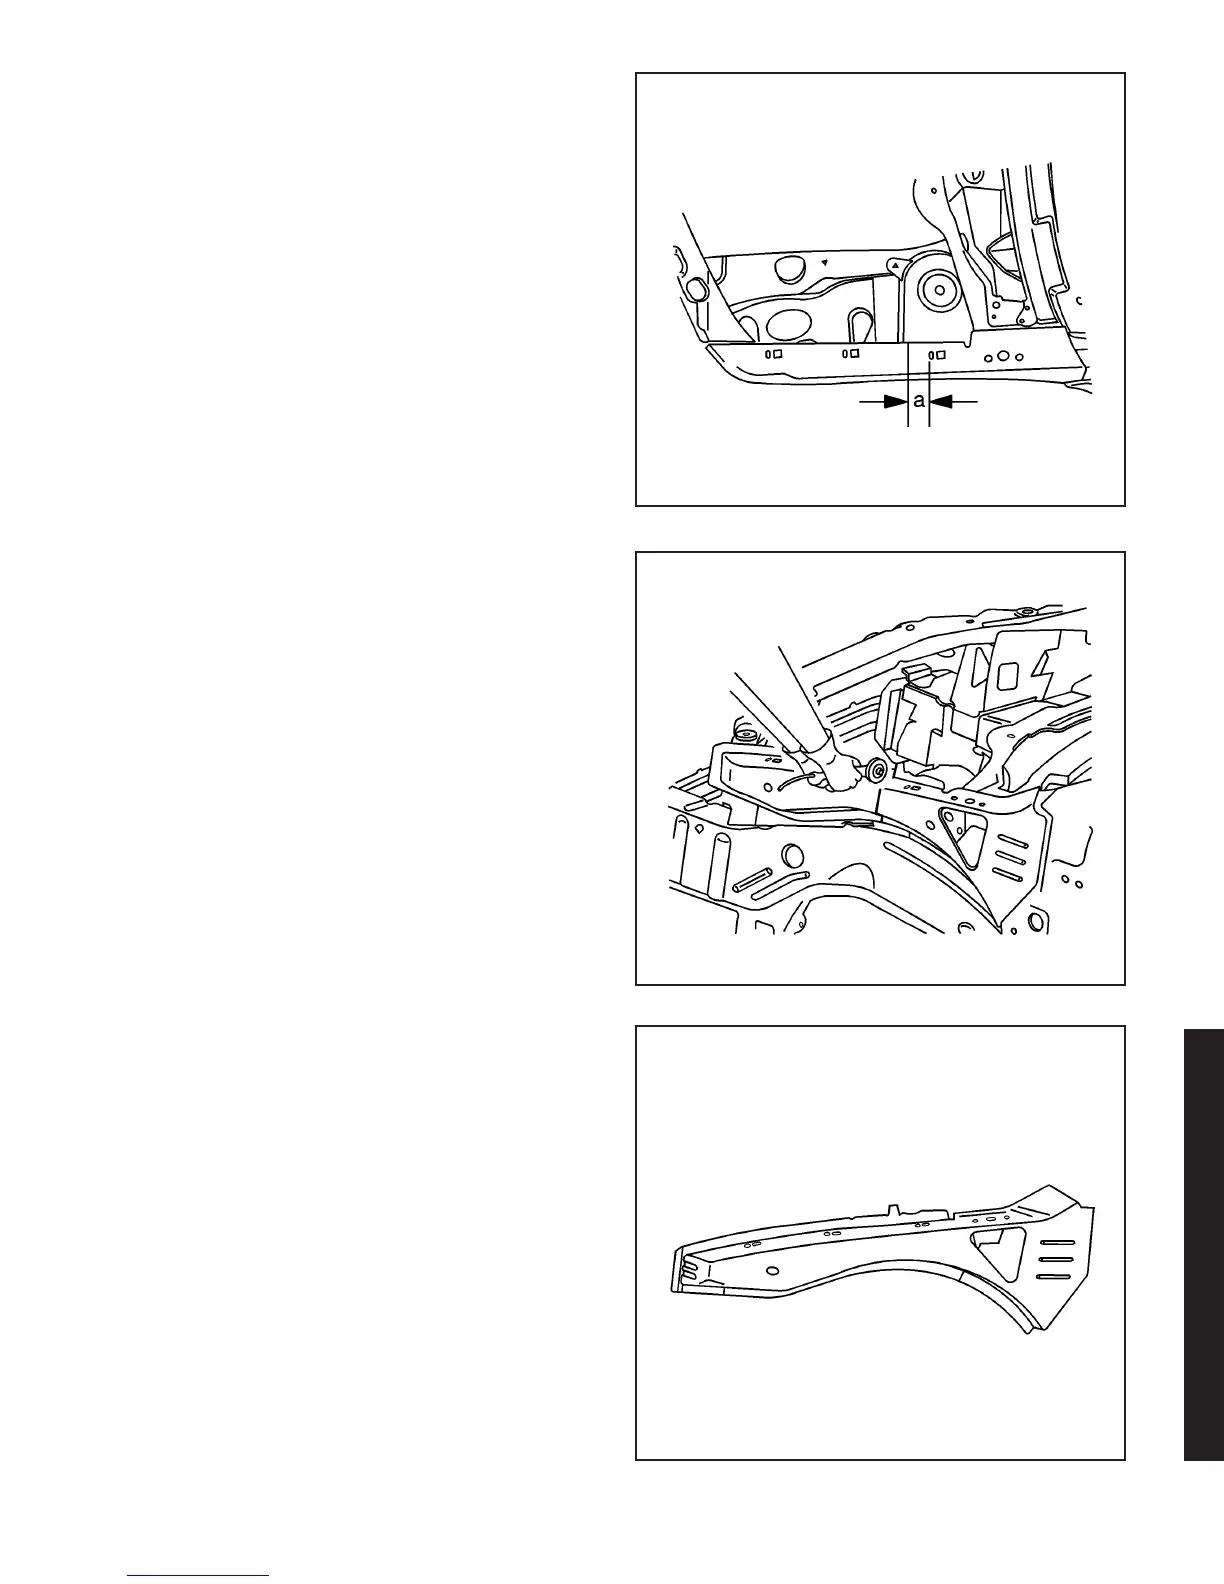
1. Measure a section on the service part that is
25 mm (1 in) (a) forward of the third fender
bolt hole. Mark this section.
2. Using the mark made in the previous step as a
starting point, use a sliding square to transfer a
line on the top, side, and bottom of the rail.
3. Cut the service part at the marked location.
Important: If the location of the original plug weld
holes can not be determined, space the plug weld
holes every 40 mm (1
1
⁄
2
in) apart.
4. Drill 8 mm (5/16 in) plug weld holes as necessary
in the locations noted on the original panel.
5. Prepare all mating surfaces as necessary.
6. Apply 3M Weld-Thru Coating P/N 05916 or
equivalent to all mating surfaces.
7. Measure 25 mm (1 in) forward from the cut area.
Mark the location on top of the rail.
8. Using the mark made in the previous step as a
starting point, use a sliding square to transfer a
line on the top, side, and bottom of the rail.
874296
874298
874290
2003 Saturn Ion
3-41
2003 Saturn Ion

 Loading...