Savant IP Audio Deployment Guide Copyright © 2020 Savant Systems, LLC
009-1571-03 | 200224 15 of 39
4.6. IP Soundbar
The included install brackets are designed to be used with the VESA Mounting points on Flat Panel Televisions. The Installer MUST verify that the TV
Mount/Stand can hold the excess weight of the Soundbar. The Soundbar can be mounted above or below a TV.
Bracket Selection
The choice of bracket is based on the thickness of the TV. Ideally the Soundbar should be flush with the front of the TV.
TV Thickness Bracket Extension Minimum wall mount depth
0.9 - 1.2 in C-Shape None 1.1 in
1.8 - 2.8 in C-Shape 50 mm 1.1 in
2.7 - 3.6 in C-Shape 70 mm 1.1 in
2.1 - 2.5 in L-Shape None None
3.0 - 4.0 in L-Shape 50 mm None
3.8 - 4.7 in L-Shape 70 mm None
Bracket Installation
1. Remove the TV from the Mount/Stand.
NOTE: This may require two people.
2. Place the TV display side down on a soft non-abrasive surface.
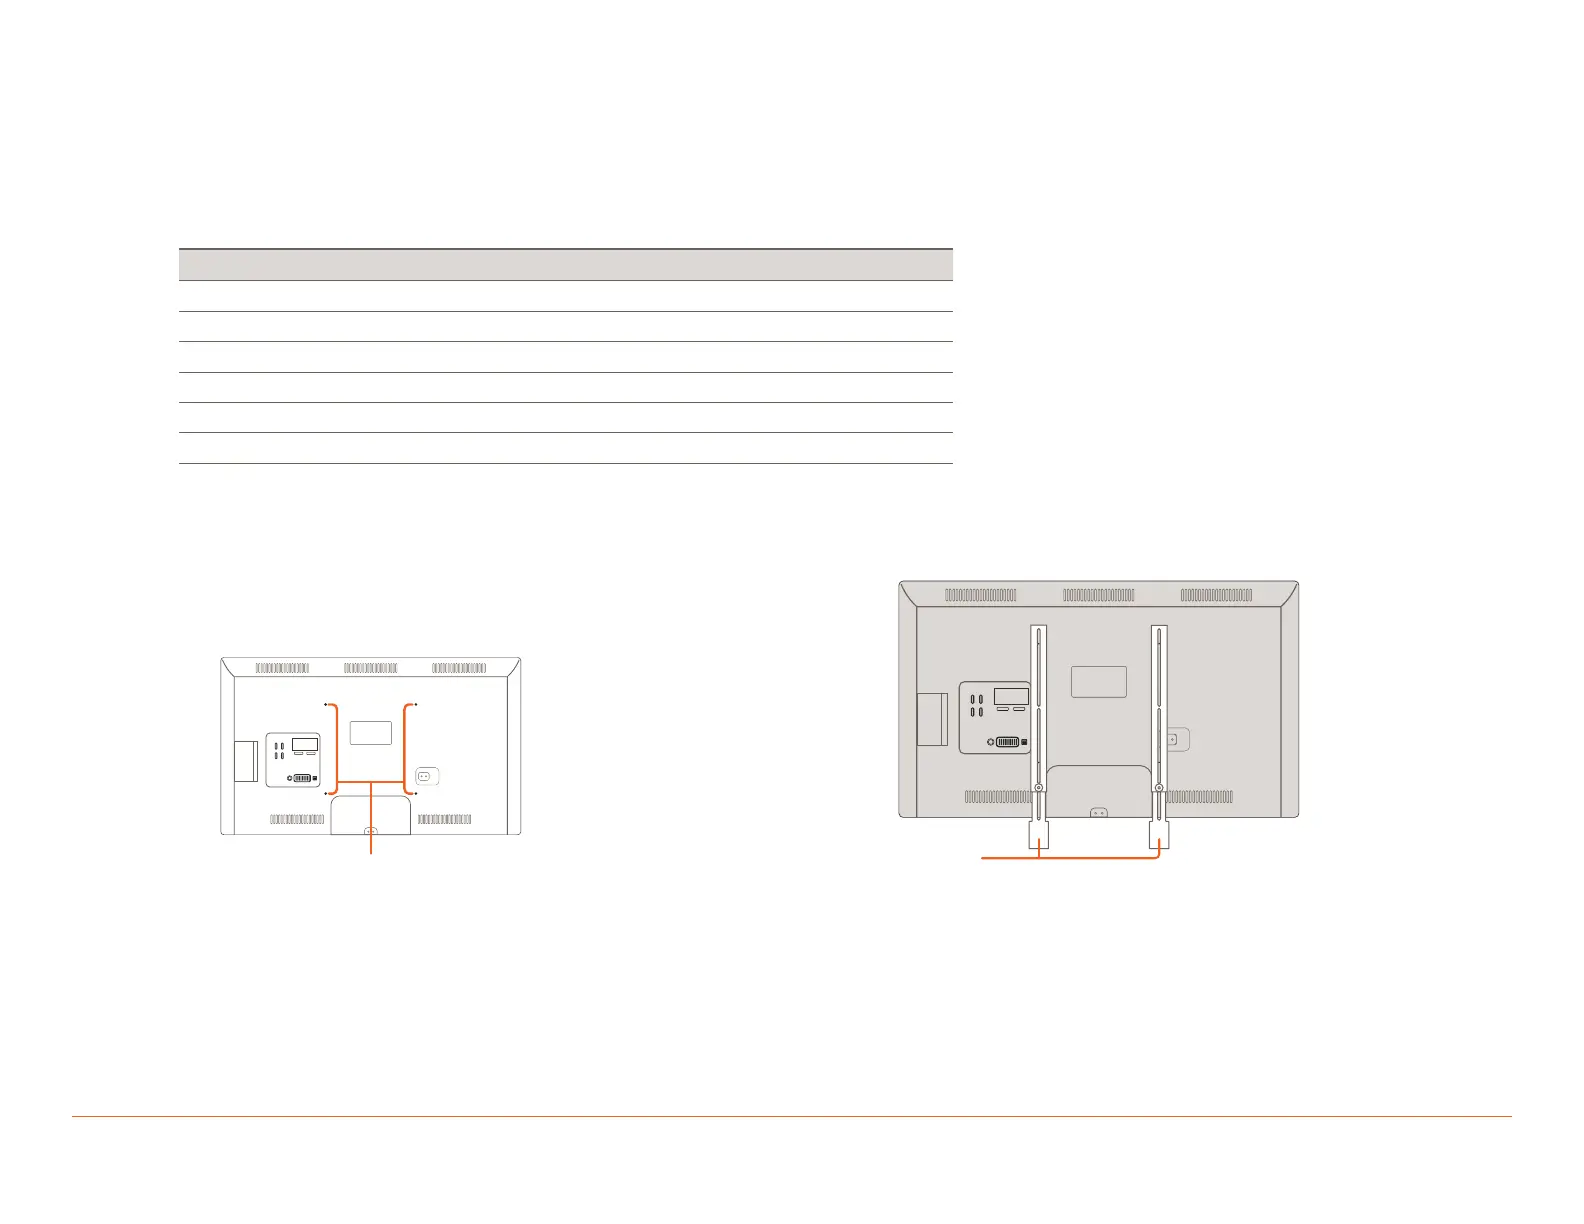
3. Remove any existing Mounting bracket and screws from the
VESA mounting points.
VESA
4. Choose the desired Mounting Bracket (use the Bracket
Selection table on the previous page). Find the screws that fit
the TV’s VESA mounting points.
5. Attach the Mounting Bracket to the TV. The Soundbar brackets
should be between the TV and the TV mount.
Brackets
Aligned with the VESA mounting points