Page 65/70 May 2015 I 2.0
7. Registration
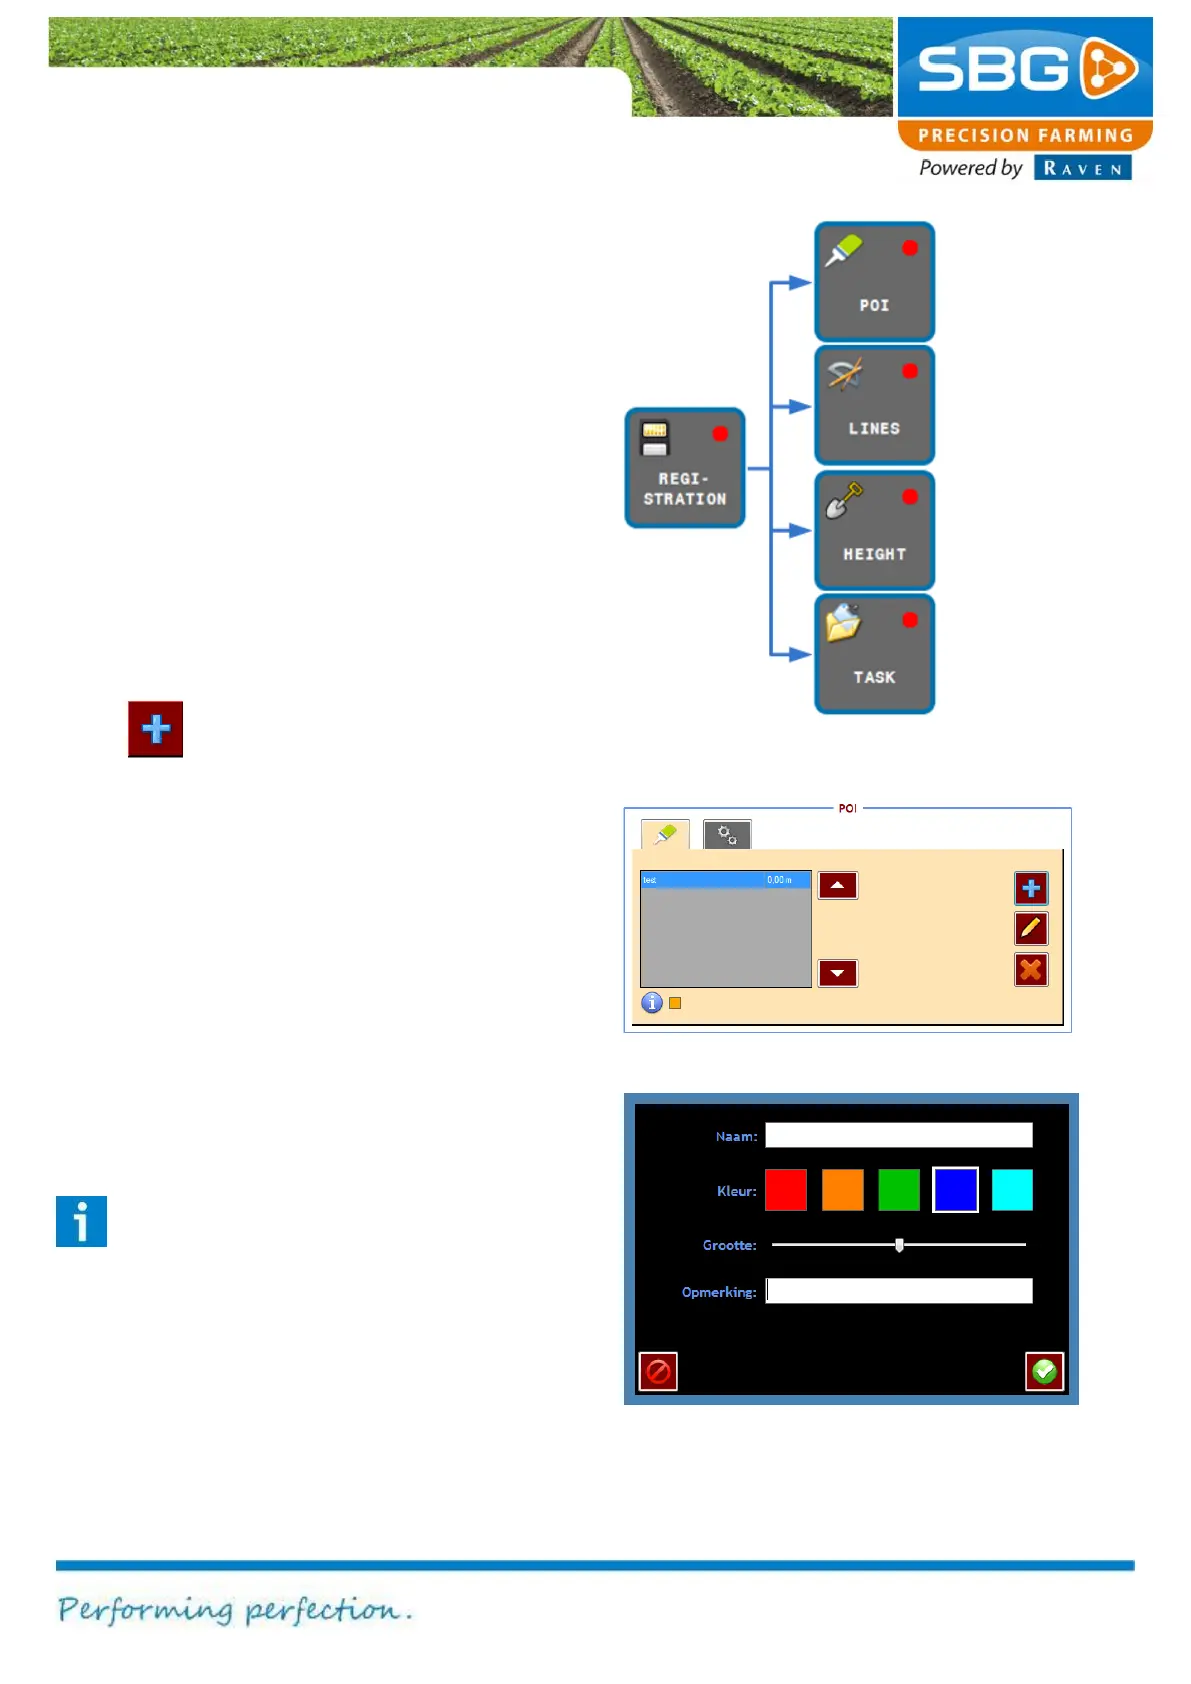
Figure 107 shows which functions are invoked
after pressing the REGISTRATION key.
7.1. Points of interest
With the POI the Points of Interest (useful position
in a field) screen can be opened. Points of interest
can be set in the active fields by the following
steps:
1. Drive and place the machine in the correct
position in the field.
2. Tap in the POI-screen (Figure 108) on the
key to add a point of interest. A new
screen will occur (Figure 109).
3. Fill in the desired name, colour and size of
the POI. Tap on the blue + icon to add the
POI. In the field display a pyramid will occur
on the current position in the field.
The marked position is stored under the current
loaded field. Thus, after reloading the field, the
added points of interest are automatically loaded
and visualised. In the table view of the POI menu
the points of interest are ranked on distance.
Therefore, the nearest point of interest is
visualised at the first row in the table (Figure 108).
Tip:
Use the key MARKED POSITIONS e. g. if
the container of the manure spreader
empties whilst in the middle of an operation.
positions on a
Distance
measurements
Elevation
measurements
documentation
Figure 107 Registration menu