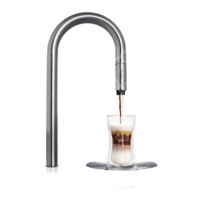
Users manual Coffee on the Spot
Scanomat A/S Vibe Allé 3. Postboks 131 DK-2980 Kokkedal (Copenhagen) Reg.nr. 236.990
Tel: (+45) 49 18 18 00. Fax: (+45) 49 18 01 18
5
Water Connection
When the water supply is being established please make sure that the coffee brewer is not situated on the rear
end of the water supply system to ensure continuous supply of fresh water (see illustration below).
1. Connect the coffee brewer to the cold water line which is equipped with an adjustable check valve (1/2"
external screw thread G+F). Before connecting the brewer draw off some buckets of water to clean the
pipes.
If the water quality is not top-quality we recommend that a Scanomat water filter is mounted.
2. Fasten the hose nipple (C) with screws to the connecting nipple (B) (available in angle and straight ver-
sion).
3. The connecting nipple is to be screwed on to the valve at the bottom of the coffee brewer.
4. Dirt filter (E) and nipple (D) are to be mounted.
5. The flange of the hose (C) is to be mounted on the nipples (D) and (B).
6. Turn on the water and make sure that all joints and connections are tight.
Note
If the water has a disagreeable taste when heated we recommend that the heated water is drawn off the
brewer and let the brewer take in water anew.
After holidays or weekends when the brewer has not been in operation for some time the water will loose on
quality therefore we recommend activating the "clean programme", perhaps a couple of times, in order to get
fresh water. In special cases it could be necessary to empty the water tank completely by means of the drain
hose and then let the brewer take in fresh water. This operation could be repeated if necessary.
Scanomat
Shower Sink Dishwasher Coffeebrewer
Waterpipe